EasyManuals Logo

Xilinx ZCU102 Getting Started Quick Guide

Xilinx ZCU102
14 pages
To Next Page IconTo Next Page
To Previous Page IconTo Previous Page
Page #7 background imageLoading...
Page #7 background image
© Copyright 2016 Xilinx
Task 6: Testing in SDK GUI:
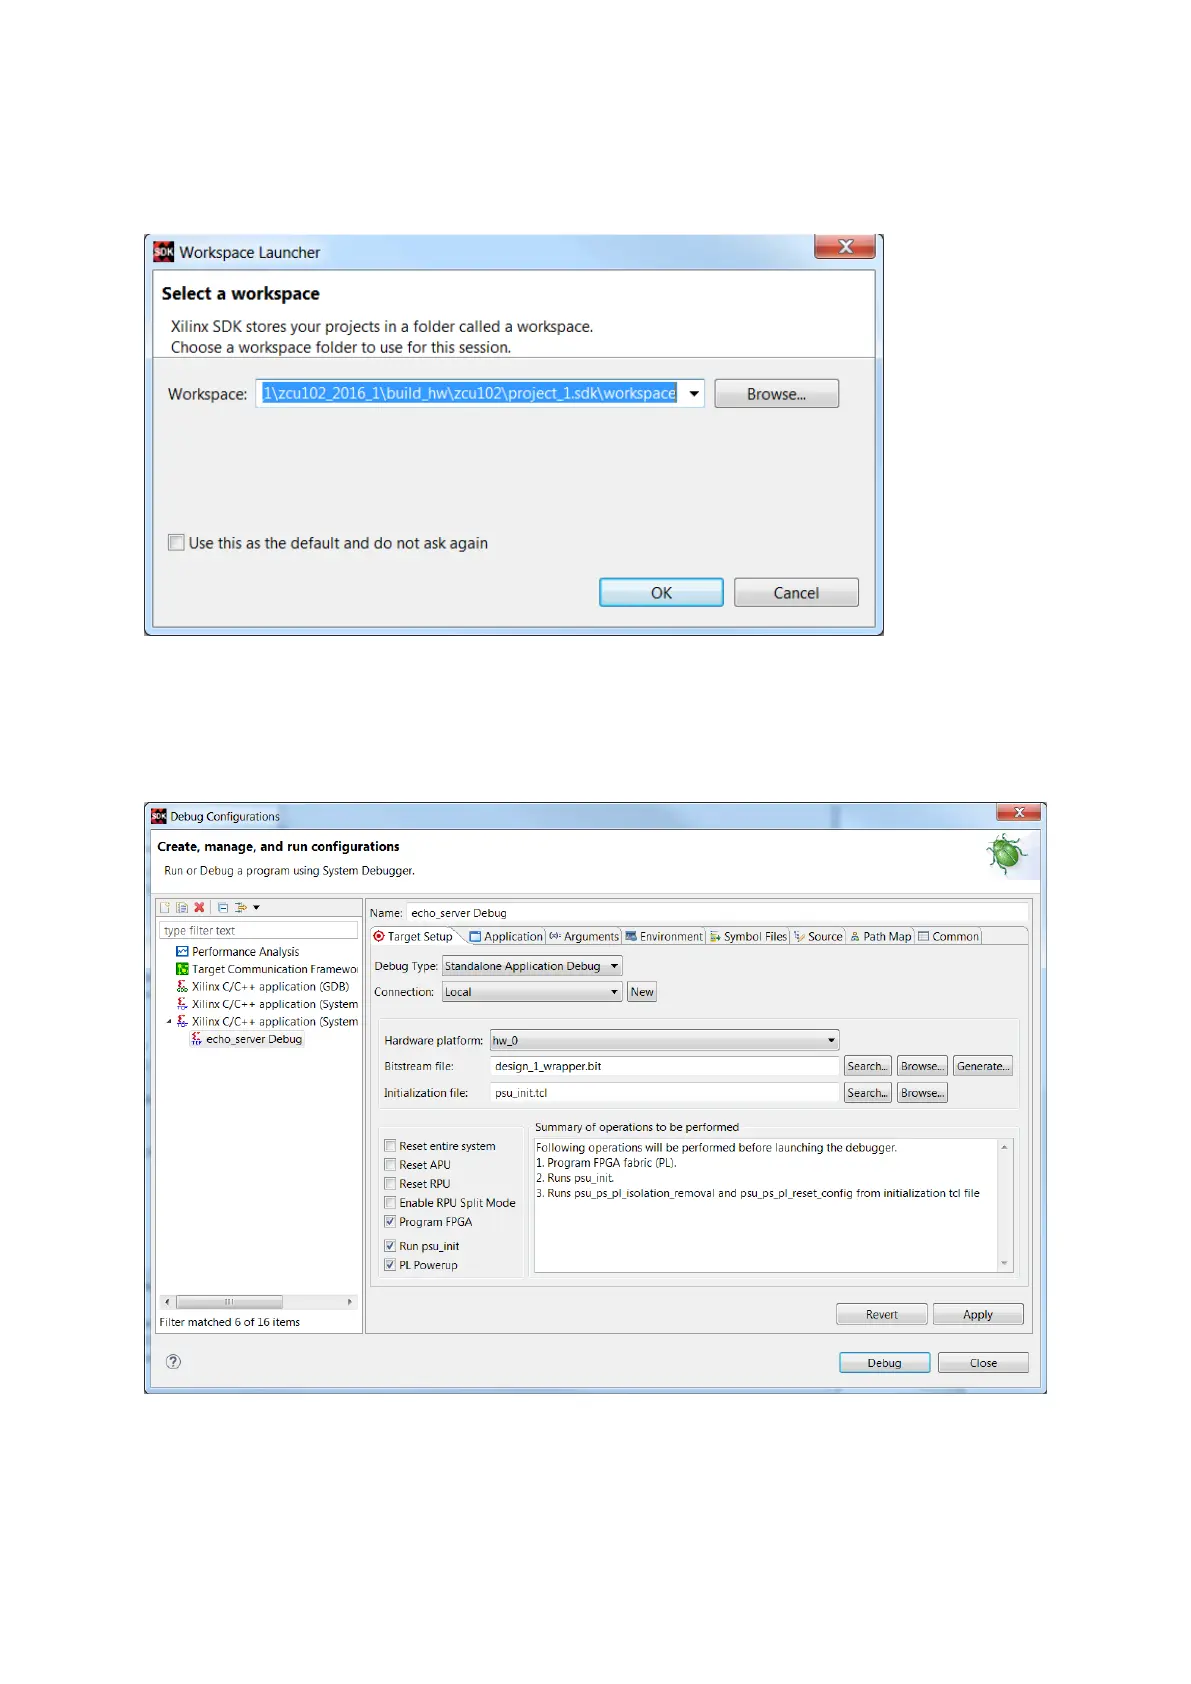
Launch the SDK, and open the workspace created in the previous step:
Select Project -> Build Automatically.
Right click on any of the applications to debug. For example, echo_server. Right click, and select
Debug As -> Debug Configurations. Double click on the Xilinx C/C++ application (System Debugger).
In the Target Setup, tick the Program FPGA box:
In the Application tab, highlight the psu_cortexa53 and tick the Download application box. Browse to
the project name, and the Application ELF.

Other manuals for Xilinx ZCU102

Questions and Answers:

Question and Answer IconNeed help?

Do you have a question about the Xilinx ZCU102 and is the answer not in the manual?

Xilinx ZCU102 Specifications

General IconGeneral
ProcessorQuad-core ARM Cortex-A53, Dual-core ARM Cortex-R5
SD CardMicroSD card slot
Video OutputsDisplayPort
FPGAXilinx Zynq UltraScale+ XCZU9EG-2FFVB1156E
Memory4GB DDR4 Component Memory
StorageMicroSD card slot
EthernetGigabit Ethernet
USB1 x USB 3.0, 1 x USB 2.0
PCIePCIe Gen2 x4
DisplayDisplayPort
Power Supply12V DC input
SATASATA 3.0
ClockingProgrammable clocks
Operating System SupportPetaLinux

Related product manuals