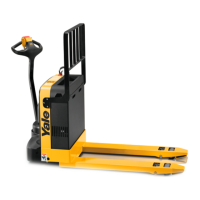
Frame Separation and Assembly 100 YRM 1015
Frame Repair
WARNING
Forklift truc
kframesandcomponentsmayhave
polyurethane
paint. Welding, burning, or other heat
sufficient to
cause thermal decomposition of the
paint may rel
ease isocyanates. These chemicals
are allergic
sensitizers to the skin and respiratory
tract and ove
rexposure may occur without odor
warning. Al
ways utilize good industrial hygiene
practices i
ncluding removal of all paint (prime and
finish coat
s) to the metal around the area to be
welded, loc
al ventilation, and/or supplied-air respi-
ratory prot
ection when repairing the frame.
WARNING
Do not make a
ny repairs or adjustments unless you
have prope
r authorization and training. Repairs and
adjustmen
ts that are not correct can cause a dan-
gerous ope
rating condition. Do not operate a lift
truck that
needs repairs. Report the need for re-
pairs to y
our supervisor immediately. If repair is
necessar
y, put a DO NOT OPERATE tag on the con-
trol hand
le.Removethekeyfromthekeyswitch.
Most lift truck repairs are performed on the individual
components that are bolted to the frame and not to the
frame itself.
FEATURES
The lift truck frames are offered in combinations of the
following options:
1. Weight Capacity
a. 1814 kg (4000 lb)
b. 2041 kg (4500 lb)
c. 2268 kg (5000 lb)
2. Fork Length
a. 900 mm (36 in.)
b. 1050 mm (42 in.)
c. 1200 mm (48 in.)
d. 1400 mm (54 in.)
e. 1500 mm (60 in.)
3. Battery Compartment Size
a. 206mm(8in.)×724mm(29in.)
b. 206mm(8in.)×804mm(32in.)
c. 232mm(9in.)×724mm(29in.)
Frame Separation and Assembly
SEPARATION
In some cases a fork frame or a drive unit frame may be
damaged, while the rest of the truck is still usable. The
twoframesmaybeseparatedfromeachotherbyusing
the following steps.
1. Raise the motorized lift truck to its maximum height.
Turn the key to the OFF position. Disconnect the
battery.
2. Remove the drive unit compartment covers.
3. Position blocks under both sides of the truck in the
area of the battery compartment and under both
forks. See How to Put Lift Truck on Blocks in Pe-
riodic Maintenance 8000 YRM 1009.
4. Remove the battery.
5. Remove the top clevis pin securing the hydraulic
cylinder to the frame. See Hydraulic Cylinder in
Walkie Hydraulic Systems 1900 YRM 1018.
6. Remove both pivot pins securing the upper link to
the drive unit frame. See Upper Link, Remove in
Lifting Mechanism 4000 YRM 1008.
7. Remove both drive unit frame pivot pins securing
the rocker arm to the drive unit frame. See Rocker
Arm, Remove in Lifting Mechanism 4000 YRM
1008.
8. Carefully move one of the frames away from the
other.
ASSEMBLY
1. Align both frames so the pins may be installed to
assemble the frames to each other.
2. Install both drive unit frame pivot pins to secure the
rocker arms to the drive unit frame. See Rocker
Arm, Install in Lifting Mechanism 4000 YRM 1008.
3. Install both pivot pins to secure the upper link to the
drive unit frame. See Upper Link, Install in Lifting
Mechanism 4000 YRM 1008.
2