Label Replacement 100 YRM 1015
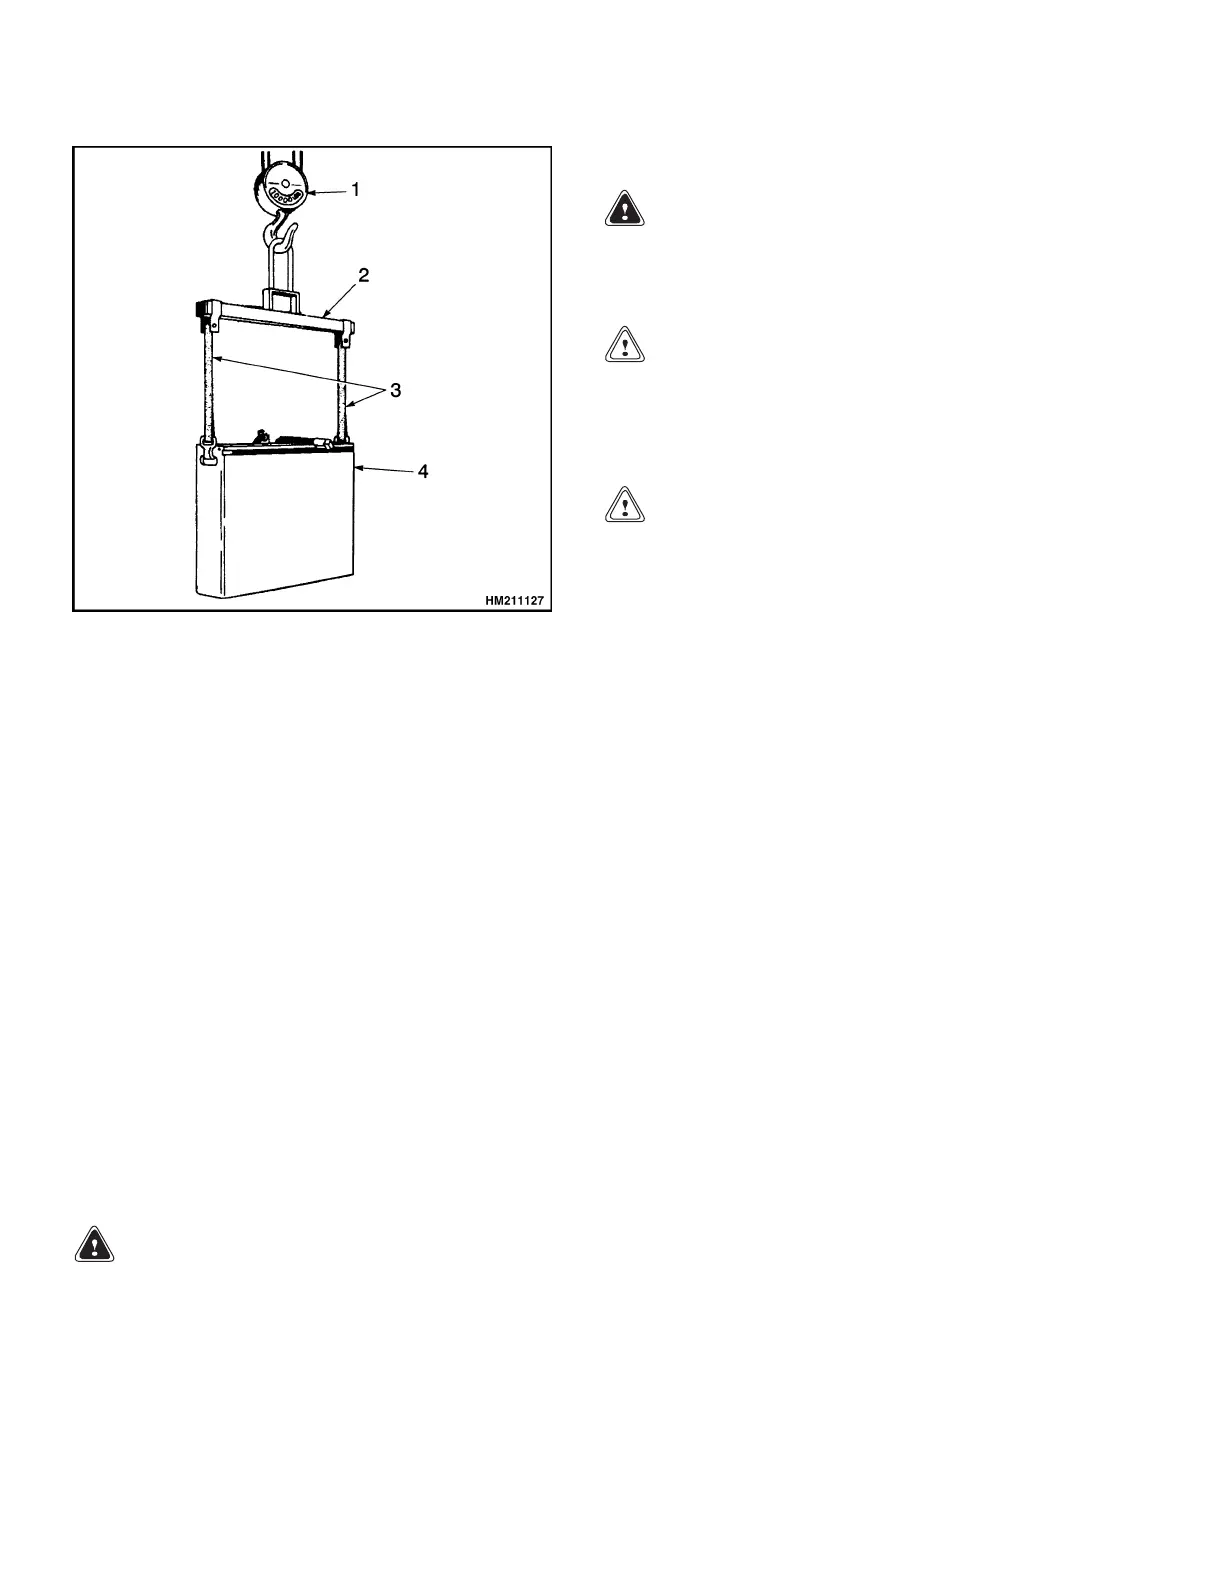
1. CRANE
2. SPREADER BAR
3. INSULATED
STRAPS
4. BATTERY
Figure 2. Changing the Battery
For the following instructions, refer to Figure 2.
Remove
1. Move lift truck under overhead crane or other suit-
able lifting device.
2. Block drive tire to prevent movement of lift truck.
3. Tur n key sw itch OFF, disconnect battery connector,
and move it out of the way.
4. Loosen one of the battery spacers and move it out
of the way. See Figure 2.
5. Connect spreader bar to battery using insulated
straps and lift battery out of lift truck.
Install
WARNING
Before connecting the battery, make sure the key
switch is in the OFF position and the control handle
is in the UP position (brake applied).
CAUTION
The replacement battery must fit the battery com-
partment correctly. Adjust the brackets on each
side of the battery and tighten the capscrews, lock-
washers, and nuts to retain the battery.
CAUTION
Make sure the voltage and weight of the replace-
ment battery is correct as shown on the nameplate.
Make sure the battery is the correct size and weight for
the lift truck.
1. Remove any obstructions in battery compartment
(i.e., battery cables or tools).
2. Lower new battery into battery compartment.
3. Connect battery cable connector. Adjust location of
battery to allow proper connection of cables.
4. Adjust the brackets on each side of the battery and
tighten the capscrews, lockwashers, and nuts to re-
tain the battery.
5. Remove spreader bar and insulated straps from
battery.
Battery Spacer Adjustment
The battery spacers are designed to hold the battery
in place during normal operation. The spacers are ad-
justed by adding or removing spacers as required to
prevent the battery from moving.
Label Replacement
WARNING
Replace damaged Warning or Caution labels imme-
diately.
If labels or information plates are missing or damaged,
they must be replaced. See Figure 3.
NOTE: The nameplate cover is installed using rivets.
Remove old rivets before installing a new nameplate
cover. See your Yale
®
lift truck dealer to make sure the
nameplate cover information is correct and complete
before installing a new nameplate cover. Fasten the
nameplate cover with the rivet heads outside.
4