CHAIN DRIVE
4-85
use only kerosene to clean the drive
chain.
• Do not soak the drive chain in kerosene
for more than ten minutes, otherwise the
O-rings can be damaged.
▲▲▲▲▲▲▲▲▲▲▲▲▲▲▲▲▲▲▲▲▲▲▲▲▲▲▲▲▲▲
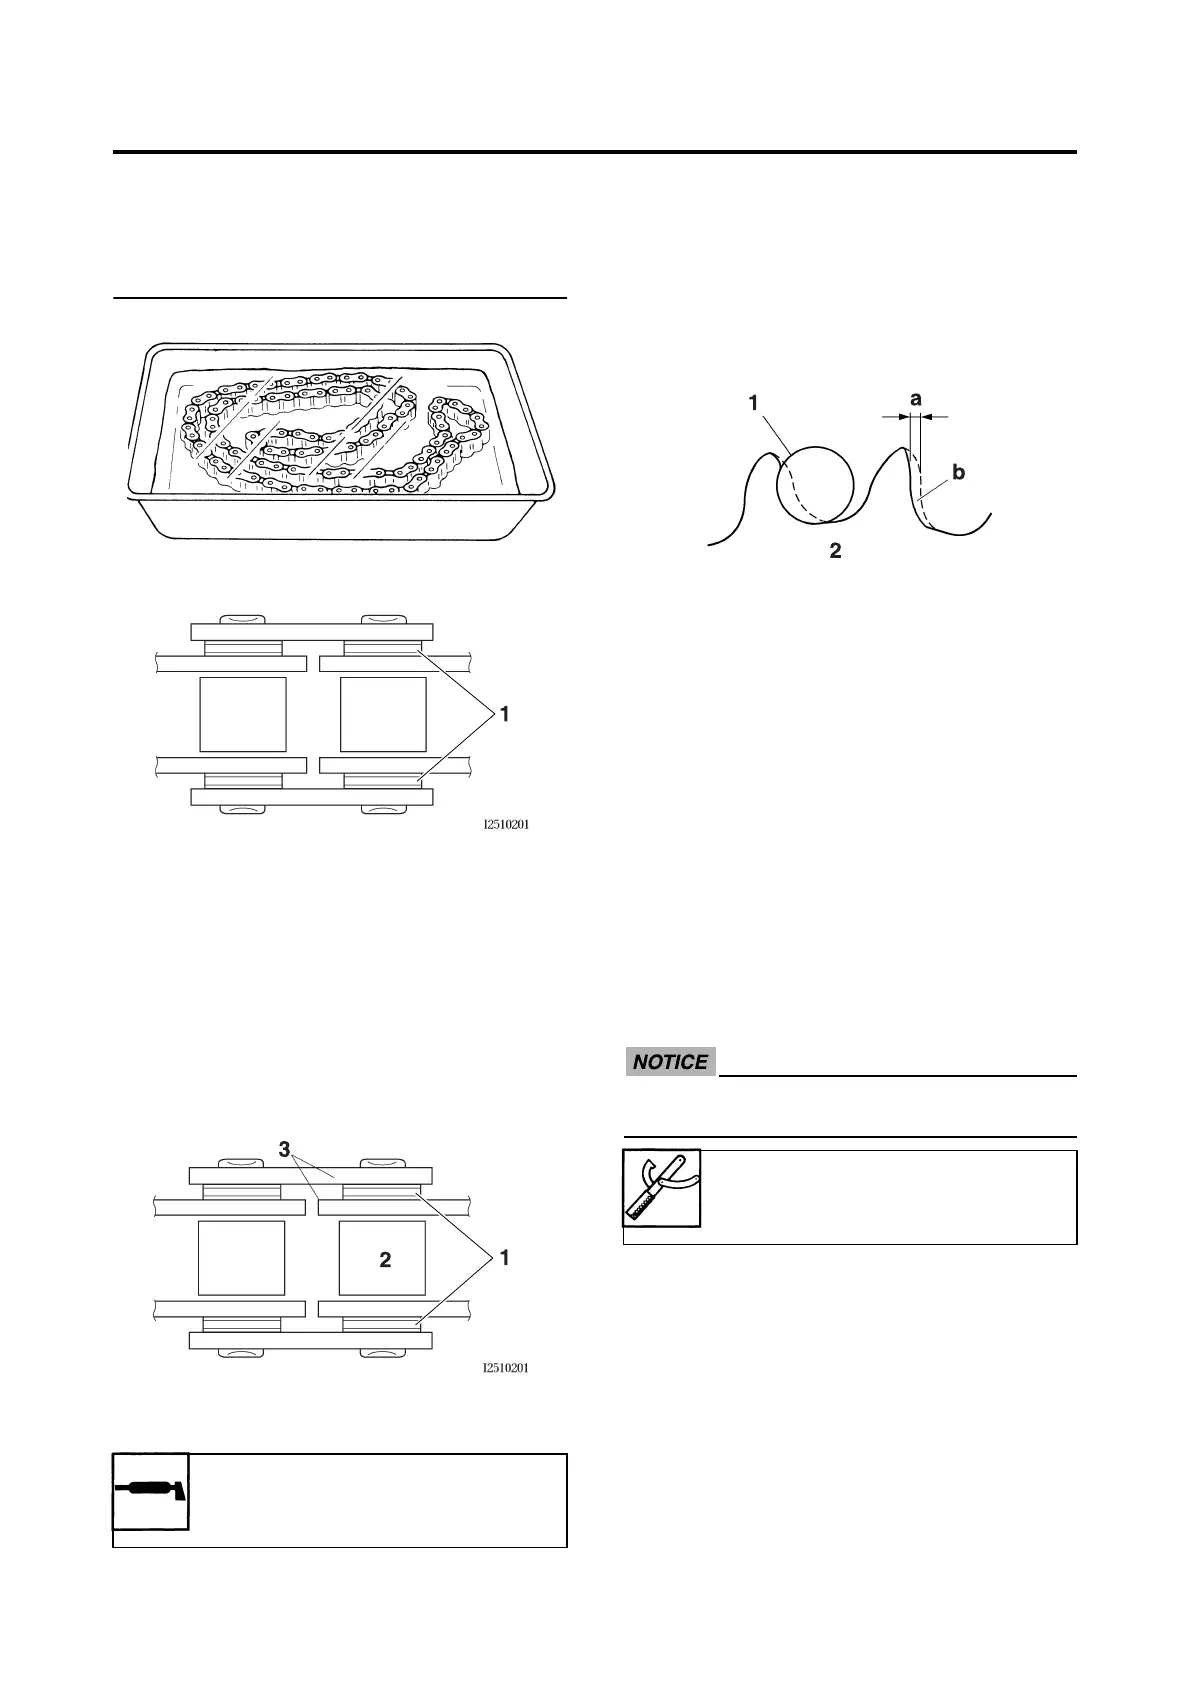
4. Check:
• O-rings “1”
Damage → Replace the drive chain.
• Drive chain rollers “2”
Damage/wear → Replace the drive
chain.
• Drive chain side plates “3”
Damage/wear/cracks → Replace the
drive chain.
5. Lubricate:
• Drive chain
EAS23460
CHECKING THE DRIVE SPROCKET
1. Check:
• Drive sprocket
More than 1/4 tooth “a” wear → Replace
the drive chain sprockets as a set.
Bent teeth → Replace the drive chain
sprockets as a set.
EAS23470
CHECKING THE REAR WHEEL SPROCKET
Refer to “CHECKING AND REPLACING THE
REAR WHEEL SPROCKET” on page 4-28.
EAS23480
CHECKING THE REAR WHEEL DRIVE HUB
Refer to “CHECKING THE REAR WHEEL
DRIVE HUB” on page 4-28.
EAS23490
INSTALLING THE DRIVE CHAIN
1. Install:
• Drive chain
ECA14B1023
Be sure to put on safety goggles when
working.
▼▼▼▼▼▼▼▼▼▼▼▼▼▼▼▼▼▼▼▼▼▼▼▼▼▼▼▼▼▼
a. When press fitting the connecting plate “1”,
make sure the space “a” between the end
of the connecting pin “2” and the connect-
ing plate is 1.2–1.4 mm (0.05–0.06 in).
Recommended lubricant
Chain lubricant suitable for O-
ring chains
b. Correct
1. Drive chain roller
2. Drive chain sprocket
Drive chain cut & rivet tool
90890-01550
YM-01550

 Loading...