EasyManua.ls Logo

Yamaha HTR-6140 - User Manual

Yamaha HTR-6140
106 pages
Print Icon
To Next Page IconTo Next Page
Loading...
YAMAHA ELECTRONICS CORPORATION, USA
6660 ORANGETHORPE AVE., BUENA PARK, CALIF. 90620, U.S.A.
YAMAHA CANADA MUSIC LTD.
135 MILNER AVE., SCARBOROUGH, ONTARIO M1S 3R1, CANADA
YAMAHA ELECTRONIK EUROPA G.m.b.H.
SIEMENSSTR. 22-34, 25462 RELLINGEN BEI HAMBURG, GERMANY
YAMAHA ELECTRONIQUE FRANCE S.A.
RUE AMBROISE CROIZAT BP70 CROISSY-BEAUBOURG 77312 MARNE-LA-VALLEE CEDEX02, FRANCE
YAMAHA ELECTRONICS (UK) LTD.
YAMAHA HOUSE, 200 RICKMANSWORTH ROAD WATFORD, HERTS WD18 7GQ, ENGLAND
YAMAHA SCANDINAVIA A.B.
J A WETTERGRENS GATA 1, BOX 30053, 400 43 VÄSTRA FRÖLUNDA, SWEDEN
YAMAHA MUSIC AUSTRALIA PTY, LTD.
17-33 MARKET ST., SOUTH MELBOURNE, 3205 VIC., AUSTRALIA
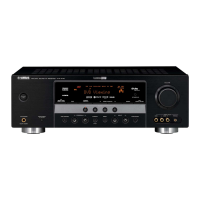
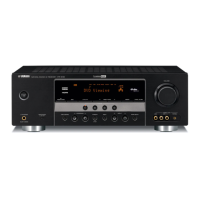
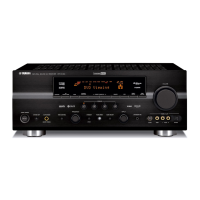
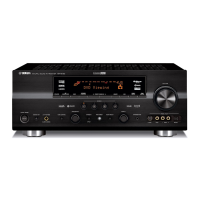
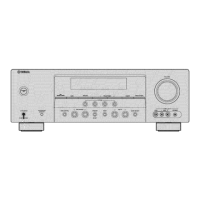
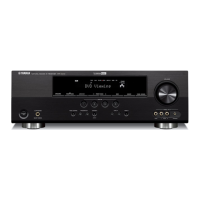
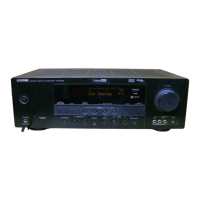
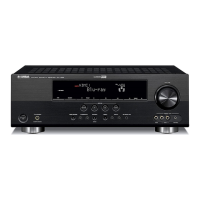
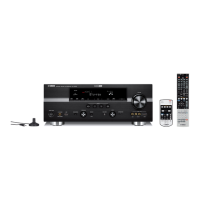
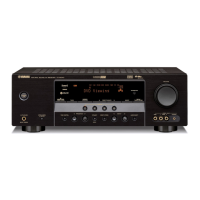
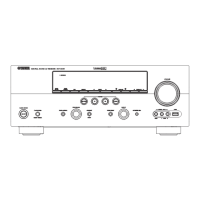
HTR-6140
©
2008 All rights reserved.
Printed in China WN25790
HTR-6140
AV Receiver
OWNER’S MANUAL
U
Memorex 1001, 1002, 1003,
1004, 1005, 1008,
1013, 1014, 1042,
1045, 1047
Memphis 1050
Metz 1048
MGA 1014
MGN Technology
1002, 1014
Micromaxx 1044, 1048
Microstar 1044, 1048
Migros 1042
Minolta 1010
Mitsubishi 1011, 1042, 1046
Montgomery Ward
1008
Motorola 1004, 1008
MTC 1002, 1014
Multitech 1002, 1005, 1006,
1042, 1046, 1050
Murphy 1042
National 1048
NEC 1000, 1001, 1007,
1011, 1043, 1051
Neckermann 1043, 1046
NEI 1046
Nesco 1050
Nikko 1003
Noblex 1002, 1014
Nokia 1043, 1047
Nordmende 1043
Oceanic 1042, 1043
Okano 1044
Olympus 1004
Optimus 1003, 1008
Orion 1012, 1013, 1044,
1065
Orson 1042
Osaki 1042, 1045, 1050
Otto Versand 1046
Palladium 1043, 1045, 1050
Panasonic 1004, 1020, 1034,
1040, 1048, 1054,
1072
Pathe Marconi 1043
Penney 1010, 1014
Pentax 1010, 1049
Perdio 1042
Philco 1004, 1051
Philips 1004, 1025, 1033,
1046, 1056, 1057,
1059, 1062, 1063
Philips Magnavox
1018
Phonola 1046
Pilot 1003
Pioneer 1011, 1046
Prinz 1042
Profex 1050
Profitronic 1014
Proline 1042
Proscan 1009
Prosonic 1044
Protec 1006
Pye 1046, 1056
Quarter 1001
Quartz 1001, 1047
Quasar 1004, 1035
Quelle 1042, 1046, 1047
Radio Shack 1003
Radio Shack/Realistic
1001, 1002, 1003,
1004, 1005, 1008
Radiola 1046
Radix 1003
Randex 1003
RCA 1002, 1004, 1009,
1010, 1014, 1015,
1022, 1032
Realistic 1001, 1002, 1003,
1004, 1005, 1008
Rex 1043
RFT 1046
Roadstar 1045, 1050, 1066
Saba 1043
Saisho 1044, 1050
Salora 1047
Samsung 1002, 1014, 1021,
1027, 1052, 1068,
1070
Sanky 1008
Sansui 1007, 1011, 1013,
1043
Sanyo 1001, 1002, 1014,
1047
SBR 1046
Schaub Lorenz 1042, 1043, 1047
Schneider 1042, 1044, 1045,
1046, 1050
Scott 1012
Sears 1001, 1003, 1004,
1010
SEG 1050
SEI-Sinudyne 1046
Seleco 1043
Sentron 1050
Sharp 1008, 1023, 1028,
1053, 1073
Shintom 1006, 1047, 1050
Shivaki 1045
Shogun 1002, 1014
Siemens 1045, 1047
Signature 2000 1008
Silva 1045
Singer 1004, 1006
Sinudyne 1046
Sontec 1045
Sony 1016, 1019, 1055,
1060, 1064, 1074
STS 1004, 1010
Sunkai 1044
Sunstar 1042
Suntronic 1042
Sunwood 1050
Sylvania 1004, 1005, 1031,
1041
Symphonic 1005
Taisho 1044
Tandy 1001
Tashiko 1003, 1042
Tatung 1007, 1042, 1043,
1046, 1066
TCM 1044, 1048
Teac 1005, 1007
Technics 1004, 1048
Teknika 1003, 1004, 1005
Teleavia 1043
Telefunken 1043
Tenosal 1050
Tensai 1042, 1045, 1050
Tevion 1044, 1048
Thomson 1043, 1058
Thorn 1043, 1047
TMK 1002, 1014
Tokai 1045, 1050
Tonsai 1050
Toshiba 1013, 1024, 1029,
1043, 1046, 1066,
1075
Totevision 1002, 1003, 1014
Towada 1050
Towika 1050
Uher 1045
Unitech 1002, 1014
Universum 1042, 1045, 1046
Vector Research 1000
Video Concepts 1000
Videon 1044, 1048
Videosonic 1002, 1014
Wards 1002, 1003, 1004,
1005, 1006, 1008,
1010, 1014
Weltblick 1045
White Westinghouse
1013
XR-1000 1004, 1005, 1006
Yamaha 1000, 1001, 1007
Yamis h i 1050
Yokan 1050
Yoko 1045, 1050
Zenith 1013, 1026, 1037
HTR-6140_U-cv.fm Page 1 Friday, February 1, 2008 2:29 PM
Black process 45.0° 240.0 LPI

Table of Contents

Questions and Answers

  • C
    candice89Aug 19, 2025
    Why is there no sound coming from my Yamaha HTR-6140 Receiver?
    • E
      Ebony WhiteSep 12, 2025
      If you're experiencing a lack of sound from your Yamaha Receiver, consider the following possible causes and solutions: * Check and properly connect all input and output cables. If the issue persists, the cables might be defective. * Ensure an appropriate Audio input jack select has been set. * If Audio input jack select is set to 'HDMI', 'COAX/OPT' or 'ANALOG', set it to 'AUTO'. * If Audio input jack select is set to 'ANALOG' while playing a source encoded in Dolby Digital or DTS, switch to 'COAX/OPT'. * Select an appropriate input source. * Select the front speakers with JSPEAKERS. * Turn up the volume. * If the sound is muted, press JMUTE or NVOLUME +/– to resume audio output and then adjust the volume. * Ensure the source signals can be reproduced by the unit.
  • C
    Carly JonesAug 21, 2025
    Why does my Yamaha HTR-6140 Receiver suddenly enter standby mode?
    • A
      Andrew WilliamsAug 21, 2025
      If your Yamaha Receiver suddenly enters standby mode, it's likely due to the internal temperature being too high. Wait about 1 hour for the unit to cool down, and then turn it back on.
  • J
    jeffreyallenAug 23, 2025
    How to troubleshoot sound only coming from one side of my Yamaha HTR-6140?
    • J
      Julia McdanielAug 23, 2025
      If you're only hearing sound from one speaker connected to your Yamaha Receiver, try these troubleshooting steps: * Ensure all cable connections are correct and secure. If the issue continues, the cables may be defective. * Adjust the 'SP LEVEL' settings.
  • J
    Jill WebsterAug 26, 2025
    How do I fix no sound from the surround speakers on my Yamaha HTR-6140 Receiver?
    • K
      Kelli LeeAug 26, 2025
      If you are not hearing any sound from the surround speakers connected to your Yamaha Receiver, verify that 'SUR. L/R SP' in 'SPEAKER SET' is set to 'SML' or 'LRG', and not 'NONE'.
  • J
    John DanielAug 27, 2025
    What causes no sound from center and surround speakers when FRONT B speakers are on Yamaha HTR-6140 Receiver?
    • N
      Nicholas NguyenAug 27, 2025
      If you're experiencing a lack of sound from the center and surround speakers when the FRONT B speakers are activated on your Yamaha Receiver, check that 'FRONT B' in 'SPEAKER SET' is set to 'FRONT', not 'ZONE B'.
  • R
    Robert WardAug 29, 2025
    Why is my Yamaha HTR-6140 subwoofer not producing sound?
    • M
      Maria LopezAug 29, 2025
      If you're not getting any sound from the subwoofer connected to your Yamaha Receiver: * If a Dolby Digital or DTS signal is being played, check 'LFE/BASS OUT' in 'SPEAKER SET'. * If a 2-channel source is being played, check 'LFE/BASS OUT' in 'SPEAKER SET'. * The source may not contain low-frequency bass signals.
  • K
    Kaitlin LeeSep 1, 2025
    Why can't I increase the volume or why is the sound distorted on my Yamaha HTR-6140 Receiver?
    • J
      Jason RobertsSep 1, 2025
      If you're unable to increase the volume or the sound is distorted on your Yamaha Receiver: * Ensure the component connected to the AUDIO OUT (REC) jacks is turned on. * You may be attempting to exceed the maximum volume level; adjust the 'MAX VOL.' setting.
  • J
    Jessica KaneSep 3, 2025
    What should I do if my Yamaha HTR-6140 is not operating properly?
    • C
      Cheryl ConnerSep 3, 2025
      If your Yamaha Receiver is not operating correctly, disconnect the power cable from the AC wall outlet and plug it back in after about 30 seconds. This can resolve issues caused by an external electric shock or low voltage affecting the internal microcomputer.
  • J
    Jessica ClarkSep 5, 2025
    Why is there no sound from the connected HDMI component on my Yamaha HTR-6140 Receiver?
    • S
      singhnatalieSep 5, 2025
      If you're not getting sound from an HDMI component connected to your Yamaha Receiver, consider the following: * The HDMI component may not accept multi-channel audio signals; convert these to 2-channel audio signals at the source component. * Ensure speaker cables are correctly connected and not short-circuited. * Move the unit away from digital or high-frequency equipment.
  • C
    Cody FrancoSep 7, 2025
    What to do if my Yamaha HTR-6140 Receiver fails to turn on?
    • N
      Nancy KingSep 7, 2025
      If your Yamaha Receiver fails to turn on or enters standby mode soon after being turned on, several factors could be responsible: * Ensure the power cable is firmly connected. * Verify the speaker impedance setting matches your speakers. * Check speaker wire connections for security and ensure no wires are touching other connections, as the protection circuitry may have been activated. * If the unit experienced a strong electric shock, set it to standby mode, disconnect the power cable, wait 30 seconds, and then reconnect and use it normally.

Summary

IMPORTANT SAFETY INSTRUCTIONS

Explanation of Graphical Symbols

Explains the meaning of safety symbols used in the manual.

CAUTION: READ THIS BEFORE OPERATING YOUR UNIT.

Features

Getting started

Supplied accessories

Lists all the accessories included with the unit for user verification.

Installing batteries in the remote control

Provides instructions on how to insert batteries into the remote control.

Quick start guide

Preparation: Check the items

Lists the necessary items to prepare for initial setup and operation.

About SCENE function

Explains the SCENE function for recalling input sources and sound field programs.

Connections

Rear panel

Diagram and list of all connection terminals on the rear panel of the unit.

Placing speakers

Recommended speaker layout for optimal audio experience.

Connecting speakers

Detailed instructions for connecting speaker cables to the unit.

Information on jacks and cable plugs

Details on different types of audio and video jacks and their corresponding plugs.

Information on HDMI

Explains HDMI compatibility, jacks, and signal flow.

Connecting video components

Instructions for connecting video sources like TVs or projectors.

Connecting other components

Guidance on connecting various audio and video source components.

Connecting audio components

Instructions for connecting CD players, recorders, and multi-format players.

Connecting a Yamaha iPod universal dock or Bluetooth adapter

How to connect iPod docks and Bluetooth adapters for wireless audio.

Setting the speaker impedance

Procedure to set speaker impedance to match connected speakers.

Front panel display

Explanation of the indicators and information shown on the unit's front panel.

Using the remote control

Guidance on operating the unit using the remote control.

Optimizing the speaker setting for your listening room

Using AUTO SETUP

Automated procedure for adjusting speaker and system parameters.

SELECTING THE SCENE TEMPLATES

Selecting the desired SCENE template

How to choose and assign pre-programmed SCENE templates.

Which SCENE template would you like to select?

Guide to selecting SCENE templates based on source and component.

Preset SCENE templates descriptions

Detailed descriptions of the available preset SCENE templates.

Creating your original SCENE templates

Instructions for customizing or creating new SCENE templates.

Playback

Basic operations

Fundamental operations for playing sources and controlling volume.

Selecting audio input jacks (AUDIO SELECT)

How to choose the default audio input jack for sources.

Displaying the current status of this unit on a video monitor

How to view the unit's operating status on a connected monitor.

Using audio features

Enjoying high quality sound

How to use DIRECT mode for high-fidelity audio playback.

Adjusting the tonal quality

Adjusting bass and treble for the front left and right speakers.

Adjusting the speaker level

Manually setting the output level for each individual speaker.

Selecting the night listening mode

Enhances listenability at low volumes or during nighttime.

Sound field programs

Sound field program descriptions

Descriptions of various sound field programs for different audio sources.

Enjoying 2-channel sources using the standard decoders

How to play 2-channel sources in multi-channel using decoders.

Using sound field programs without surround speakers (Virtual CINEMA DSP)

Enjoying DSP surround effects without physical surround speakers.

Editing sound fields parameters

How to adjust parameters of sound field programs for better audio.

FM;AM tuning

Automatic tuning

Procedure for automatically tuning FM/AM radio stations.

Manual tuning

Procedure for manually tuning FM/AM radio stations.

Automatic preset tuning

Automatically stores strong FM stations into memory presets.

Manual preset tuning

Manually stores selected radio stations into memory presets.

XM SATELLITE RADIO TUNING

Connecting the XM Mini-Tuner Dock

Instructions for connecting the XM Mini-Tuner Dock.

Activating XM Satellite Radio

Steps to activate the XM Satellite Radio subscription service.

Basic XM Satellite Radio operations

How to select channels and navigate XM Satellite Radio.

All Channel Search mode

Search for XM channels across the entire channel list.

Category Search mode

Search for XM channels by selecting a specific category.

Preset Search mode

Accessing saved XM Satellite Radio channels.

Setting XM Satellite Radio preset channels

Instructions for saving current XM channels as presets.

Displaying the XM Satellite Radio information

How to view channel information on the front panel or OSD.

SIRIUS SATELLITE RADIO TUNING

Connecting the SiriusConnect tuner

Instructions for connecting the SiriusConnect tuner.

Activating SIRIUS Satellite Radio subscription

Steps to activate the SIRIUS Satellite Radio subscription service.

Basic SIRIUS Satellite Radio operations

How to select channels and navigate SIRIUS Satellite Radio.

All Channel Search mode

Search for SIRIUS channels across the entire channel list.

Category Search mode

Search for SIRIUS channels by selecting a specific category.

Preset Search mode

Accessing saved SIRIUS Satellite Radio channels.

Setting the SIRIUS Satellite Radio preset channels

Instructions for saving current SIRIUS channels as presets.

Setting the Parental Lock

How to set a parental lock code and lock channels.

Displaying the SIRIUS Satellite Radio information

How to view channel information on the front panel or OSD.

SET MENU

Auto setup AUTO SETUP

Automated speaker and system parameter adjustment.

Manual setup MANUAL SETUP

Manual adjustment of speaker and system parameters.

Signal information SIGNAL INFO

Displays audio signal information for the current input.

Speaker settings A)SPEAKER SET

Manual adjustment of speaker size, crossover, and front B terminals.

Speaker level B)SP LEVEL

Manually adjust the output level of each speaker.

Speaker distance C)SP DISTANCE

Manually adjust speaker distance and channel delay.

Center speaker equalizer D)CENTER GEQ

Adjusts the center speaker's tonal quality using a 5-band EQ.

Low-frequency effect level E)LFE LEVEL

Adjusts the output level of the LFE channel for surround sound.

Dynamic range F)DYNAMIC RANGE

Adjusts dynamic range compression for Dolby Digital/DTS signals.

Audio settings G)AUDIO SET

Adjusts mute type, audio delay, and volume levels.

HDMI set H)HDMI SET

Selects whether to play HDMI audio on this unit or another component.

Input assignment A)INPUT ASSIGNMENT

Reassigns input jacks to specific components for custom setup.

Input rename B)INPUT RENAME

Changes the displayed name of input sources in OSD and front panel.

Volume trim C)VOLUME TRIM

Adjusts the output volume of each source to balance levels.

Decoder mode D)DECODER MODE

Sets the default decoder mode for digital input sources.

Multi channel input setup E)MULTI CH SET

Selects background video source for MULTI CH INPUT sources.

Display settings A)DISPLAY SET

Adjusts front panel brightness and display scroll behavior.

Memory guard B)MEMORY GUARD

Prevents accidental changes to DSP parameters and other settings.

Audio select C)AUDIO SELECT

Designates default audio input jack for sources on power-on.

Parameter initialization D)PARAM. INI

Resets sound field program parameters to factory defaults.

Bluetooth setting E)BLUETOOTH SET

Starts the pairing process for Bluetooth adapter and component.

XM Radio setting F)XM RADIO SET

Checks XM Satellite Radio signal reception level.

SIRIUS Satellite Radio setting G)SIRIUS SET

Sets the Parental Lock code number for SIRIUS channels.

Remote control features

Controlling this unit

Using the remote to operate the AV receiver itself.

Controlling a TV

Using the remote to operate a connected TV.

Controlling other components

Operating other audiovisual components via the remote.

Setting remote control codes

Instructions for programming remote control codes for external devices.

Advanced setup

Speaker impedance SP IMP.

Sets the unit's speaker impedance to match connected speakers.

SIRIUS Satellite Radio Parental Lock code number reset SSR PIN

Resets the SIRIUS Satellite Radio Parental Lock code to factory default.

Tuner frequency step TU

Sets the tuner frequency step based on regional spacing.

Initializing INIT.

Resets all unit parameters to their initial factory settings.

Troubleshooting

General

Common operational issues and their solutions for the unit.

Tuner

Troubleshooting specific problems related to FM/AM radio reception.

XM Satellite Radio

Troubleshooting messages and issues related to XM Satellite Radio.

SIRIUS Satellite Radio

Troubleshooting messages and issues related to SIRIUS Satellite Radio.

AUTO SETUP

Troubleshooting common errors encountered during the AUTO SETUP process.

iPod

Troubleshooting issues related to iPod connection and playback.

Bluetooth

Troubleshooting common problems with Bluetooth connections.

Remote control

Troubleshooting issues with the remote control not functioning properly.

Resetting the system

Procedure to reset all unit parameters to factory default settings.

Yamaha HTR-6140 Specifications

General IconGeneral
BrandYamaha
ModelHTR-6140
CategoryReceiver
LanguageEnglish

Related product manuals