33 En
English
INTRODUCTION
ADDITIONAL
INFORMATION APPENDIX
PREPARATION
BASIC
OPERATION
ADVANCED
OPERATION
Once you have stationed your iPod in a Yamaha iPod universal dock (such as the YDS-11, sold separately) connected to
the DOCK terminal on the rear panel of this unit (page 18), you can enjoy playback of your iPod using the supplied
remote control or the menu displayed on the GUI screen. You can also use the Compressed Music Enhancer mode of this
unit to improve the sound quality of the compression artifacts (such as MP3 format) stored on your iPod (page 29).
Notes
• iPod touch, iPod (Click and Wheel including iPod classic), iPod nano, and iPod mini are supported.
• Some features may not be compatible depending on the model or the software version of your iPod.
• Some features may not be available depending on the model of Yamaha iPod universal dock. The following sections describe the procedure when using
the YDS-11.
y
• Once the connection between your iPod and this unit is complete, “iPod connected” appears on the front panel display.
• For a complete list of status messages that appear on the front panel display and GUI screen, see “iPod” (page 67).
You can control your iPod when you set it in the iPod
universal dock and switch the input source to DOCK. The
operations of your iPod can be done with the aid of the
video display (menu browse mode) or without it (simple
remote mode).
When you connect your iPod to this unit, you can perform
the following operations with the remote control.
You can perform basic iPod operations (play, stop, skip,
etc.) using the supplied remote control without displaying
the menu on the GUI screen. You can also directly control
your iPod in this mode.
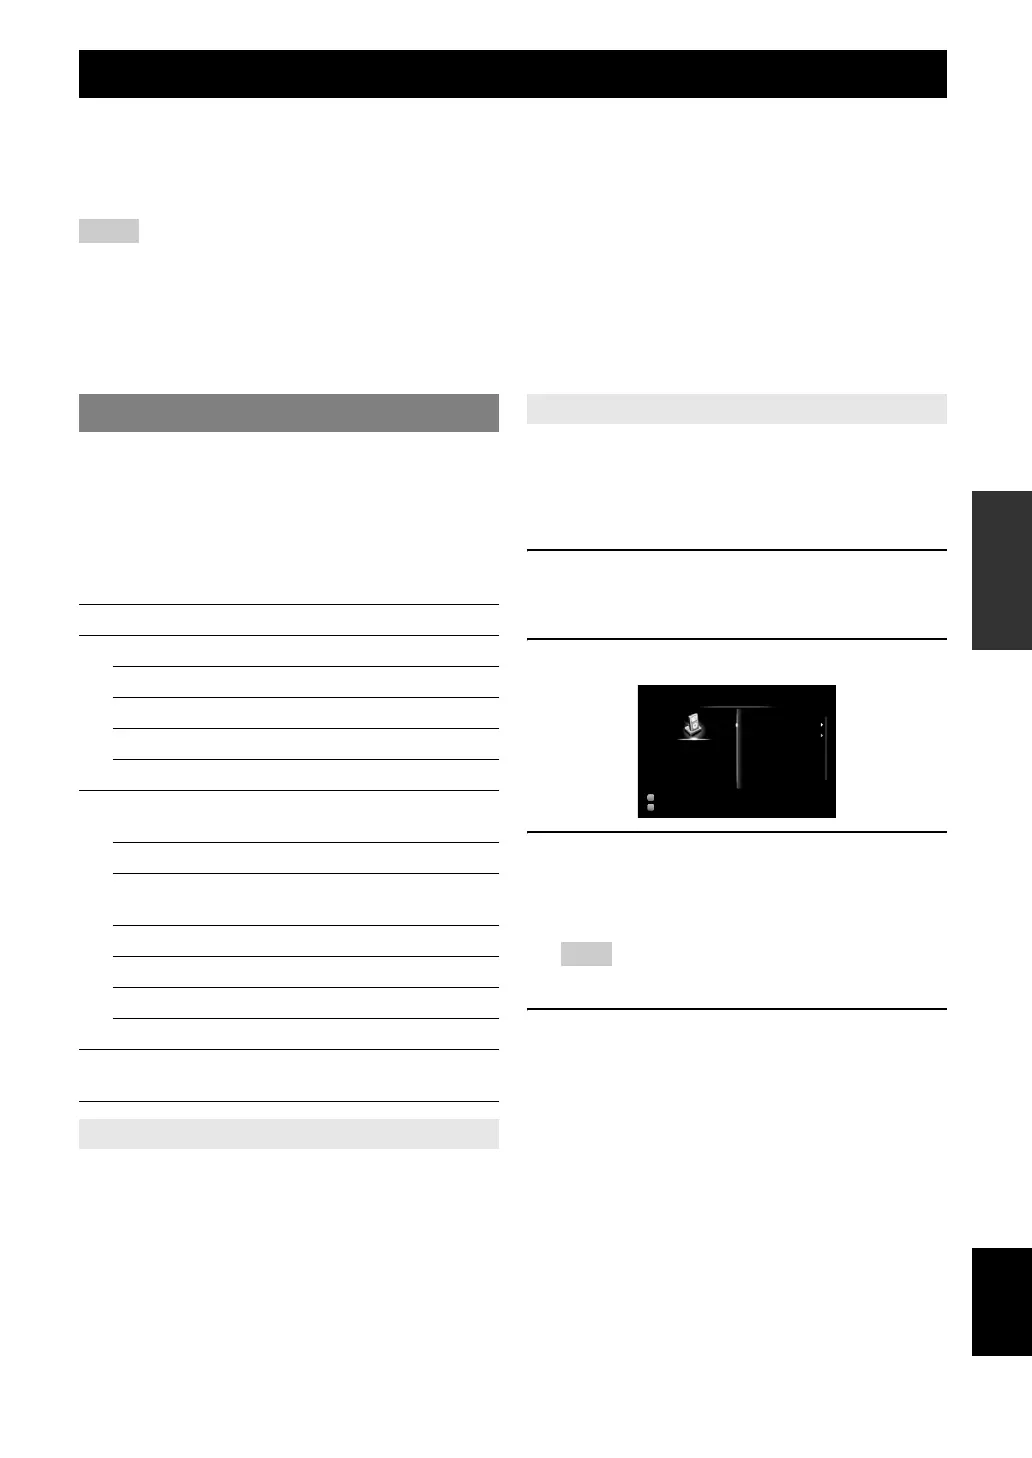
You can browse song or video files stored on your iPod
using the GUI screen. You cannot directly control your
iPod in this mode.
y
• “_”(underscore) is displayed for characters that this unit cannot display.
1 Rotate the TINPUT selector (or press
dDOCK) to select “iPod” (DOCK) as the
input source.
2 Press uDISPLAY on the remote control.
3 Press jCursor k / n to select “Music” or
“Videos” and then press jCursor h.
• Select “Music” to browse music files.
• Select “Videos” to browse video files.
Note
• The “Videos” menu does not appear unless the both your iPod and
Yamaha iPod universal dock support the video browsing feature.
4 Press jCursor k / n / l / h to select a
menu item and then press jENTER to start
playback.
Using iPod™
Controlling iPod™
Key Function
j
ENTER Subsequent menu
k Menu up
n Menu down
l Previous menu
h Subsequent menu
k
p
Play (Menu browse mode)
Play/Pause (Simple remote mode)
s Stop
e
Pause (Menu browse mode)
Play/Pause (Simple remote mode)
w Search backward (Press and hold)
f Search forward (Press and hold)
b Skip backward
a Skip forward
u DISPLAY
Switch between Menu browse mode and
Simple remote mode
Controlling iPod in simple remote mode
Controlling iPod in menu browse mode
Input
DSP
Music
Videos
iPod
DOCK
STRAIGHT
 Loading...