Advanced speaker configuration En 19
Using a speaker that supports bi-amp connection
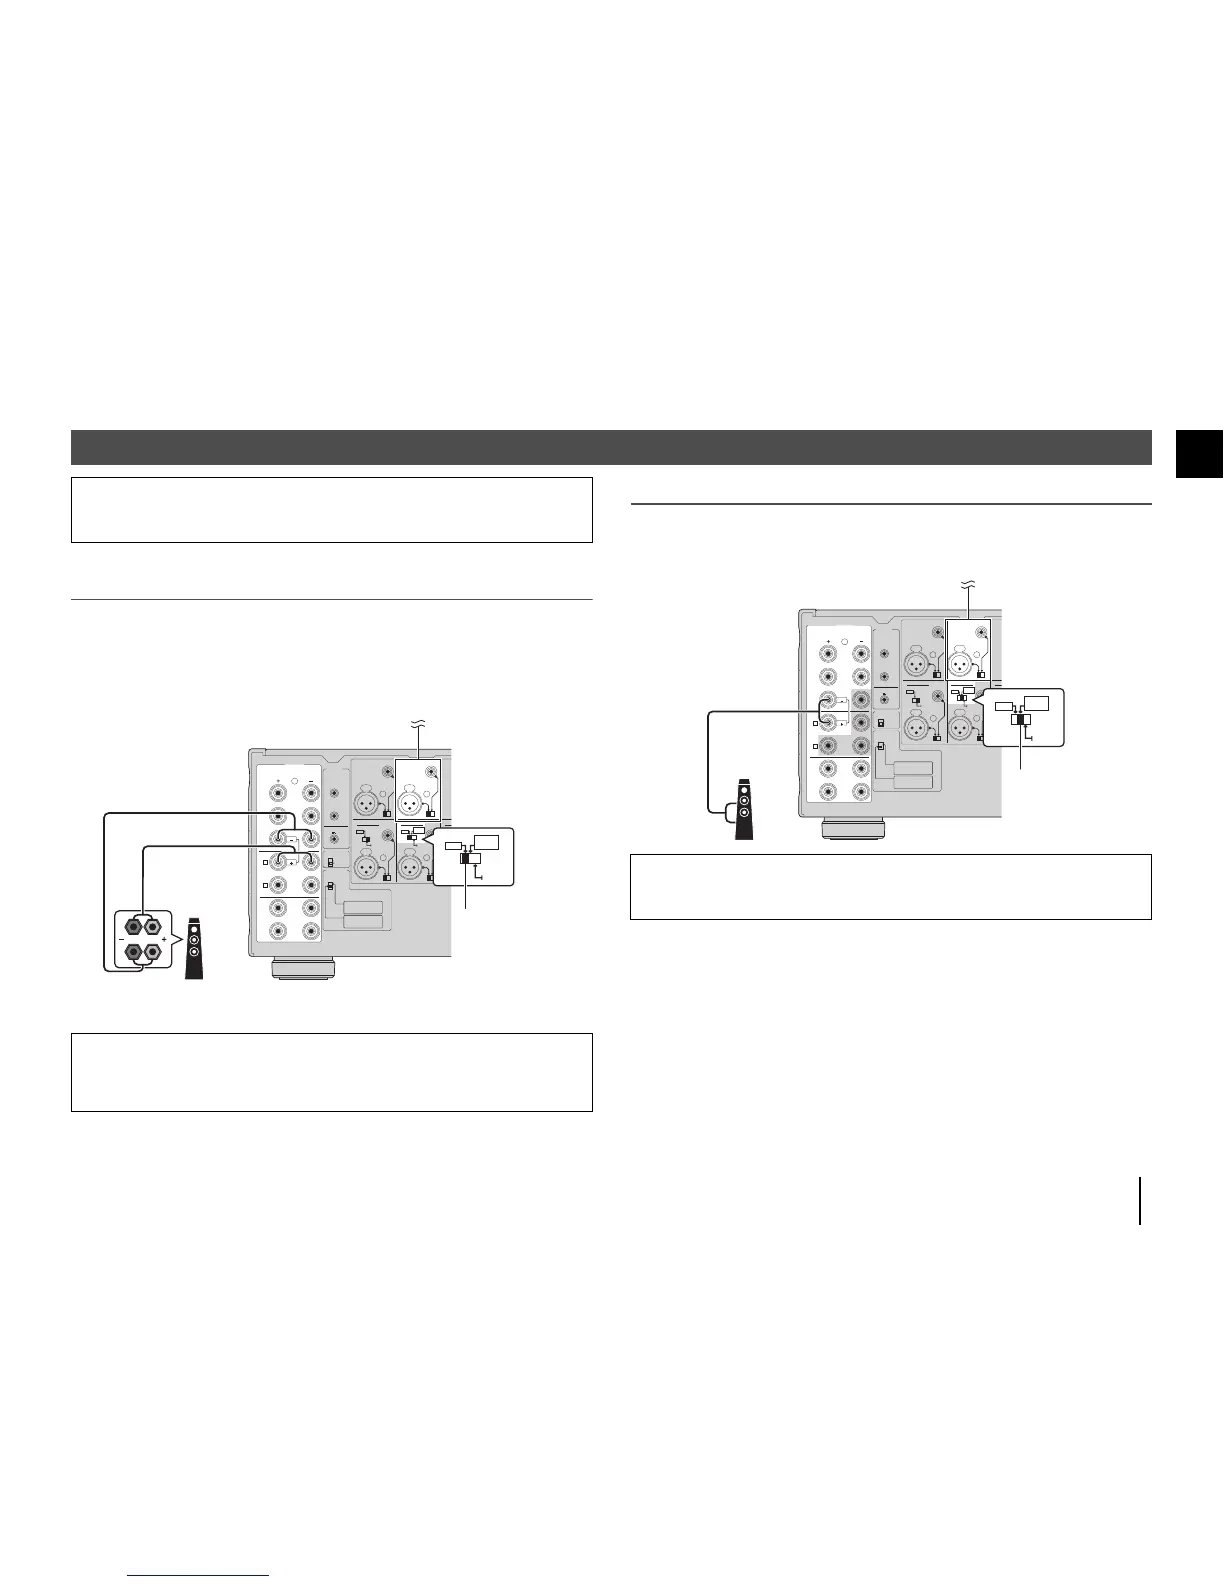
If you want to use a speaker that supports bi-amp connection to have more high-quality sounds,
change the CH. SELECTOR setting and connect the speaker to the corresponding pair of the
SPEAKERS terminals.
(Example)
Using a speaker that supports bi-amp connection for CH.3 (R)
By setting the CH. SELECTOR for CH.4 (R) to “CH.3”, CH.3 (R) input signals are output from both the
CH.3 A (R) and CH.4 (R) speaker terminals. In this case, CH.4 (R) input is not used.
Making a Bridge Connection Between the Front Speakers
You can enjoy high-powered sound by bridging the front speakers.
To make a bridge connection, set the CH. SELECTOR for CH.4 (L/R) to “CH 3 BRIDGE”, and then
connect speakers to the CH.3 A (L/R) and CH.4 (L/R) speaker terminals.
Advanced speaker configuration
Caution
• Remove the unit’s power cable from an AC wall outlet before making any connections or operating the
switches.
Caution
• Before making bi-amp connections, remove any brackets or cables that connect a woofer with a tweeter.
Refer to the instruction manual of the speakers for details. If you are not making bi-amp connections, make
sure that the brackets or cables are connected before connecting the speaker cables.
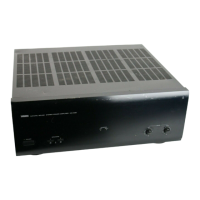
R
R
R
SPEAKERS
TRIGGER
+12V
THROUGH
OUT
AUTO POWER
STANDBY
IMPEDANCE
SELECTOR
OUT
12V 0.1A
OFF
ON
CH.6
CH.5 CH.3
SURROUND
REAR
PRESENCE
BRIDGE
( )
REAR
PRESENCE
SURROUND
SURROUND
BACK
CENTER
FRONT
PRESENCE
FRONT
FRONT
CH.5
CH.4
A
CH.3
CH.2
CH.1
IN
RR
CH.2 CH.4 AMP ASSIGNCH.6 AMP ASSIGN
CH.4CH.6
FRONT
PRESENCE
BRIDGE
( )
B
CH.5 CH.1CH.3
CH.3
BRIDGE