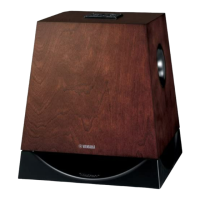
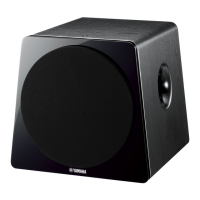
This document describes the Yamaha NS-SW700 Subwoofer, a device designed to enhance the bass response of an audio system. It incorporates Yamaha's Advanced Active Servo Technology II and QD-Bass Technology for high-quality, super-bass sound.
Function Description
The NS-SW700 Subwoofer is a powered subwoofer system that reproduces low-frequency sounds, adding depth and impact to audio. It can be integrated into an existing audio system by connecting to either the amplifier's speaker terminals or line output (pin jack) terminals.
Advanced Yamaha Active Servo Technology II (YST II): This technology provides powerful, high-quality bass reproduction. It utilizes a direct connection between the amplifier and speaker, allowing for accurate signal transmission and precise speaker control. YST II employs negative-impedance drive and constant-current drives to create more resonant energy, effectively making the speaker cabinet volume and port act as an "air woofer." This allows for deep bass reproduction from smaller cabinets and offers stable performance with clear bass reproduction.
QD-Bass Technology: This unique Yamaha technology (Quatre Dispersion Bass) efficiently radiates sound in four horizontal directions, contributing to the subwoofer's overall bass performance.
Automatic Power-Switching Function: This feature allows the subwoofer to automatically switch between power-on and standby modes. If no input signal is detected for 7 or 8 minutes, the subwoofer enters standby (power indicator lights red). When a bass signal below 200 Hz is detected, it automatically powers on (power indicator lights green). This function is active when the POWER switch and STANDBY/ON button are set to ON. The sensitivity of this function can be adjusted using the AUTO STANDBY switch (HIGH/LOW/OFF).
B.A.S.S. (Bass Action Selector System) Button: This button allows users to select a bass effect suitable for the audio source.
- MUSIC position: Reproduces bass sound well for audio software, making the sound clearer by cutting excessive low-frequency components.
- MOVIE position: Enhances low-frequency effects for video software, providing a more powerful, richer, and deeper sound.
HIGH CUT Control: This control adjusts the high-frequency cut-off point. Frequencies higher than the selected point are cut off, meaning they are not output by the subwoofer. This allows users to match the subwoofer's sound to their front speakers.
PHASE Switch: This switch allows users to reverse the phase (REV) or keep it normal (NORM). Depending on the speaker system and listening conditions, adjusting this switch can improve sound quality.
VOLUME Control: This control adjusts the overall volume level of the subwoofer.
POWER Switch: This switch turns the main power supply to the subwoofer ON or OFF.
STANDBY/ON Button: When the POWER switch is ON, this button toggles the subwoofer between power-on mode (power indicator green) and standby mode (power indicator off). In standby mode, the subwoofer still consumes a small amount of power.
INPUT/OUTPUT Terminals:
- INPUT1 (FROM AMPLIFIER) terminals: Used to connect the subwoofer to the speaker output terminals of an amplifier.
- OUTPUT (TO SPEAKERS) terminals: Used to connect the main speakers to the subwoofer, receiving signals from the INPUT1 terminals.
- INPUT2 terminals: Used to input line-level signals from an amplifier.
- INPUT3 (LFE) terminals: Designed for amplifiers that can cut off high frequencies from signals sent to the subwoofer. Connecting to these terminals bypasses the subwoofer's built-in HIGH CUT circuit, potentially leading to higher sound quality.
Usage Features
Placement: For optimal effect, it is recommended to place one subwoofer on the outside of either the right or left front speaker. If using two subwoofers, place them on the outside of each front speaker. Placing the subwoofer at an oblique angle to a wall can prevent "standing waves" from canceling bass sounds, which might occur if placed directly facing a wall. Breaking up parallel surfaces with bookshelves can also help.
Connections: The subwoofer can be connected to an amplifier using either line output (pin jack) terminals or speaker output terminals.
- Line Output Connection: Connect the amplifier's SUBWOOFER (or LOW PASS) terminal to the subwoofer's INPUT2 terminal. For amplifiers with SPLIT SUBWOOFER terminals, connect both L and R to the subwoofer's INPUT2 terminals. If the amplifier has PRE OUT terminals, ensure it has at least two sets; otherwise, use the speaker output connection method. For monaural line output, use the L/MONO INPUT2 terminal.
- Speaker Output Connection: If the amplifier lacks line output terminals, connect the amplifier's speaker output terminals to the subwoofer's INPUT1 terminals. If the amplifier has two sets of front speaker output terminals, connect one set to the subwoofer's INPUT1 and the other to the front speakers. If the amplifier has only one set, connect it to the subwoofer's INPUT1, and then connect the subwoofer's OUTPUT terminals to the front speakers.
- LFE Connection: For amplifiers capable of cutting high frequencies from subwoofer signals, connect to the subwoofer's INPUT3 (LFE) terminals to bypass the internal HIGH CUT circuit for potentially better sound quality.
Cable Connections: Use high-quality shielded cables. Ensure correct polarity (+ to + and – to –) for speaker cables. Keep speaker cables as short as possible and avoid bundling or rolling excess cabling. Banana plug connections are possible for U.S.A., Canada, and Australia models.
Initial Setup:
- Set the VOLUME control to minimum.
- Turn on all other audio components.
- Ensure the POWER switch is ON, then press the STANDBY/ON button to turn on the subwoofer (power indicator green).
- Play a source with low-frequency content and adjust the amplifier's volume to the desired listening level.
- Adjust the HIGH CUT control to a level slightly higher than the front speakers' rated minimum reproducible frequency.
- Gradually increase the subwoofer's VOLUME to balance it with the front speakers, aiming for a slightly more bass effect than without the subwoofer. Re-adjust HIGH CUT and VOLUME if needed.
- Set the PHASE switch to the position (REV or NORM) that provides the best bass sound.
- Select "MOVIE" or "MUSIC" using the B.A.S.S. button based on the source material.
Automatic Power-Switching Adjustment:
- Set the subwoofer to standby.
- Adjust the AUTO STANDBY switch:
- LOW: Activates the automatic power-switching function.
- HIGH: Activates the function with lower input signal detection sensitivity, useful if LOW doesn't operate or if the subwoofer turns on unexpectedly due to noise.
- OFF: Deactivates the function, useful if the subwoofer switches on unexpectedly due to external noise.
Voltage Selector (Asia and General models only): Before plugging in, ensure this switch on the rear panel is set to the correct local main voltage (110/120/220/230-240V AC, 50/60 Hz). Always unplug the subwoofer before adjusting this switch.
Maintenance Features
Cleaning: Do not use chemical solvents to clean the unit, as this may damage the finish. Use a clean, dry cloth.
Placement Considerations:
- Install in a cool, dry, clean place, away from windows, heat sources, excessive vibration, dust, moisture, and cold.
- Avoid sources of humming (transformers, motors).
- Allow at least 20 cm of space above, behind, and on both sides of the unit for heat radiation to prevent fire or damage. Do not cover the rear panel with newspapers or tablecloths.
- Do not place the rear panel facing down on the floor or other surfaces.
- Avoid placing objects that might fall due to vibrations (glass, china, small metallic items, burning candles, water vessels) on the unit to prevent injury, fire, or electric shock.
- Do not place the unit where foreign material or dripping water might enter.
- Avoid placing fragile objects near the YST port, as air pressure could cause them to fall and cause damage or injury.
- When using a humidifier, ensure sufficient space around the unit and avoid excessive humidification to prevent condensation, which could lead to fire, damage, or electric shock.
- If super-bass frequencies cause a turntable to howl or TV images to distort, move the subwoofer away from these devices.
Troubleshooting: The manual includes a troubleshooting section to address common operating errors. If issues persist, disconnect the power cord and contact an authorized Yamaha dealer or service center.
Safety Precautions:
- Never open the cabinet due to high voltage inside.
- Do not use force on switches, controls, or connection wires.
- When moving the unit, disconnect the power plug and all connected wires.
- Unplug the unit during lightning storms or when unused for long periods.
- Protect the power cord from being walked on or pinched.
- Use only manufacturer-specified attachments/accessories.
- Use caution when moving the unit with a cart/stand to avoid tip-over.
- Refer all servicing to qualified service personnel.
- Avoid continuous output of certain sounds (e.g., 20 Hz-50 Hz sine waves, bass from electronic instruments, turntable stylus touching a disc surface) at high volume levels to prevent damage. Reduce volume if distortion (unnatural "rapping" or "hammering" sounds) is heard.
FCC Information (for US customers): Do not modify the unit. Use only high-quality shielded cables. The product complies with FCC Regulations, Part 15 for Class "B" digital devices. If interference occurs, try relocating the product or affected device, using different power outlets, installing AC line filters, or reorienting radio/TV antennas.
U.K. Customers: Ensure a suitable 3-pin plug is fitted if necessary, following the specified wiring code (Blue: NEUTRAL, Brown: LIVE).
Canadian Customers: Match the wide blade of the plug to the wide slot and fully insert to prevent electric shock.