8-33
1FSJPEJDNBJOUFOBODFBOEBEKVTUNFOU
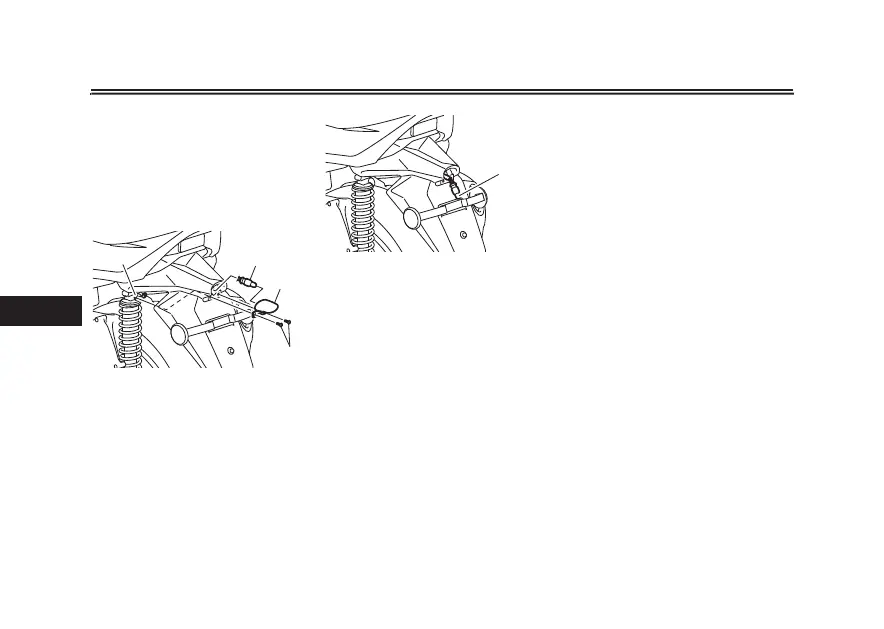
EAU78560
3FQMBDJOHUIFMJDFOTFQMBUF
MJHIUCVMC
1. Remove the license plate light unit
by removing the bolts and plate,
and then remove the license plate
light bulb socket (together with the
bulb) by pulling it out.
2. Remove the burnt-out bulb by
pulling it out.
3. Insert a new bulb into the socket.
4. Install the socket (together with
the bulb) by pushing it in, and then
install the license plate light unit by
installing the plate and bolts.
1. License plate light unit
2. Bolt
3. License plate light bulb socket
4. Plate
1. License plate light bulb
1
2
3
4
1
EAU60701
5SPVCMFTIPPUJOH
Although Yamaha vehicles receive a
thorough inspection before shipment
from the factory, trouble may occur
during operation. Any problem in the
fuel, compression, or ignition systems,
for example, can cause poor starting
and loss of power.
The following troubleshooting charts
represent quick and easy procedures
for checking these vital systems your-
self. However, should your vehicle re-
quire any repair, take it to a Yamaha
dealer, whose skilled technicians have
the necessary tools, experience, and
know-how to servi
ce the vehicle prop-
erly.
Use only genuine Yamaha replace-
ment parts. Imitation parts may look
like Yamaha parts, but they are often
inferior, have a shorter service life and
can lead to expensive repair bills.