8-13
6. Install the nal transmission oil
drain bolt and its new gasket, and
then tighten the bolt to the speci-
ed torque.
7. Rell with the specied amount of
the recommended nal transmis-
sion oil. 8"3/*/( .BLF TVSF
UIBU OP GPSFJHO NBUFSJBM FOUFST
UIF ãOBM USBOTNJTTJPO DBTF
.BLF TVSF UIBU OP PJM HFUT PO
UIFUJSFPSXIFFM
[EWA11312]
8. Install the nal transmission oil ll-
er cap and its new O-ring, and
then tighten the oil ller cap.
9. Check the nal transmission case
for oil leakage. If oil is leaking,
check for the cause.
5JHIUFOJOHUPSRVF
Final transmission oil drain bolt:
20 N·m (2.0 kgf·m, 15 lb·ft)
3FDPNNFOEFEãOBMUSBOTNJTTJPO
PJM
See page 10-1.
0JMRVBOUJUZ
0.20 L (0.21 US qt, 0.18 Imp.qt)
EAU20071
$PPMBOU
The coolant level should be checked
before each ride. In addition, the cool-
ant must be changed at the intervals
specied in the periodic maintenance
and lubrication chart.
EAU78580
5PDIFDLUIFDPPMBOUMFWFM
1. Place the vehicle on the center-
stand.
5*1
The coolant level must be
checked on a cold engine since
the level varies with engine tem-
perature.
Make sure that the vehicle is posi-
tioned straight up when checking
the coolant level. A slight tilt to the
side can result in a false reading.
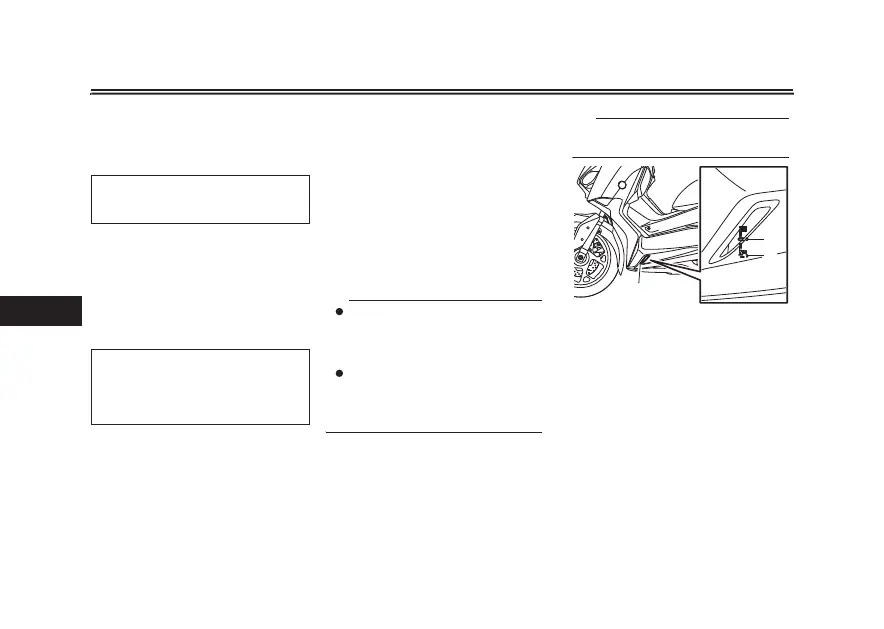
2. Check the coolant level through
the check window.
5*1
The coolant should be between the mi-
nimum and maximum level marks.
3. If the coolant is at or below the mi-
nimum level mark, remove the left
oorboard mat by pulling it up.
1. Coolant level check window
2. Maximum level mark
3. Minimum level mark
1
2
3
1FSJPEJDNBJOUFOBODFBOEBEKVTUNFOU