CLEANING THE ENGINE AND DECK
Any fuel or oil spilled on the machine should be
wiped off promptly. Do NOT allow grass, leaves, and
dirt to accumulate around the cooling fins of the
engine or on any other part of the machine,
especially the pulleys and other moving parts.
Clean the underside of the deck with a wisk broom,
putty knife or forced air after each mowing.
IMPORTANT: Do NOT use a garden hose to
clean the cuffing deck. The ball bearings in the blade
spindles are sealed at the factory and cannot be re-
lubricated. Spraying water near the spindles can
significantly reduce the life of the beadngs.
CUTTING DECK REMOVAL
WARNING: Before performing any
maintenance, move the PTO lever into the
disengaged (OFF) position, engage the
parking brake, turn the ignition key to the
OFF position and remove the key from the
switch to avoid accidental starting.
Several attachments are available for your tractor.
To mount some of these attachments and in order to
perform certain maintenance procedures, the deck
must be removed from the tractor. To properly
remove the cutting deck, proceed as follows:
WARNING: Do NOT remove deck
,_ after the tractor.
immediately operating
Allow the engine and other moving parts
ample time to cool down.
• Move the PTO lever into the disengaged
(OFF) position and engage the parking brake.
\
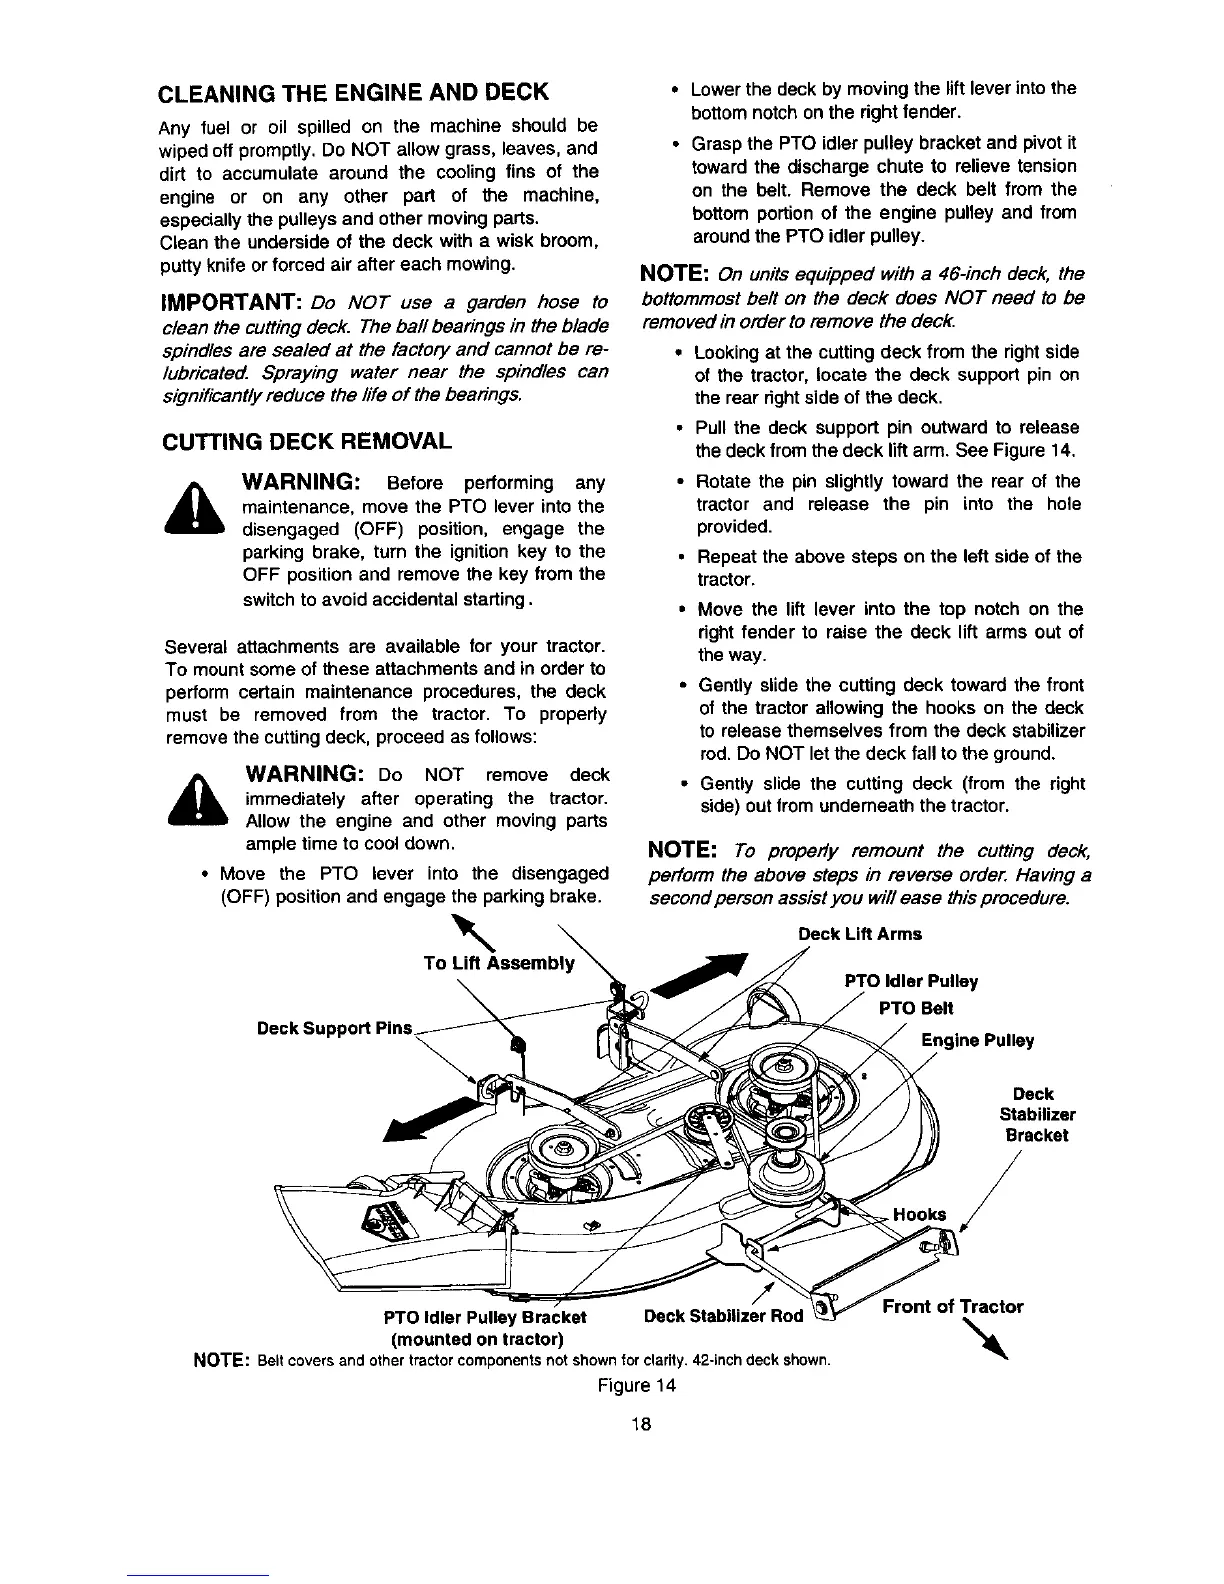
To Lift Assembl_
• Lower the deck by moving the lift lever into the
bottom notchon the right fender.
• Grasp the PTO idler pulley bracket and pivot it
toward the discharge chute to relieve tension
on the belt. Remove the deck belt from the
bottom portion of the engine pulley and from
around the PTO idler pulley.
NOTE: On units equipped with a 46-inch deck, the
boffommost belt on the deck does NOT need to be
removed in order to remove the deck.
• Looking at the cutting deck from the right side
of the tractor, locate the deck support pin on
the rear right side of the deck.
• Pull the deck support pin outward to release
the deck from the deck lift arm. See Figure 14.
• Rotate the pin slightly toward the rear of the
tractor and release the pin into the hole
provided.
• Repeat the above steps on the left side of the
tractor.
• Move the lift lever into the top notch on the
right fender to raise the deck lift arms out of
the way.
• Gently slide the cutting deck toward the front
of the tractor allowing the hooks on the deck
to release themselves from the deck stabilizer
rod. Do NOT let the deck fall to the ground.
• Gently slide the cutting deck (from the right
side) out trom underneath the tractor.
NOTE: To propedy remount the cuffing deck,
perform the above steps in reverse order. Having a
second person assistyou will ease this procedure.
Deck Lift Arms
PTO Idler Pulley
PTO Belt
Engine Pulley
Deck
Stabilizer
Bracket
. Hooks /
PTO Idler Pulley Bracket Deck Stabilizer Rod
(mounted on tractor)
NOTE: Beltcoversand othertractorcomponentsnot shownfor clarity.42-inchdeck shown.
Figure 14
18
Front of Tractor
"x