13 support@yardistrystructures.com
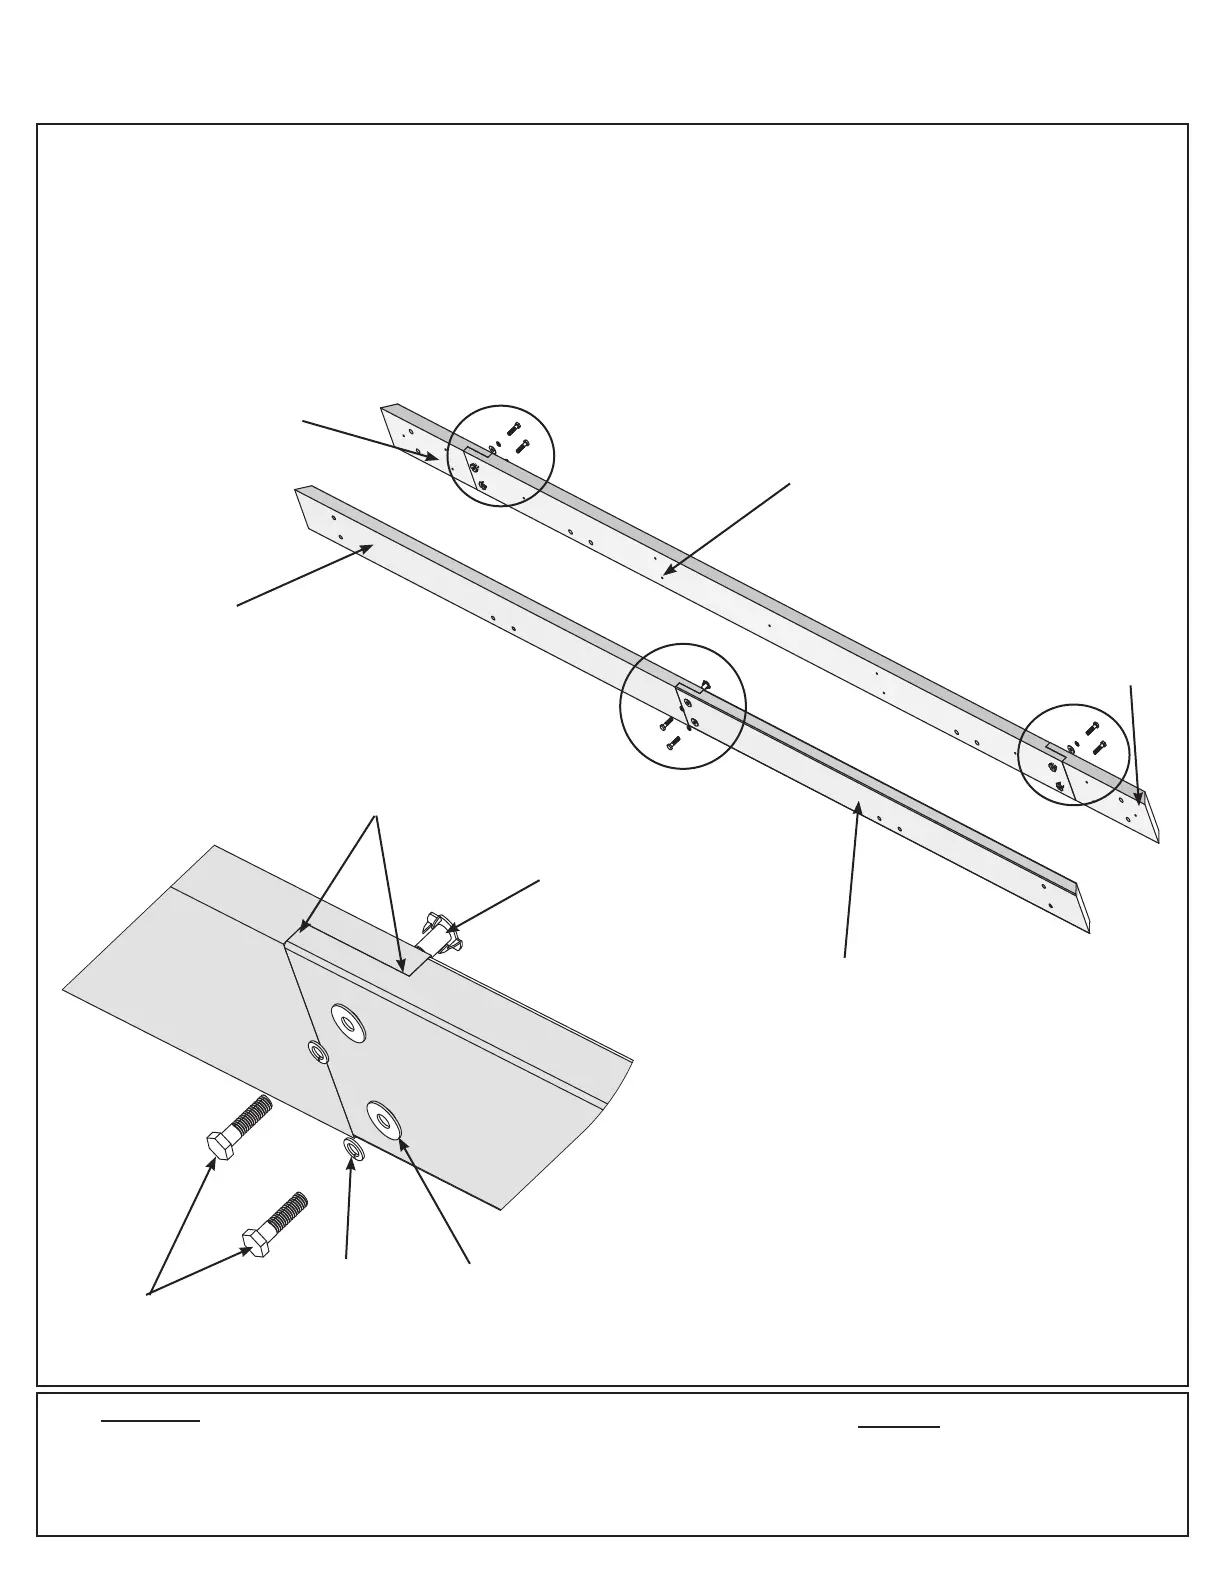
Step 3: Beam Assembly
Part 1
Hardware
Wood Parts
A: Connect one (725) Left Outside Beam and one (726) Right Outside Beam using two 5/16 x 1-1/4” Hex Bolts
(with 5/16” lock washer, 1/4 - 5/16” large washer and 5/16” t-nut) as shown in g. 3.1 and 3.2.
B: Connect one (727) Inside Short Beam to each end of one (728) Inside Long Beam using two 5/16 x 1-1/4”
Hex Bolts (with 5/16” lock washer, 1/4 - 5/16” large washer and 5/16” t-nut) per end as shown in g. 3.1 and 3.2.
C: Repeat Steps A and B three more times to make four Outside Beam Assemblies and four Inside Beam
Assemblies.
(725) Left
Outside Beam
4 x (725) Left Outside Beam
4 x (726) Right Outside Beam
8 x (727) Inside Short Beam
4 x (728) Inside Long Beam
Fig. 3.1
24 x 5/16 x 1-1/4” Hex Bolt
(5/16” lock washer, 1/4-5/16” large washer, 5/16” t-nut)
Fig. 3.2
1/4 -5/16”
Large Washer
5/16 x 1-1/4”
Hex Bolt
5/16”
T-nut
Tight
(726) Right
Outside Beam
(728) Inside
Long Beam
(727) Inside
Short Beam
5/16” Lock
Washer
Make sure bolt heads
are on the outside of
each Beam Assembly
(727) Inside
Short Beam