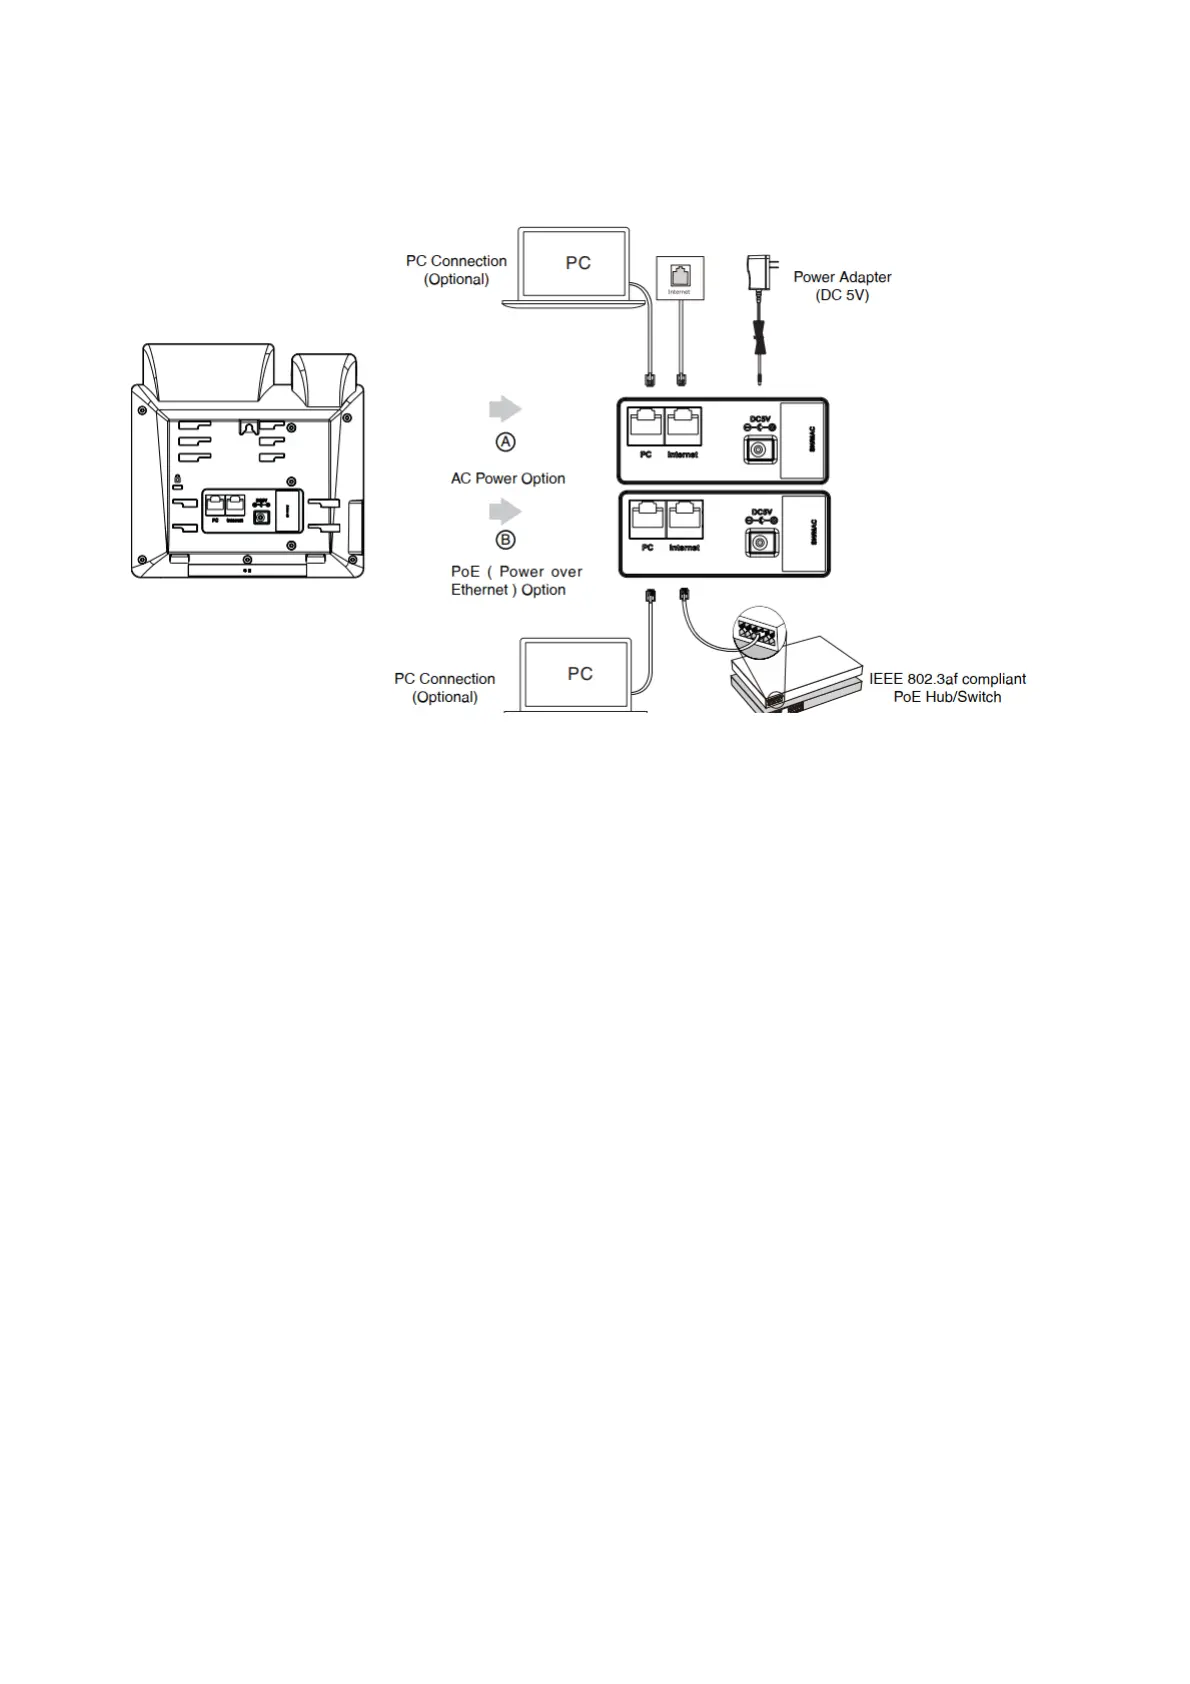
AC Power (Optional)
To connect the AC power:
1. Connect the DC plug on the power adapter to the DC5V port on the phone and connect the other end
of the power adapter into an electrical power outlet.
2. Connect the included or a standard Ethernet cable between the Internet port on the phone and the
one on the wall or switch/hub device port.
Power over Ethernet
With the included or a regular Ethernet cable, the IP phone can be powered from a PoE-compliant switch or
hub. To connect the PoE:
1. Connect the Ethernet cable between the Internet port on the phone and an available port on the in-
line power switch/hub.
If in-line power switch/hub is provided, you don’t need to connect the phone to the power adapter.
Make sure the switch/hub is PoE-compliant. The phone can also share the network with another
network device such as a PC (personal computer). It is an optional connection. Important, do not
unplug or remove power to the phone while it is updating firmware and configurations.
 Loading...