are running on and how to upgrade them in this guide: How to manual upgrade Yealink IP phones.
Step 2: Factory Reset the IP Phone
Before provisioning the IP phone, the phone must be brought back to factory defaults in case the device has
residual settings of a previous configuration. To reset the device read our How to Factory Reset Yealink
phones document.
Step 3: Provision the phone
There are several methods to provision a phone:
● Plug & Play - For phones on the local LAN or behind the 3CX SBC.
● RPS - For phones on remote networks that will connect directly to 3CX and use STUN.
For more information, see “When can I use which provisioning method?”
Local LAN or SBC: Provision via Plug’n’Play
1. Connect the phone to the network. A PnP request will be sent automatically to 3CX.
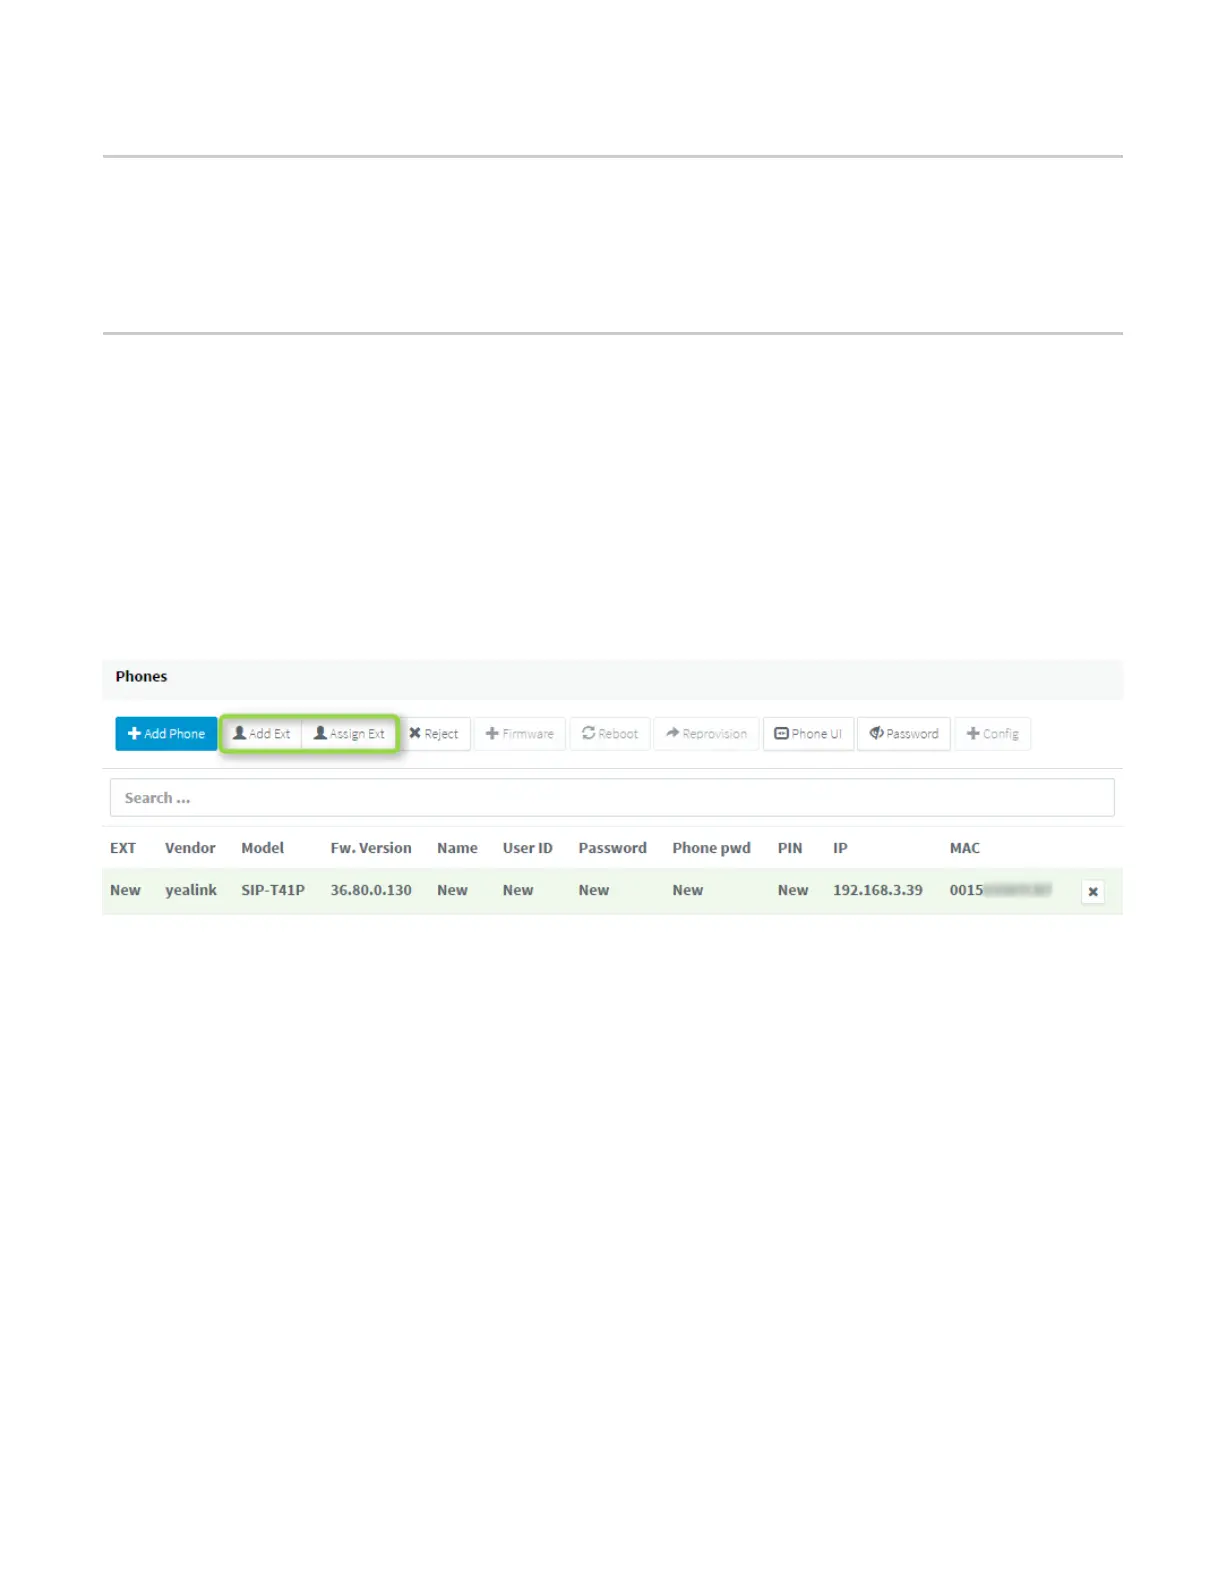
2. Go to the 3CX Management Console ⇒ “Phones” page. The new phone will be marked in Bold.
3. Click on the BOLD entry and choose between “Assign Ext” or “Add Ext”, depending on whether
you want to assign the phone to an existing extension or create a new one.

 Loading...