EasyManua.ls Logo

Yealink T41 User Manual

Yealink T41
9 pages
To Next Page IconTo Next Page
Page #1 background imageLoading...
Page #1 background image
Tronic Networks | ABN 71 123 059 307 | tronic.com.au
Suite 221, 202 Jells Road, Wheelers Hill, 3150
Yealink Automatic Provisioning
Provisioning of Yealink phones for Hosted PBX services can now be done through
https://voipportal.com.au
To begin configuring your handset/s, login to https://voipportal.com.au and select PBX
Extensions
Configuring Yealink Phones
To set an existing handset to an extension, find the MAC address of the handset you're
configuring, then click Edit. To locate a handset's MAC address, for example if you're setting
up several and would like to be sure you're working on the correct phone, please see Locating
a Handset MAC Address at the end of this guide
Set the Phone Name, for example 'Bob' and, if it's not already selected, choose the phone's
model.
If you'd like the handset to subscribe to any of your Address Books, select the appropriate
entry in the Address Book field. To learn more about setting up address books, please
see Portal Guide - Address Book
Finally, select the Extension that this phone should connect to from the Extensions field. If
this phone should connect to more than one extension, use the +Add Extension button to
attach additional extensions. For more information on creating new extensions, please refer
to Portal Guide - PBX Extensions and Sip Trunks
Adding a New Handset
If the handset you're working on hasn't previously been added to the provisioning system,
click the Setup Yealink Phone button
In the Add Phone box, enter the phone's name, for example 'Bob'

Other manuals for Yealink T41

Question and Answer IconNeed help?

Do you have a question about the Yealink T41 and is the answer not in the manual?

Yealink T41 Specifications

General IconGeneral
SIP Accounts6
BluetoothNo
Wi-FiNo
Audio CodecsG.722, G.711, G.723, G.729, iLBC, G.726
Network10/100M Ethernet
PoEYes
HD VoiceYes
ProtocolsSIP

Summary

Configuring Yealink Phones

Set Phone Name and Model

Set the phone's name and choose its model.

Address Book Integration

Link phone to hosted Address Books for subscriptions.

Assign Extension to Phone

Select the extension for the phone to connect to.

Adding a New Handset

Initiate Yealink Phone Setup

Click the 'Setup Yealink Phone' button to begin.

Enter Handset Name

Input the phone's name in the 'Add Phone' box.

Configuring Phone Settings

Enter MAC Address

Input the phone's MAC address for identification.

Select Phone Model

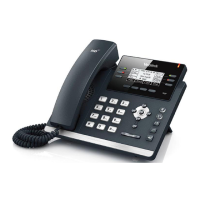
Choose the correct Yealink phone model.

Assign Address Book

Select a hosted Address Book for the phone.

Assign Extension

Link the phone to one or more extensions.

Configuring DSS Keys

Accessing Key Configuration

Locate phone/extension and click 'Keys'.

Adding Key Functions

Select function, target, and name for a key.

Configuring Expansion Module Keys

Set up additional keys via the expansion module.

Understanding Available Key Types

Line Key Functionality

Configure buttons for incoming calls.

PBX Extensions Key

Monitor extension state and enable speed dial.

External Numbers Key

Create speed dial keys for external numbers.

Call Parking Key

Park callers and monitor parking lots.

Custom Values Key

Manually specify target for BLF, Speed Dial, etc.

Applying Phone Settings and Resetting

Automatic Settings Delivery

Changes are delivered automatically after initial config.

Factory Reset for Initial Config

Phone may require a factory reset for initial config.

Updating Assigned Extension/Address Book

Re-assign handset or change address book settings.

Release Provisioning Profile

Release profile before phone re-downloads configuration.

Resetting Phone Provisioning

Use 'Actions' menu to reset the provisioning profile.

Factory Resetting Yealink Phones

Resetting T4 Series Phones

Hold OK key for 8 seconds to reset T4 series.

Resetting T5 Series Phones

Hold OK key for 8 seconds to reset T5 series.

Resetting Phones Without OK Key

Use 'Redial' key for phones without an OK key.

Yealink Cordless Phone Management

Resetting the Cordless Base Station

Hold 'Connect' key during power up to reset.

Reconnecting Cordless Handset

Press 'Connect' until registration flashes to reconnect.

Locating Handset MAC Address

MAC Address on Handset Box

Find MAC address on the phone's shipping box label.

MAC Address on Handset Rear

Find MAC address on the rear of the phone device.

Related product manuals