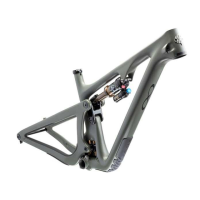
SB165 | OWNER’S MANUAL
9
09
Apply grease to the main pivot cavities of rear
triangle, lightly grease shaft and apply Blue
243 Loctite to the threads of Main Pivot Collet
Axle (3.1). Slide Rear Triangle Assembly onto
main pivot and secure with Main Pivot Collet
Axle (3.1) and Routing Collet Nut* (3.7), placing
routing feature at the top.
Torque: 25 Nm
Install a plain collet nut (3.2, at top with no
clamp feature) if kit uses a wireless drivetrain.
07
Lightly grease underside of 2x Race Extenders
(3.5) and place them onto lower bearing in Link
Assembly (3.16). Lightly grease shaft and apply
Blue 243 Loctite to the threads of Link Pivot
Collet Axle (3.4). Grease cavity for the Collet Nut
(3.2). Install into front triangle using Link Pivot
Collet Axle (3.4) and plain Collet Nut (3.2).
Torque: 25 Nm
08
Lightly grease under the ange of the race extenders (3.15) and apply Blue 243 Loctite to the threads
of Male M6 Bolt (3.19). Assemble Upper (3.23) and Lower (3.22) Shock Extender to SB165 Link (3.16) by
placing 2X Race Extender (3.15) in the extender cavities and sliding between the Link tabs. Threaded
Extender (3.23) should be assembled on top. Secure with a Guide Pin and assemble Female 8x41mm
Bolt (3.17) with Washer (3.21) through the assembly. Secure with Male M6 Bolt (3.19) and Washer (3.20).
Torque: 10 Nm
10
Grease Rear Triangle keyed nut wells, lightly grease underside of the race extender (3.5) anges, and
lightly grease shaft and apply Blue 243 Loctite to the threads of SS Pivot Screws (3.3). Place 2x Race
Extenders (3.5) onto the upper bearings in Link Assembly (3.16). Rotate Rear Triangle and Link together,
lining up SS Pivot bores.
Install 2x SS Pivot Screws (3.3) from the inside of the Link and partially into the Rear Triangle.
Place 2x plain Collet Nut (3.2) into the Rear Triangle.
Using a wrench from the outside of the Swingarm, begin tightening in the “left-hand” direction (this is
still a standard thread, but installed from the inside), tightening the SS Pivot Screw and Collet Nut.
Torque: 25 Nm
11
Apply grease to threads and wedge, then install
Large Collet Wedge Bolts (3.9) into 2x Collet
Axles (3.1) and (3.4).
Torque: 14 Nm
12
Install the Shock into the frame by securing front
eyelet with a Guide Pin. Lightly Grease shaft
and apply Blue 243 Loctite, then install small
Collet Axle (3.14) through the lower Extender
(3.22), through the Shock, and thread into Upper
Extender (3.23).
Torque: 15 Nm
Apply grease to threads and wedge, then install
Small Collet Wedge Bolt (3.10) into Axle.
Torque: 8 Nm