<7. Operation>
7-6
IM 01C25B01-01E
7.6 Local Parameter Setting
WARNING
The local push button on the integral indicator
must not be used in a hazardous area. When
it is necessary to use the push button, operate
it in a non- hazardous location. In the case of
theexplosion-proof/ameprooftypetransmitter,
please refer to section 2.9 for each product.
IMPORTANT
• Donotturnothepowertothetransmitter
immediately after performing parameter
setting.Poweringowithin30secondsof
performing this procedure will return the
parameter to its previous setting.
• The parameters of Ext SW for HART
or J55:EXT ZERO ADJ for BRAIN, to
enable or inhibit zero point adjustment
by means of the zero-adjustment screw
on the transmitter must be“Enabled” to
performthisconguration.Pleasereferto
either IM 01C25T01-06EN for the HART
communication type, or IM 01C25T03-01E
for the BRAIN communication type for the
setting procedure.
• The Local Parameter Setting function
is available with HART or BRAIN
communication type.
LCD update will be slower at low ambient
temperature, and it is recommended to use
LPS function at temperatures above -10
degrees C.
7.6.1 Local Parameter Setting (LPS)
Overview
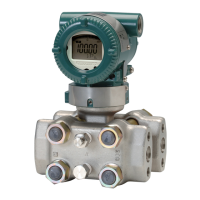
Parametercongurationbythezero-adjustment
screw and push button (integral indicator code
E)oerseasyandquicksetupforparametersof
Loop test, Tag number, Unit, LRV, URV, Damping,
Output mode (linear/square root), Display out
1, and Re-range by applying actual pressure
(LRV/URV) and Device Information. There is no
eectonmeasurementsignal(analogoutputor
communication signal) when Local Parameter
Setting is carried out.
zero-adjustment
screw cover
F0708.ai
Figure 7.7 Zero-adjustment Screw
F0709.ai
Integral indicator
Push-button
Figure 7.8 Range –Setting Switch (push button)
 Loading...


