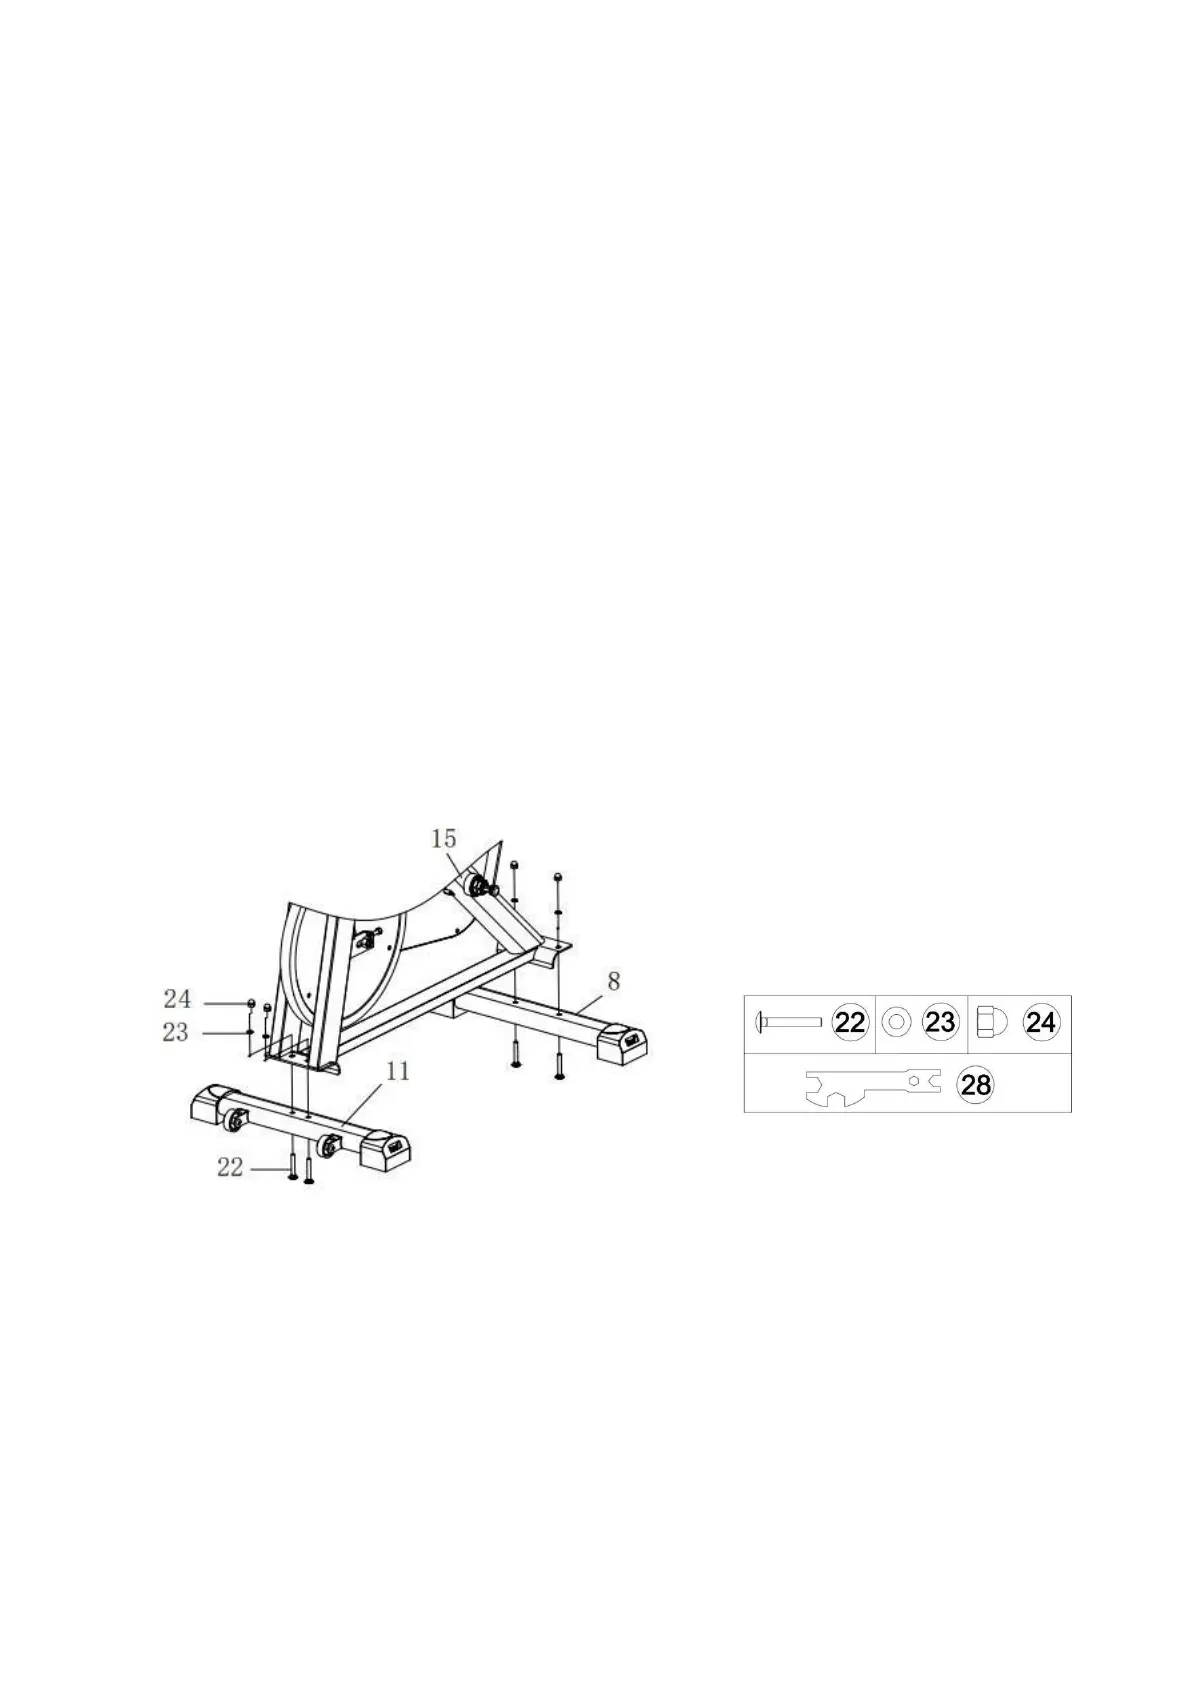
Assembly Instructions
STEP 1. Install the Front and Rear Stabilizer
Required parts:
#8-Rear Stabilizer #11-Front Stabilizer #23-Plain Washer (8x16, 4pcs)
#22-Carriage Bolt (M8x5, 4pcs) #24-High Cap (M8, 4pcs)
#28-Multi-functional Wrench
Ⅱ
1. Attach the #8-Rear Stabilizer and #11-Front Stabilizer to the #15-Main Frame.
2. Insert the #22-Carriage Bolts to the holes from bottom, and then install the #23-Plain
Washer and #24-High Cap, tighten and secure the #24-High Cap with #28-Multi-
functional Wrench Ⅱ.