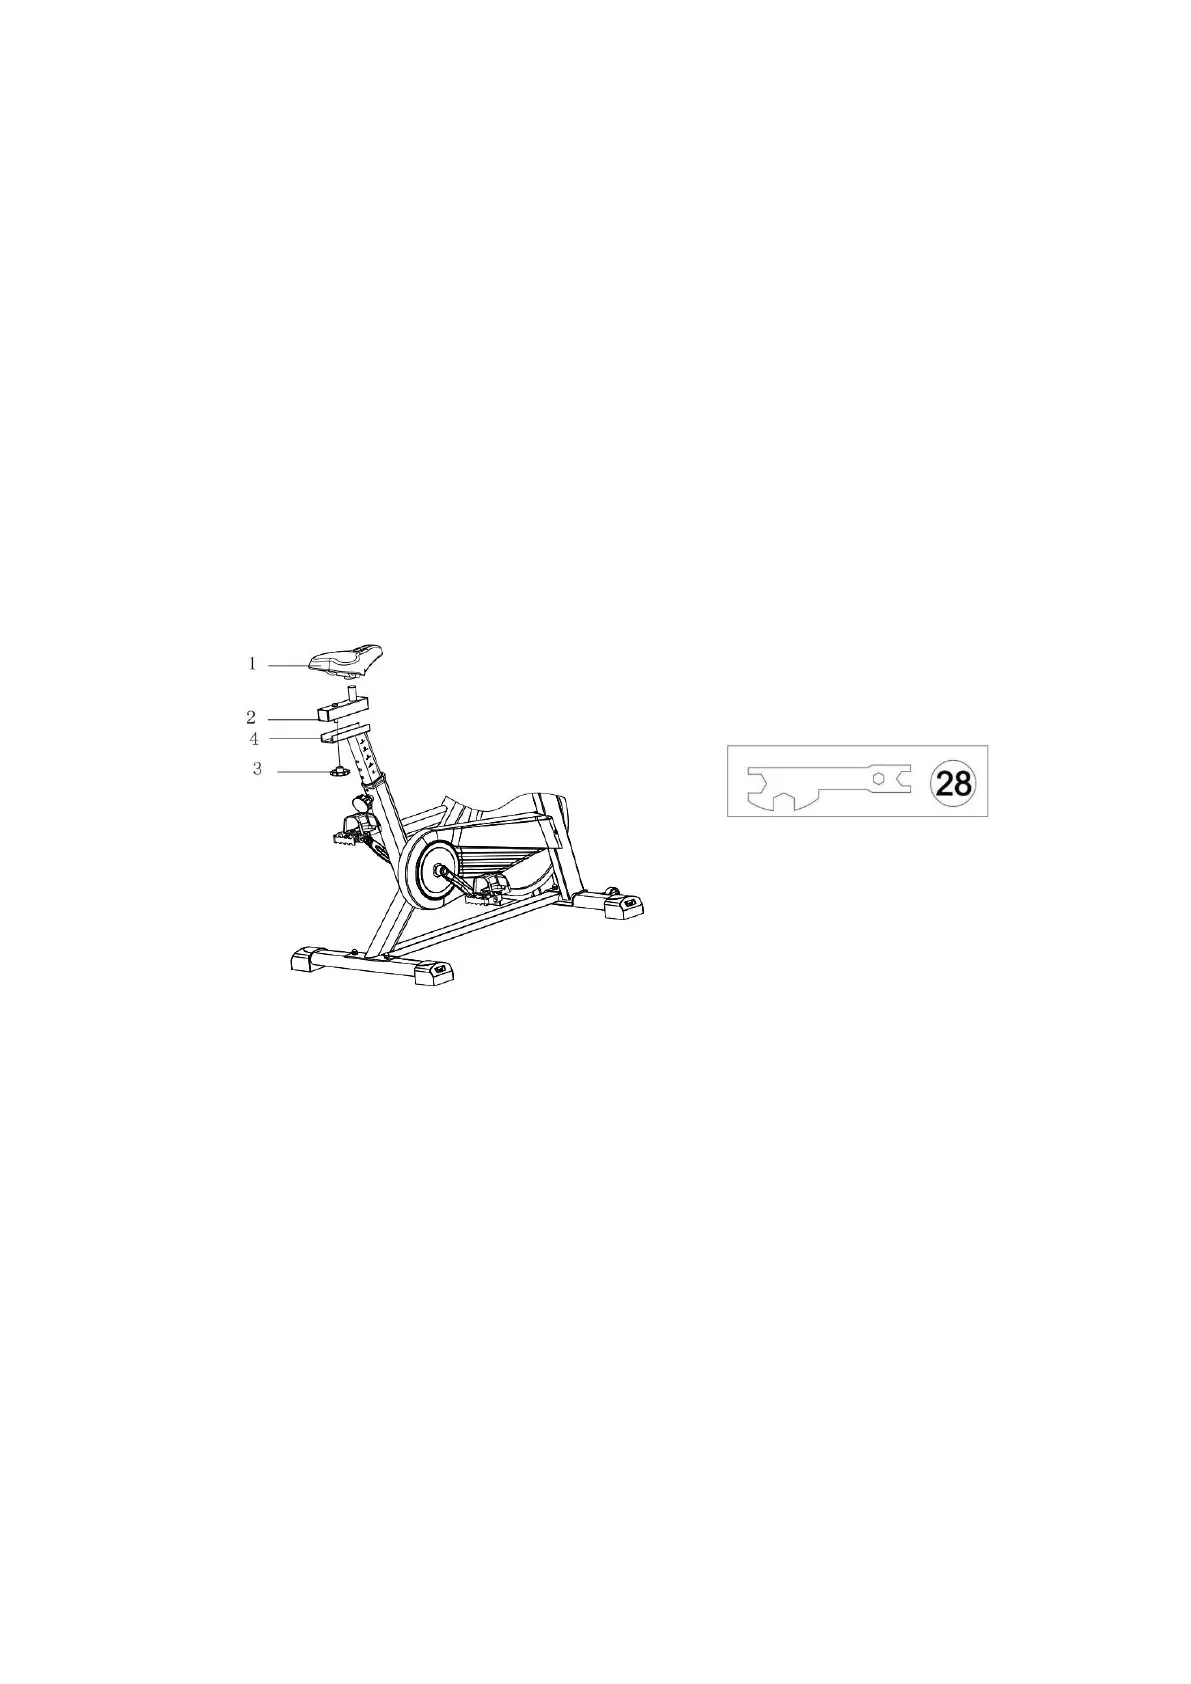
STEP 4. Install the Seat
Required parts:
#1-Seat #2-Seat Slider #28-Multi-functional Wrench
Ⅱ
#3-Plum Blossom Knob
1. Unscrew the #3-Plum Blossom Knob on the #2-Seat Slider, put #2-Seat Slider on the
#4-Seat Post.
2. Adjust the #2-Seat Slider to a proper position, re-insert and tighten #3-Plum Blossom
Knob to secure the slider in place.
3. Place the #1-Seat on the #2-Seat Slider. Use #28-Multi-functional Wrench Ⅱ in
clockwise to tighten the nuts on both sides of the #1-Seat.
Note: Before you fully tighten the seat, you can adjust the front of the seat higher
or lower to meet your needs.