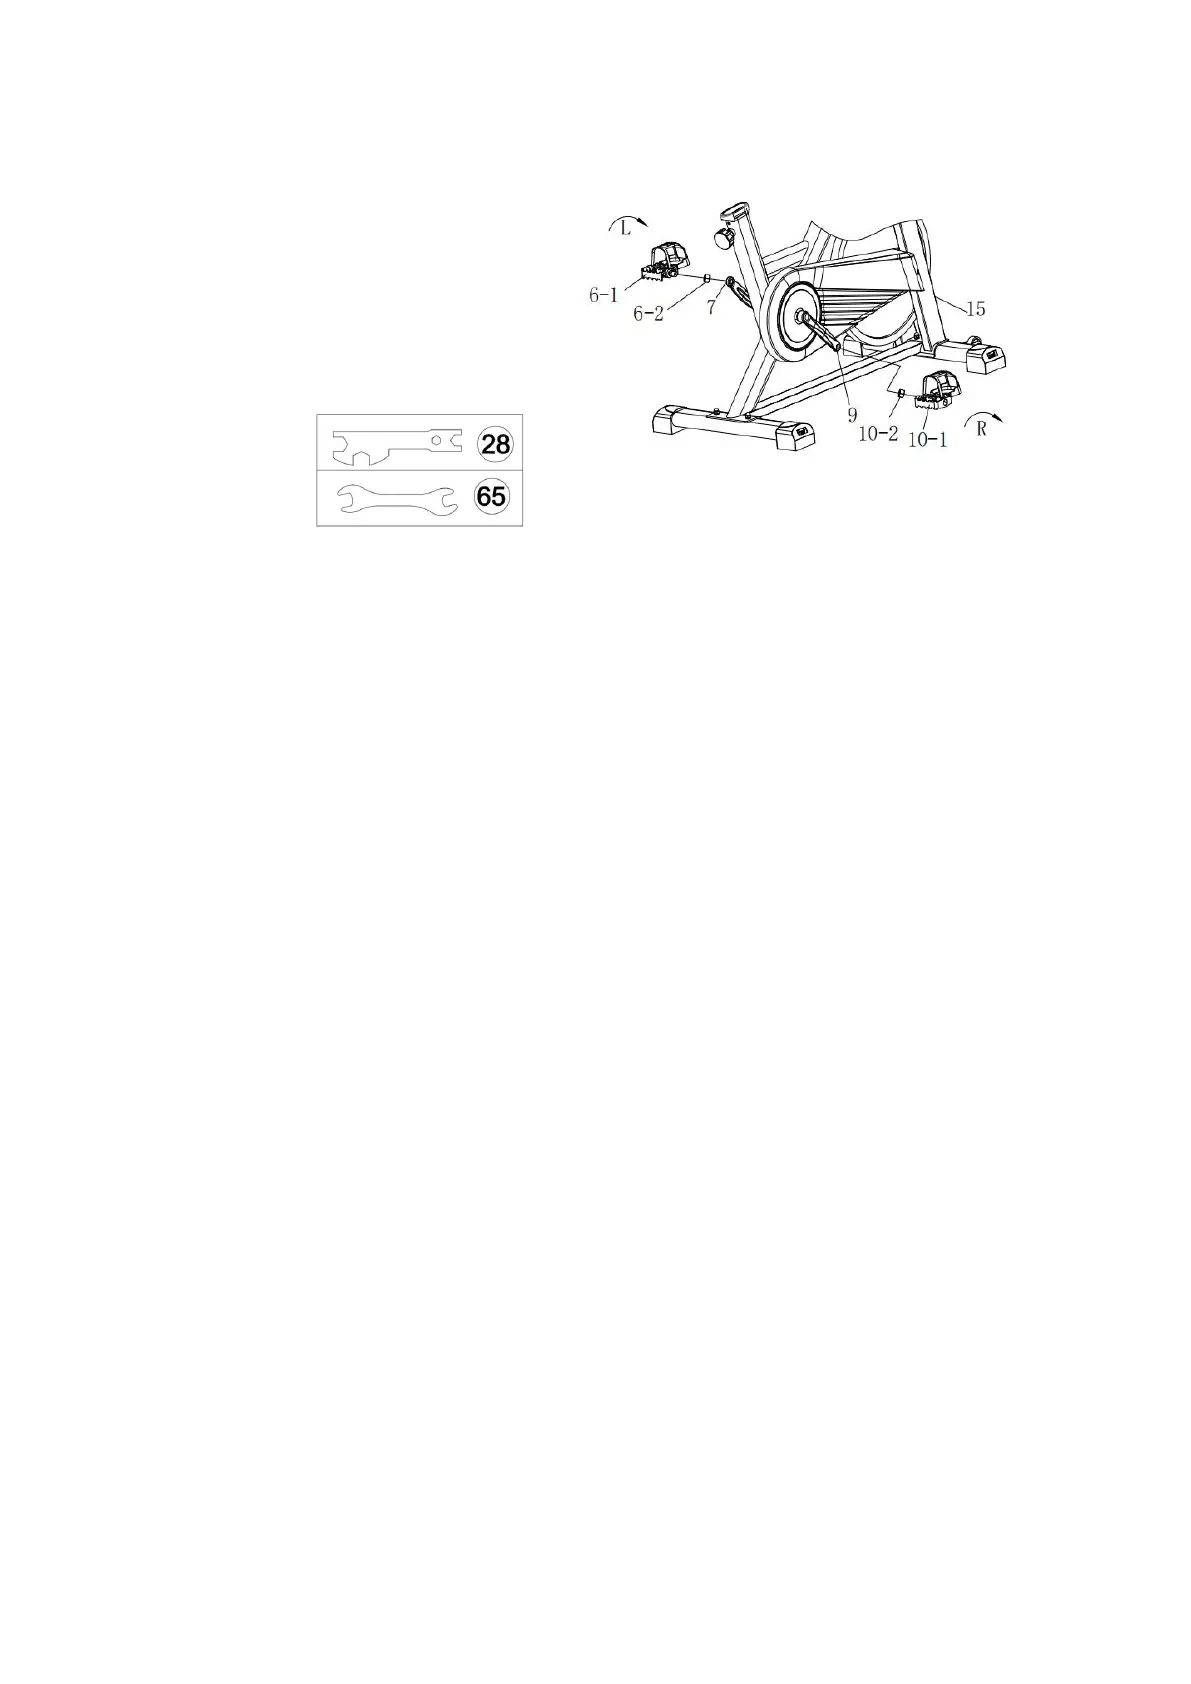
STEP 2. Install the Left and Right Pedal
Required parts:
#6-Left Pedal #10-Right Pedal
#28-Multi-functional Wrench Ⅱ
#65-Multi-functional Wrench Ⅰ
Turn the Brake Knob CLOCKWISE as tightly as you can with your hand.
1. Install the Left Pedal:
Unscrew the #6-2 nut from the #6-1 Left Pedal.
Align the #6-1 Left Pedal with the #7-Left Crank at 90°, note to align the threads of the
#6-1 Left Pedal bolt to the threads of the #7-Left Crank. Turn the #6-1Left Pedal bolt
COUNTER-CLOCKWISE (follow the arrow direction on the #7-Left Crank) as tightly as you
can, then use #28 and #65 Multifunctional Wrench to tighten and secure the pedal. Later,
install the #6-2 nut to the #6-1 Left Pedal axle, turn the #6-2 nut CLOCKWISE as tightly as
possible with the #28 and #65 Multifunctional Wrench.
2. Install the Right Pedal:
Unscrew the #10-2 nut from the #10-1 Right Pedal.
Align the #10-1 Right Pedal with the #9-Right Crank at 90°, note to align the threads of
the #10-1 Right Pedal bolt to the threads of the #9-Right Crank. Align the #10-1 Right
Pedal with the #9-Right Crank at 90°, note to align the threads of the #10-1 Right Pedal
bolt to the threads of the #9-Right Crank. Turn the #10-1 Right Pedal bolt CLOCKWISE
(follow the arrow direction on the #9-Right Crank) as tightly as you can, then use #28 and
#65 Multifunctional Wrench. Later, install the nut to the #9-Right Pedal axle, turn the nut