Printhead
Preparations
Before starting the procedure, open the printer, then remove any media from the printer.
Tools:
3mm Allen wrench hex key or driver
16 980428-102 Rev. 1 Prelim.
Removal
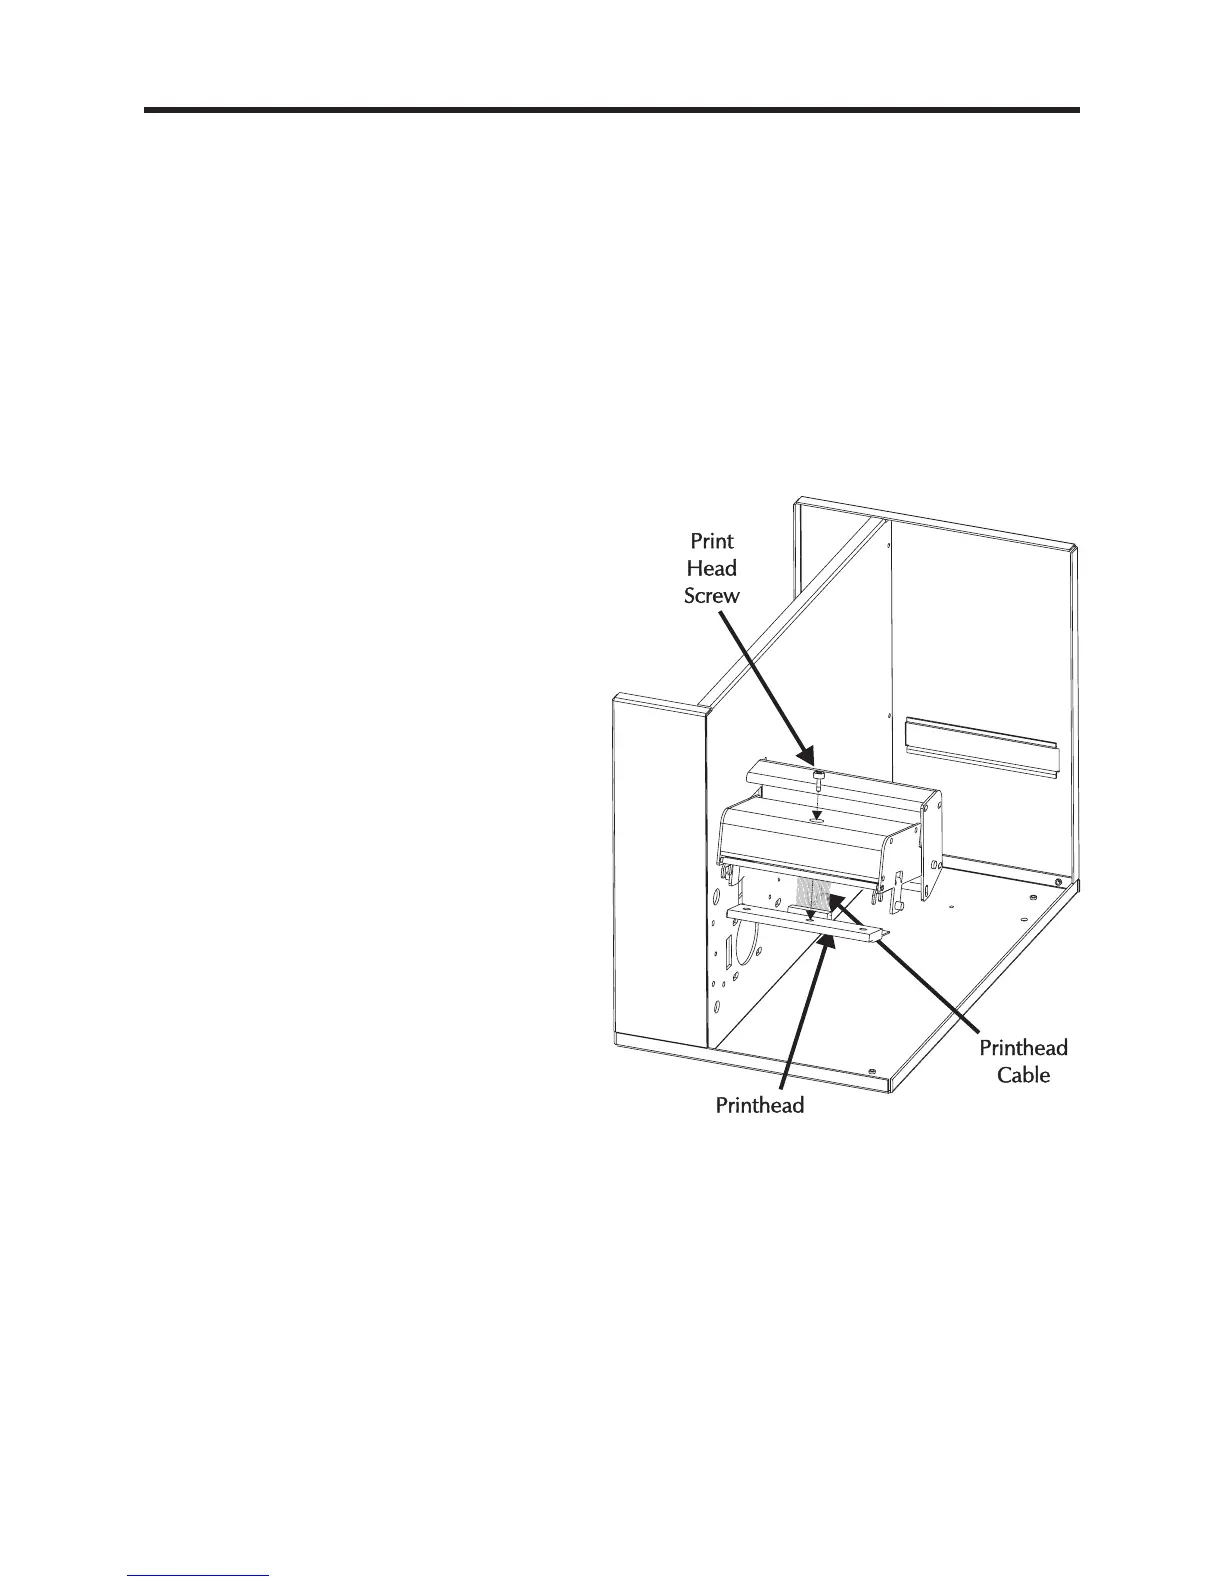
1. Open the printhead assembly.
2. Lower the printhead by loosening the
mounting Allen head screw which is
accessed through a hole in the top of the
printhead assembly.
3. Detach the printhead (ribbon) cable.
Installation
1. Connect the replacement printhead. Pin 1
on the printhead and cable is toward the
center panel of the printer.
2. Align the printhead with the two bracket
alignment pins.
3. Secure printhead to printhead bracket by
tightening the printhead bracket screw.
Recommended - Tighten the Allen head
screw to 4.7 ±1 in. lb.
4. Close and open the printhead and recheck
that the printhead cable still secure and
connected to the printhead and moves
freely without binding..
5. Clean the printhead after completing
installation, see Cleaning and Maintenance.
6. Reset the printhead odometer with the
Printer Information service utility program,
see procedure 980428-157.
 Loading...
