What to do if there is no camera image on the Zeiss Microscope screen?
G
gstewartAug 5, 2025
If you're not seeing a camera image on your screen, start by checking the light setting of the microscope. Also, verify that the green control light on the camera is on; if it's off, inspect the cable connections between the camera and computer. You may also want to execute an automatic exposure measurement (Autoexposure), check display adjustments for the live image, check the aperture diaphragm of the microscope, and check the position of the beam splitter between the ocular and the TV port.
A
allenjacobAug 10, 2025
Why is the color of the Zeiss Microscope image green and not realistic?
J
James BellAug 11, 2025
If the color in your image appears green instead of realistic, the first step is to check the white balance. If it's off, repeat the white balance adjustment to correct the color.
D
Douglas RobertsonAug 17, 2025
How to fix AxioCam MR if it does not appear in the menu of selectable cameras of Zeiss Microscope?
K
Kelsey DiazAug 17, 2025
If the AxioCam MR isn't showing up in the selectable cameras menu, ensure that the AxioCam MR files were installed correctly, following the software installation instructions. Also, if you're using Microsoft Windows 2000 Professional or Microsoft Windows XP Professional, confirm that the camera drivers were installed with administrator rights.
K
Kenneth RileyAug 23, 2025
What to do if the Zeiss Axiocam MR Microscope image has sudden jolts, vibration, or moving objects?
J
John ParksAug 23, 2025
If you're experiencing sudden jolts, vibrations, or moving objects in your image, retake the shot, making sure that the conditions remain calm and stable during the process.
K
Keith DurhamAug 28, 2025
Why are there fluctuations in illumination in my Zeiss Microscope image?
C
Carl CobbAug 29, 2025
Fluctuations in illumination, resulting in stripes or blotches in the image, can occur if the light source has a fluctuating quality of light intensity.
The FireWire (IEEE 1394 a) interface is defined as a "hot plugging" interconnection, i.e. peripherals (cameras, drives, etc.) may be connected or disconnected while the computer is powered up.
We strongly recommend that all users save the data they create, such as images, measurement data, archives, reports, forms and documents, at regular intervals on an external medium.
The appropriate system requirements relating to hard- and software equipment can be found in the file "Installation Manual.PDF" on the actual product DVD.
The standardized FireWire interface allows the camera to be used for a variety of applications. The following graphic provides an overview of the possible hardware configurations and the required accessories.
In addition to the socket for the data cable, the camera also has an additional socket. This socket can be used to open and close an external shutter via trigger output signals.
This FireWire socket may be used to cascade FireWire devices. This feature should only be used, if you are sure that the power specification of your computer's FireWire interface fits the needs of all connected devices.
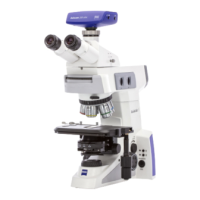
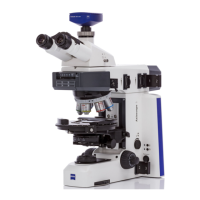
Check the following connections: The AxioCam MR is mounted onto the microscope and is receiving light. The AxioCam MR is connected to the PC or notebook via the FireWire data cable.
This section describes installation using the hardware wizard. If you want to update the camera installation or if you have interrupted the driver wizard, follow the instructions in chapter "Installing the camera driver using the setup program".
In this section, installation is explained using screenshots from Microsoft Windows XP Professional. After you have inserted the DVD into the DVD drive installation starts automatically.
If the entry in the Device Manager must be corrected, i.e. if a question mark or an exclamation mark is in front of the AxioCam MR entry, proceed as follows.
If the color of the LED on the back of the AxioCam MR does not immediately change from red to green but goes out after the insertion of the FireWire cable, this means that the AxioCam MR's firmware is not functioning properly.
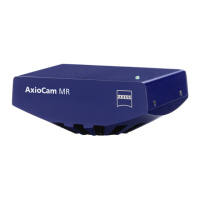
The AxioCam MR is a professional, high-resolution digital camera. It has been specially optimized for routine and research applications in the area of light microscopy.
The camera's exposure time can be adjusted to the lighting conditions on the microscope using a slider or by entering an exposure time directly into the input field.
In order to achieve a color display which is neutral and close to reality it is necessary to balance the individual color channels against one another.
On a microscope, however, the brightness of a halogen lamp is often adjusted by changing the lamp voltage. This changes the color of the light emitted at the same time, though.
A histogram indicates the intensity distribution of the image signal in the live image and the acquired image. It provides a clear representation of the brightness distribution in the current image.
RGB and B/W: Two types of AxioCam MR are produced; one with a CCD sensor with a color mask on the chip (AxioCam MRc), and the other with a black and white sensor (AxioCam MRm).
The process of Binning ensures that the information in neighboring pixels, in both a horizontal and vertical direction, is summarized on the camera's sensor.
Using the slider it is possible to change the interpretation of the brightness of the image data received. This allows you to display dark images as very bright images.
An AxioCam MR image is adjusted in such a way that the image orientation corresponds to the image in the eyepiece when mounted on an upright microscope.
Below you will find a few practical notes on the speed of the live image, color adjustment, working with exposure times, fluorescence images and configurable toolbars.
There are three speed modes available for the AxioCam MR live image. If you use the pointer to click on the Slow icon at the bottom edge of the live image, a pop-up menu with the possible setting options appears.
A PC graphics card cannot display more than 3 x 8 bits per pixel. However, as we have already mentioned, the AxioCam MR is able to generate 3 x 12 bits per pixel.
Gamma setting. This setting is required to compensate for the inherently non-linear behavior of the image tube ("gamma"). It also influences the quality of the color display.
Check the light setting of the microscope. Is the green control light on the camera on? If not, check the cable connections between camera and computer.