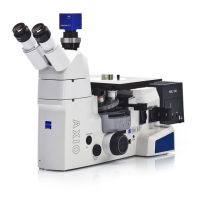
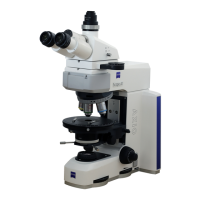
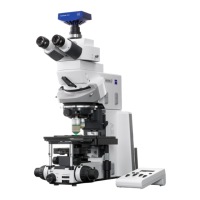
Do you have a question about the Zeiss Axio Imager and is the answer not in the manual?
Essential safety precautions and warnings for operating the microscope.
Table detailing component compatibility across various Axio Imager stand models.
Instructions for unpacking, checking components, and setting up the microscope.
Procedure for attaching or replacing the binocular tube or phototube on the microscope.
Step-by-step guide for correctly screwing objectives into the objective nosepiece.
Procedure for attaching or replacing the microscope condenser.
Detailed instructions for replacing the DIC prism in the universal condenser.
Procedure for installing and removing P&C reflector modules.
How to enable or disable the high-performance focus feature for stage protection.
Instructions for mounting the TFT display onto the motorized stand.
Instructions for connecting the microscope to a power source for operation.
Detailed steps for coarse and fine adjustment of the HAL 100 halogen illuminator.
Instructions for safely replacing the HAL 100 halogen lamp, including cool-down.
Instructions for aligning the HBO 100 illuminator for optimal performance.
Overview of the operation and function controls for the coded Axio Imager (manual version).
Detailed description of operation and function controls specific to the motorized Axio Imager.
Procedure for powering the microscope and the HAL 100 illuminator on and off.
Overview of the Light Manager's operating modes (OFF, CLASSIC, SMART) and functions.
Using the Light Manager in SMART mode for automatic brightness calculation and optimization.
Light Manager functions for motorized microscopes, controlled via the TFT display.
Comprehensive guide to operating the motorized microscope using the TFT touchscreen interface.
Controlling stage movement (XY) and focusing (Z), including position saving and measurement.
Accessing configuration settings for microscope components, extras, and general information.
Guides for setting up various illumination techniques and contrast methods for microscopy.
Detailed procedure for setting up Köhler illumination for transmitted-light brightfield microscopy.
Instructions for setting up transmitted-light darkfield microscopy for enhanced contrast.
Procedure for setting up transmitted-light phase contrast microscopy for unstained specimens.
Steps for setting up transmitted-light DIC and C-DIC microscopy for 3D contrast.
Performing transmitted-light polarization for orthoscopic viewing and identifying crystal properties.
Setting up transmitted-light circular polarization contrast microscopy for consistent specimen appearance.
Performing transmitted-light polarization for conoscopic observation to identify crystal optical character.
Procedure for setting up reflected-light brightfield microscopy for opaque samples.
Instructions for setting up reflected-light darkfield microscopy for specimens with surface deviations.
Steps for setting up reflected-light DIC and C-DIC microscopy for high-contrast phase specimens.
Procedure for setting up reflected-light TIC technique for object structure analysis and measurement.
Instructions for setting up epi-fluorescence microscopy for high-contrast fluorescent images.
Detecting bireflection and pleochroism in specimens using reflected-light polarization.
Guidelines for cleaning optical surfaces and protecting the instrument from environmental factors.
Procedures for performing routine instrument maintenance and checks.
Step-by-step guide for safely replacing fuses on the manual stand.
Procedure for changing fuses on the VP232-2 CAN power supply unit.
Common problems encountered during operation and their recommended solutions.
| Type | Upright Microscope |
|---|---|
| Illumination | Halogen or LED |
| Objective Lenses | Plan-Apochromat, Plan-Neofluar |
| Stage | Manual or motorized stages available |
| Focus | Motorized or manual focus drive |
| Software | ZEN (Zeiss Efficient Navigation) |
| Contrast Methods | Brightfield, Darkfield, Phase Contrast, DIC, Fluorescence |
| Objective Turret | Manual or motorized |
| Observation Tubes | Binocular or trinocular |
