START-UP
Axio Imager Installing the LED illuminator for transmitted light Carl Zeiss
M70-2-0020 e 06/2009 430000-7344-001 59
3.29 Installing the LED illuminator for
transmitted light
The LED illuminator for transmitted light can be
installed optionally on the transmitted light port on
the rear side of the instrument or on the bottom of
the condenser carrier.
The LED illuminator delivers light of constant color
temperature independent of the set light intensity.
CAUTION
Avoid looking directly into the LED
light.
CAUTION
Always make sure that the instrument
is switched off when mounting the
LED illuminator onto the transmitted-
light port or dismounting it from the
transmitted-light port.
Installing the LED illuminator on the transmitted light port
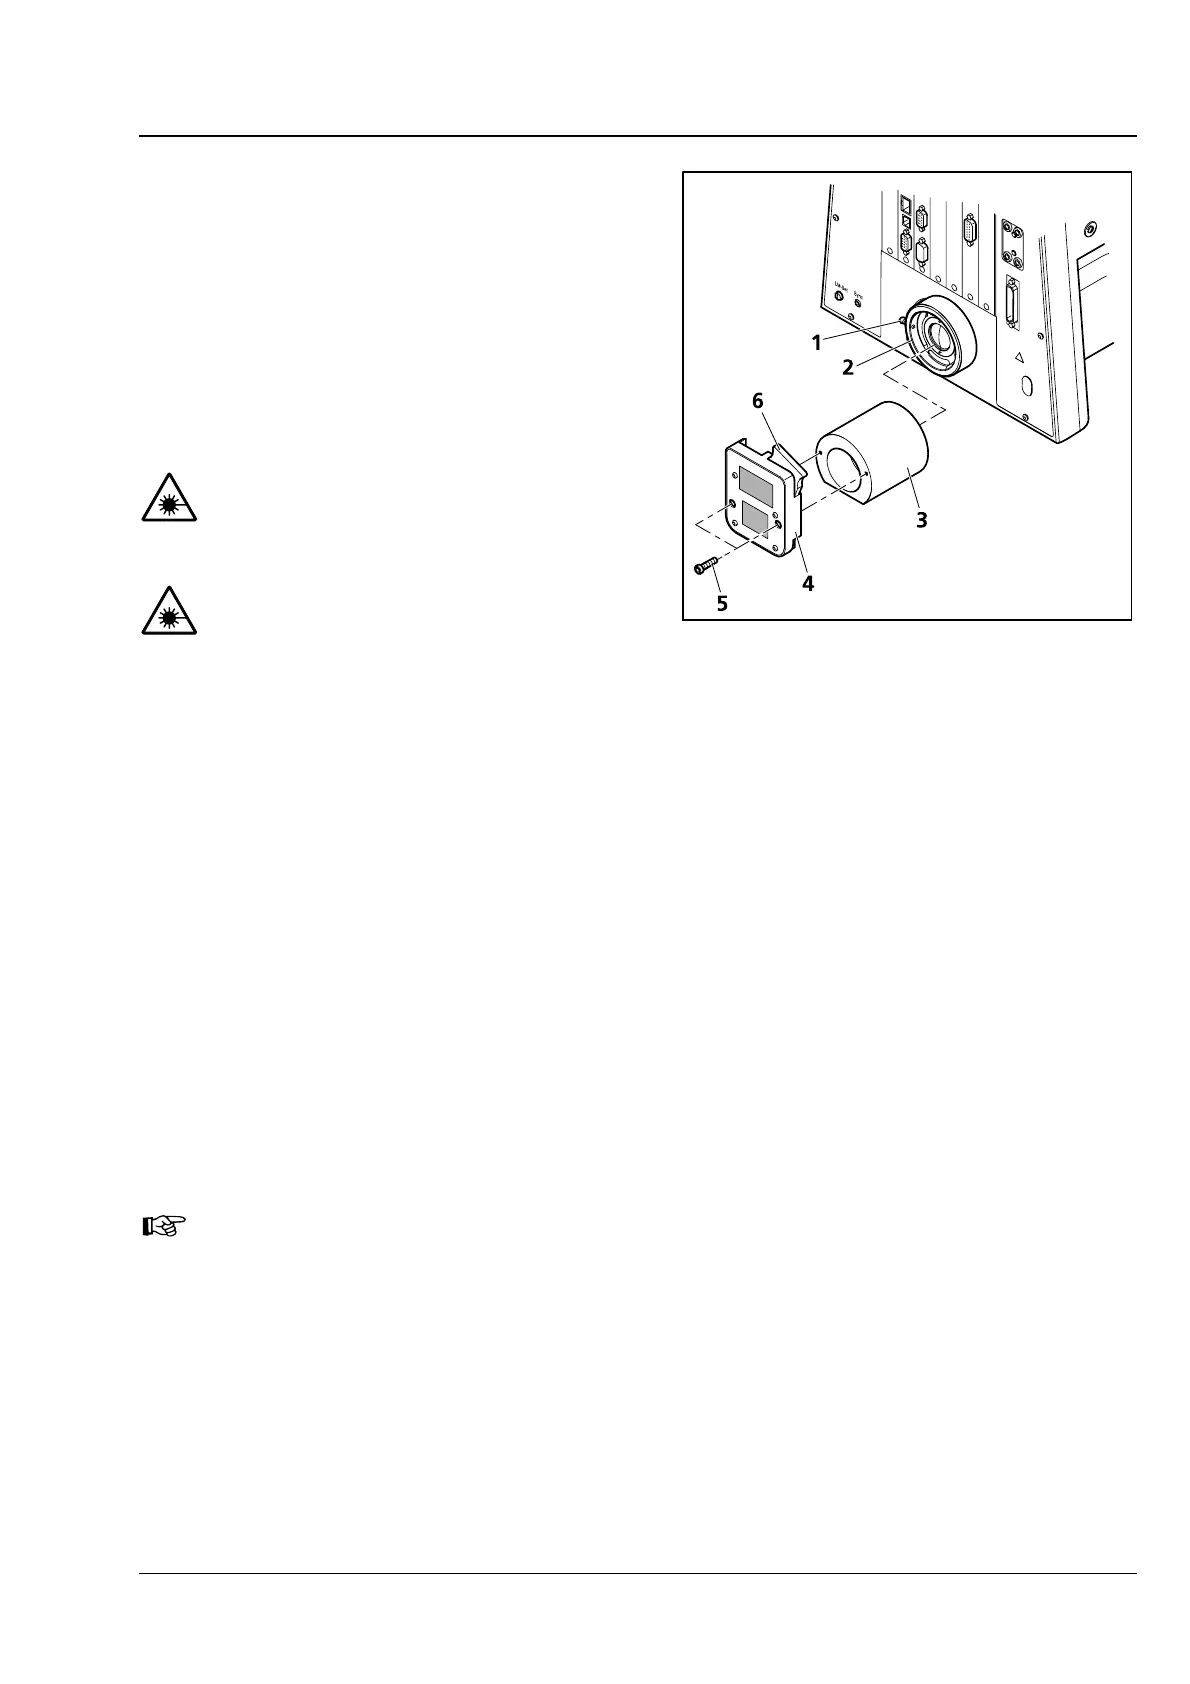
• Loosen clamping screw (3-40/1) on transmitted-light port (3-40/2). Remove the halogen lamp.
• Disconnect the illuminator plug from the 12 V/100 W connector (transmitted light) on the back of the
instrument.
• Insert adapter optics for LED illuminator (3-40/3) in the transmitted-light port with the slant pointing
down and tighten the clamping screw.
• Screw LED illuminator (3-40/4) onto the adapter optics using the provided Allen screws (3-40/5).
• Push slider with diffusion disk 10° (3-40/6) into LED illuminator.
• Plug the plug of the LED illuminator into the 12 V/100 W connector (transmitted light) on the back of
the instrument.
You can change the color temperature for specimen observation by inserting color
temperature filters in the slider with diffusion disk (to be held by retaining ring).
Fig. 3-40 Installing the LED illuminator