START-UP
Carl Zeiss Installing the LED illuminator for transmitted light Axio Imager
60 430000-7344-001 M70-2-0020 e 06/2009
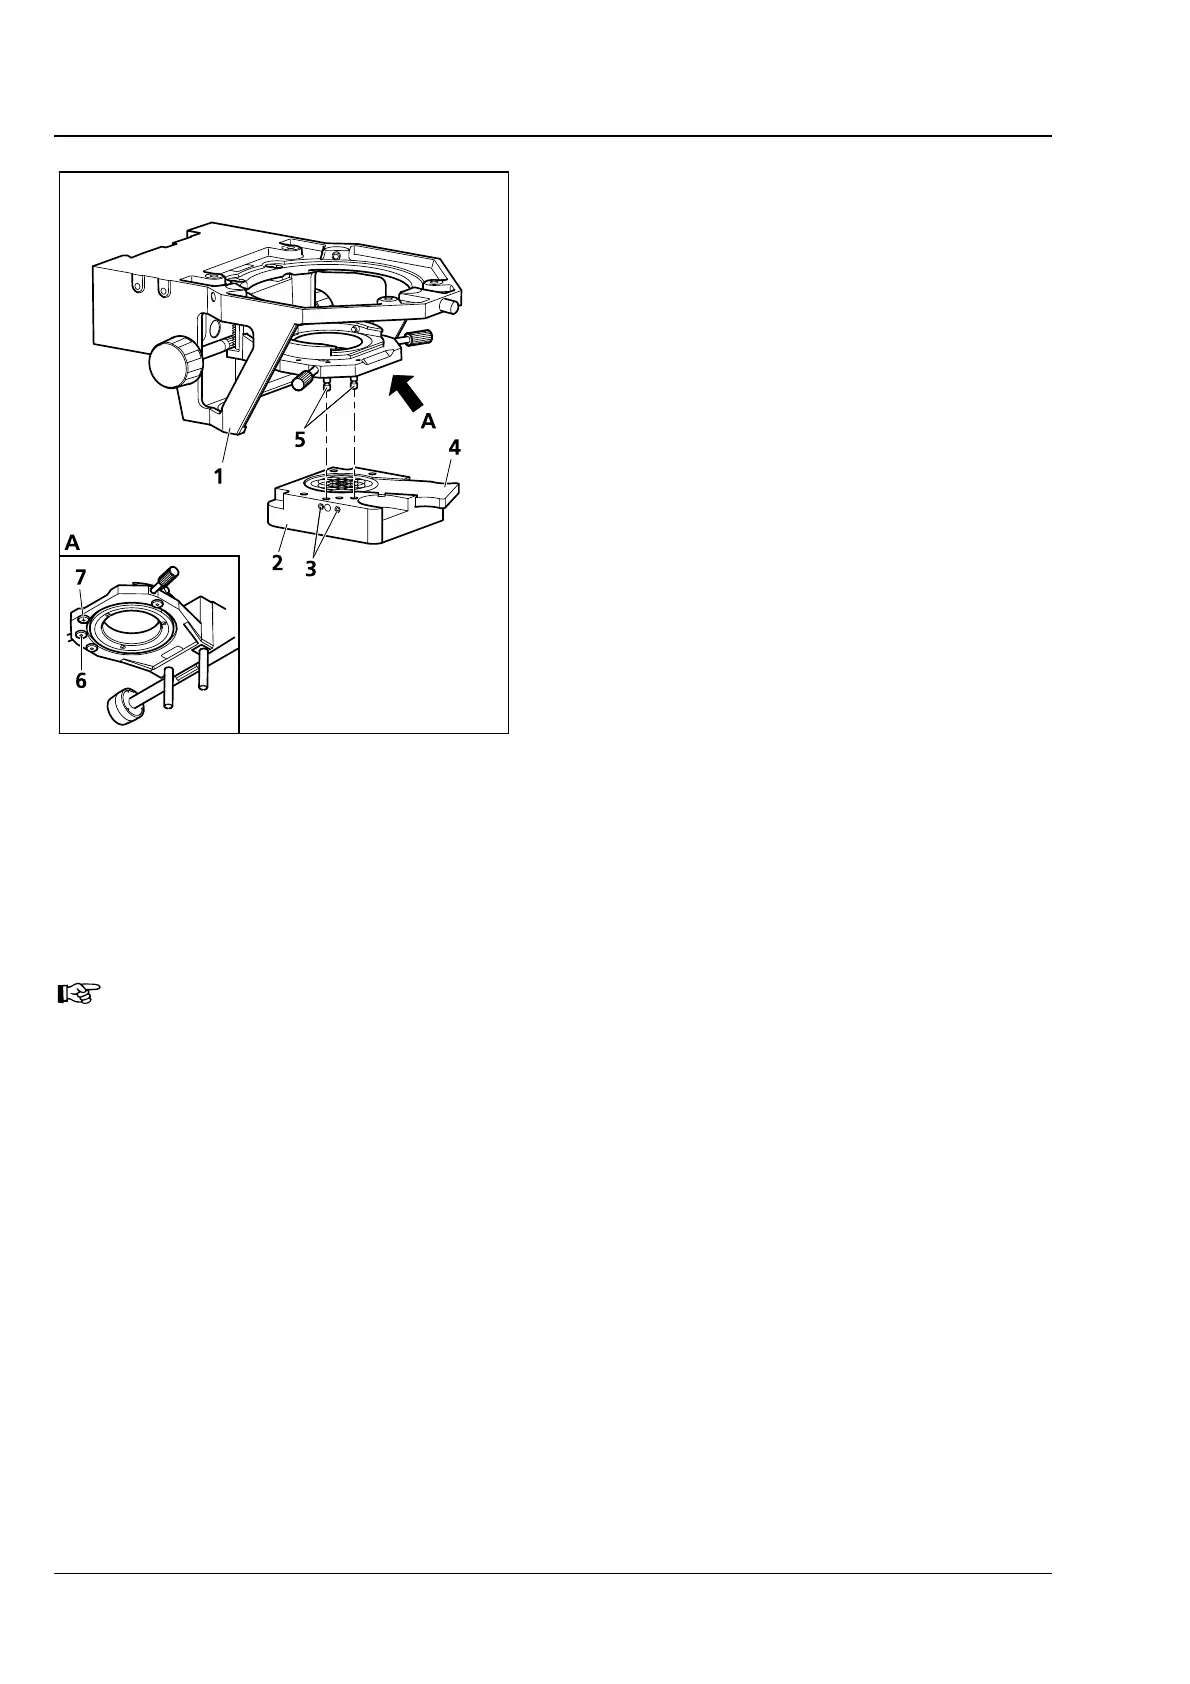
Installing the LED illuminator on the
condenser carrier
• Remove the halogen illuminator from the
transmitted-light port and disconnect the
illuminator plug. Close the transmitted-light
port with the cover cap.
• Move microscope stage and condenser carrier
fully up using focusing drive (stage) and height
control (condenser).
• Screw bolts (3-41/5) by hand into the tapped
holes (
3-41/6 and 7) in the bottom of the
condenser carrier.
• Hold the LED illuminator (3-41/2) parallel to the
underside of the condenser carrier (
3-41/1).
Move it upwards so that the bolts (
3-41/5) fit
into the corresponding holes on the illuminator.
Fasten the illuminator by means of the
countersunk screws (
3-41/3) located at the left
side of the LED illuminator.
• Push slider with diffusing glass 80° (3-41/4) into
the LED illuminator, or for transmitted-light
polarization, push in the polarizer for LED
(427708-0000-000).
When using the polarizer, simple polarization
contrast is possible. However, conoscopy cannot
be carried out.
• Plug the plug of the LED illuminator into the 12 V/100 W connector (transmitted light) on the back of
the instrument.
You can change the color temperature for specimen observation by inserting color
temperature filters in the slider with diffusing disk (to be held by retaining ring).
Fig. 3-41 Installing the LED illuminator