START-UP
Axio Imager HAL 100 halogen illuminator Carl Zeiss
M70-2-0020 e 06/2009 430000-7344-001 57
3.28.3 Adjusting the HAL 100 halogen
illuminator
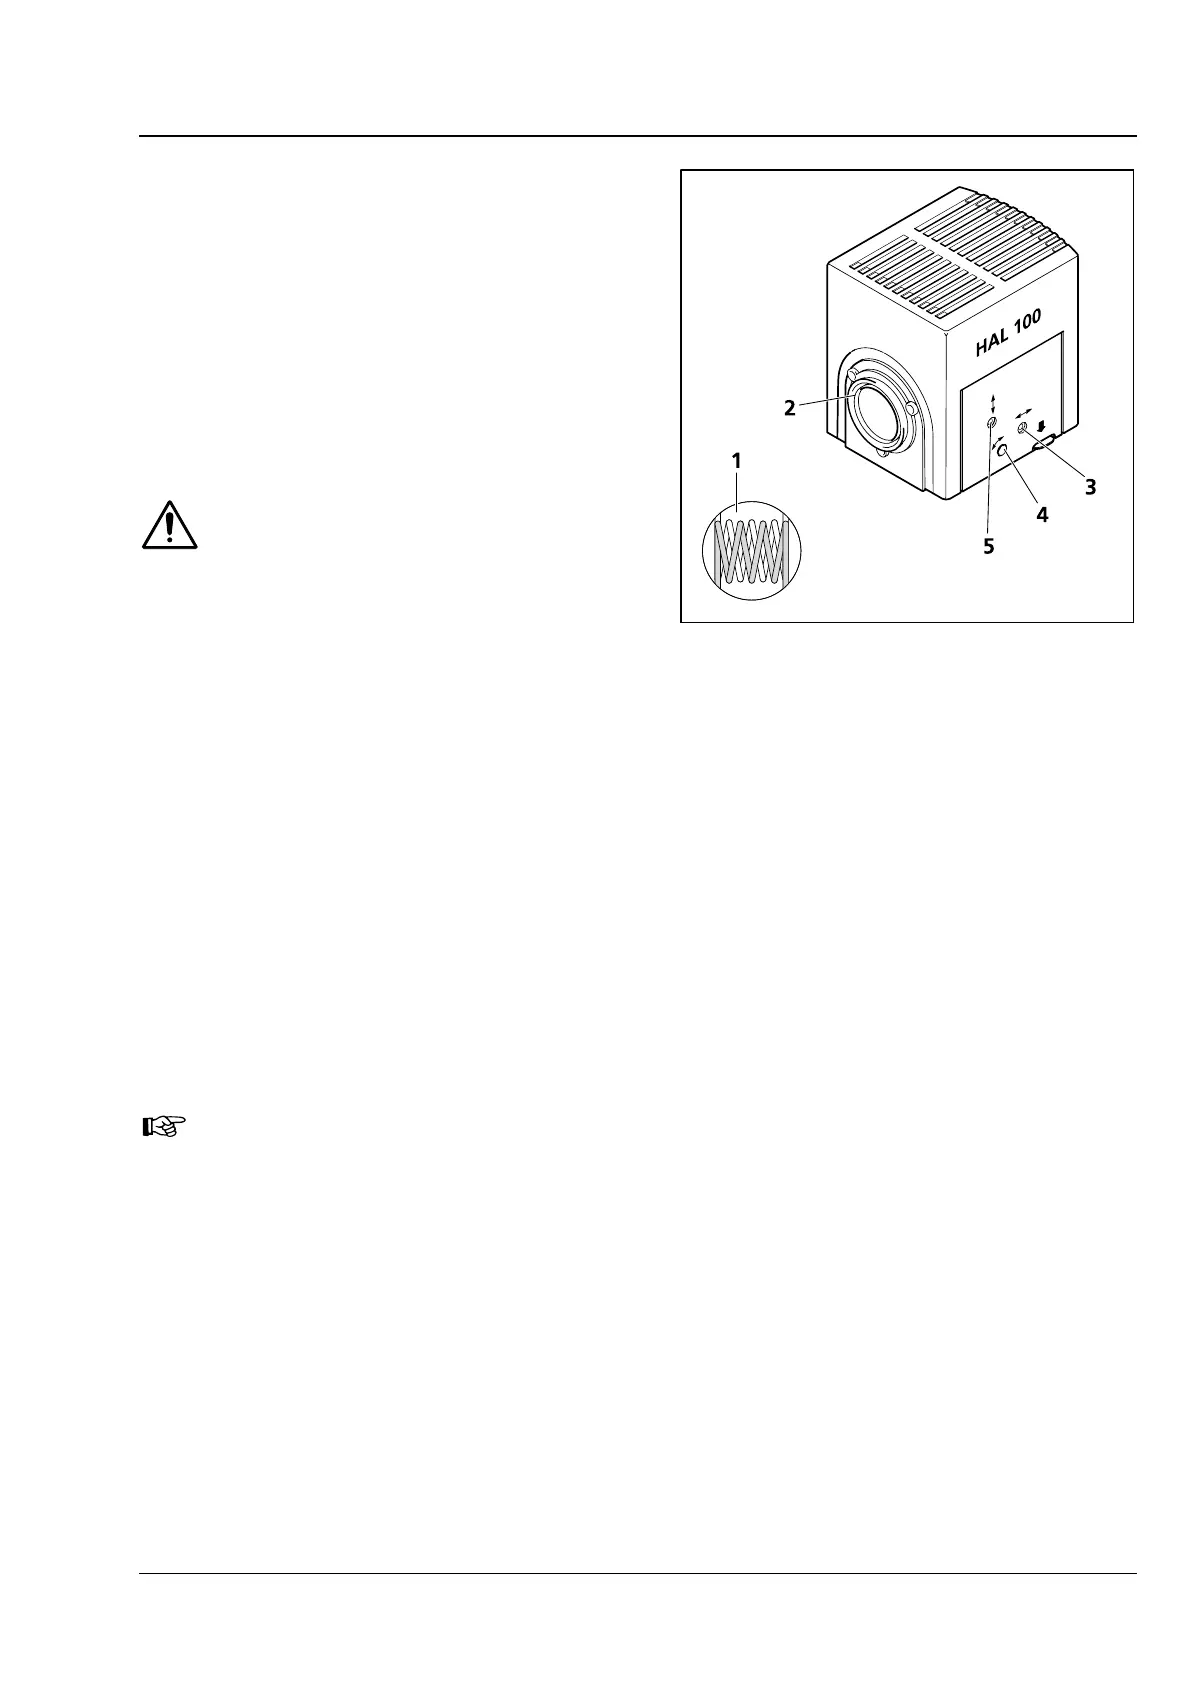
(1) Coarse adjustment
• Loosen clamping screw (3-35/1 or 3-35/8) and
remove the operational halogen illuminator
(
3-38/2) from the microscope stand.
• Switch on microscope as described in Section
4.3.
• Direct the light beam to a projection surface
(wall) that is at least 3 m away.
Do not look into the light exit aperture
of the illuminator.
• Using the SW 3 ball-headed screwdriver turn
adjusting screw (
3-38/3) until both images of
the lamp filament appear as sharp as possible
on the projection surface.
• Then, turn adjusting screws (3-38/4 and 5) until
the lamp filament of one image exactly fills the
gaps of the reflected filament image (
3-38/1).
(2) Fine adjustment
• Reattach the microscope illuminator to the microscope stand and lock it with the clamping screw.
• Move diffusion disk for reflected or transmitted light out and remove the filter wheels from the
respective slot.
• With an objective of ≤ 40x, focus on the specimen and search for a free place on the specimen.
• Remove eyepiece and, in the pupil image visible in the eyepiece socket, center the lamp filament and
its reflection with adjusting screws (
3-38/4 and 5).
• Using adjusting screws (3-38/3) optimize the evenness of illumination of the pupil image.
It is advisable to use the adjusting aid (
4-1/5) for fine adjustment of the halogen illuminator
mounted to the reflected-light socket. After pulling out the adjusting aid, the lamp filament
and its reflection can be viewed directly in its viewing glass.
• Move the diffusion disk in and reinsert the filter wheels.
Fig. 3-38 Adjusting the HAL 100 halogen
illuminator