Installation & Operation • 13
INSTALLATION & OpERATION
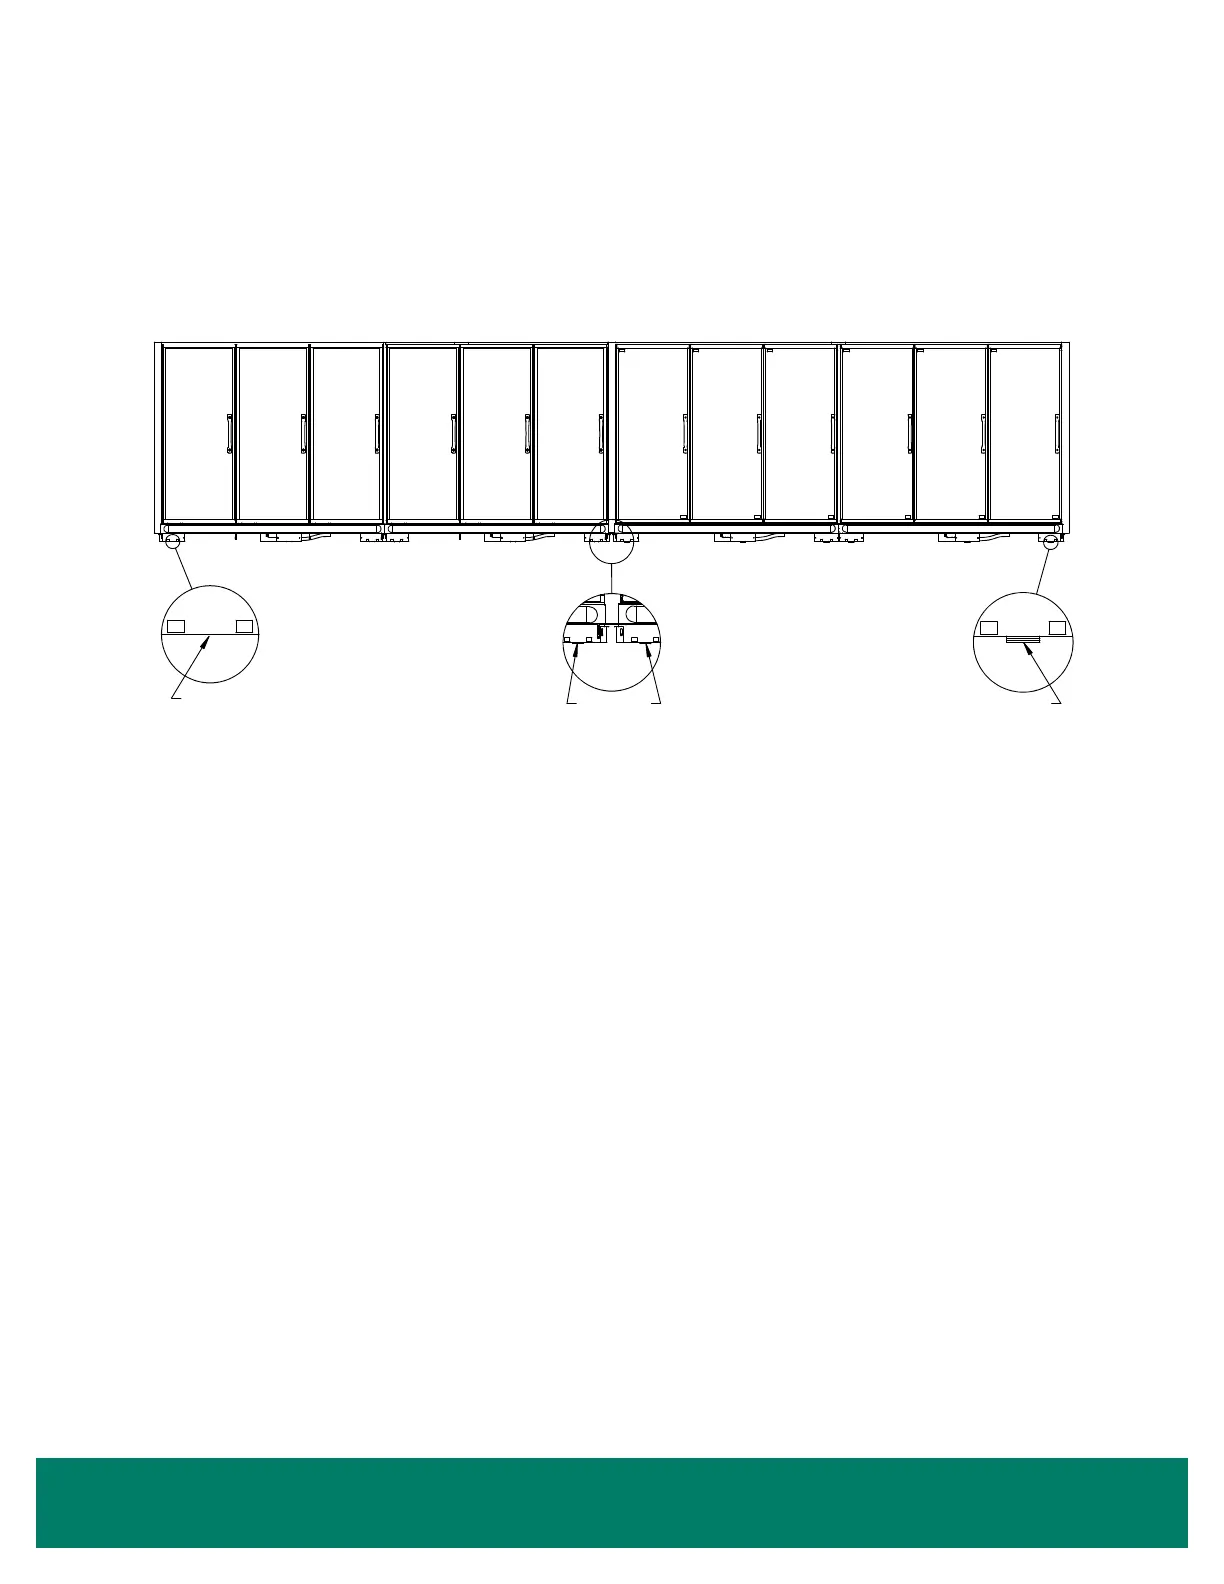
10. When joining a freezer and cooler in a long lineup (3 or more cases: at least 1 freezer and at least 1 cooler), the tilt back on the coolers
should gradually increase while working away from the cooler/freezer joint until the last case has an additional 3/8" of shims under the front
base and the tilt back on the freezers should gradually decrease to no additional shims while working away from the cooler/freezer joint
(See Figure 15).
11. Place additional support shims under any bases or hat channel rails with gaps taller than one shim. Do not place shims between bases
and hat channel rails.
Lineup Assembly
Zero Zone display cases have been designed for continuous display so that multiple cases may be joined together to create a lineup of any
desired length. The bottom of the end panel is protected with a removable steel plate that must be removed after the lineup is set.
The cases will be ready for assembly after removing the packaging material. A 1" wide trim piece is shipped inside the case to seal the vertical
gap between cases being joined. It needs to be attached on the right of the rst case using the top and bottom joining holes in the extrusion.
The next case in the lineup should slide up to the trim piece so that the door seals against the trim piece.
Case caulking instructions are shipped with every case, explaining the proper procedure for joining cases (See Figure 16 on page 14). A
case must be prepared with Butyl caulk before setting the next case in the lineup.
Move the next case into position and bolt it to the rst case using the 4 joining bolts that are provided. Begin tightening the bolts at the top rear,
working down the back of the case and up the front, making sure that the seams are ush. Do not pull cases together using joining bolts.
For NSF case installation compliance, the interior case seams must be sealed using NSF-approved caulk (See Figure 17 on page 15). Do
not allow Butyl sealant and NSF-approved caulk to contact one another as this may affect adhesion or color of each.
An insulated divider is used to join two different case models or two different temperature cases. The divider is typically factory-installed to one
of the cases. There are 2 types of insulated dividers:
1. Between a Crystal
™
cooler and a different case: The insulated divider has a panel on each side with nut inserts in the panels; each side is
bolted to the respective end frames.
2. Between 2 Crystal
™
coolers: The insulated divider uses a thru-bolt design. The divider is attached to one of the cases using short bolts for
shipping. When the cases are installed, the short bolts are removed and longer joining bolts are installed to bolt the cases together. Do not
pull cases together using joining bolts.
FIGURE 15: Cooler to Freezer Leveling for Long Lineup (3 or more cases)
Freezer Freezer Cooler Cooler
 Loading...