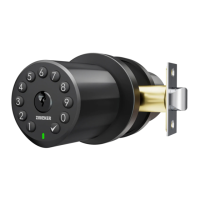
The Zincker Vaulta K1 is an electronic door knob designed to enhance indoor room security with a blend of robust construction and stylish design. It is made from rigorously selected Zinc Alloy materials, ensuring durability and a premium feel. Unlike traditional door knobs, the Vaulta K1 offers advanced features for managing access and convenience.
Function Description:
The primary function of the Vaulta K1 is to provide secure access control for indoor rooms using customizable passcodes. It supports up to 50 users, each with their own passcode, offering flexibility for various use cases such as homes, offices, or shared spaces. The door knob can be unlocked using a passcode entered on the exterior keypad or with a physical backup key. For emergency power, if the batteries die, a USB-C cable can be used with a power source like a power bank to temporarily power the knob for unlocking.
Important Technical Specifications:
- Material: Zinc Alloy
- User Capacity: Up to 50 customizable passcodes
- Passcode Length: 4-8 digits for administrator passcode, user passcodes can also be 4-8 digits.
- Power Source: 4 AA Alkaline batteries (Duracell or Energizer recommended), purchased separately. 1.2V Rechargeable batteries are NOT recommended.
- Battery Life: Up to 2 years with power-saving technologies.
- Emergency Power: USB-C Port for emergency power supply.
- Door Thickness Compatibility:
- M4 Screws x 2 (60mm) for door thickness 45mm or above.
- M4 Screws x 2 (40mm) for door thickness 35 - 45mm.
- Overall door thickness range: 1-3/8" to 2.5" (35mm to 65mm).
- Backset Compatibility: 2-3/8" (60mm) or 2-3/4" (70mm).
- Hole in Door Compatibility: 2-1/8" (54mm).
- Hole in Door Edge Compatibility: 1" (25mm).
- Latch Bolt: 1" (25mm).
- Strike Plate Screws: 4 x 3/4" (19mm).
Usage Features:
- Passcode Management:
- Administrator Passcode: Default is '123456'. Can be changed to a 4-8 digit code. It is recommended to change this immediately after installation.
- Add User Passcode: Allows adding new user passcodes.
- Change User Passcode: Allows modifying existing user passcodes.
- Delete User Passcode: Allows removing specific user passcodes.
- Clear All Users: Resets all user passcodes.
- Passage Mode: When activated, the door remains unlocked until manually turned off. This is useful for periods of high traffic or when constant access is needed. Turning on Passage Mode automatically disables the Auto-Lock feature; Auto-Lock resumes when Passage Mode is off.
- Autolock: Automatically locks the door after 5 seconds of being unlocked.
- Anti-Prying Passcode: This technology allows users to enter up to 20 digits, including their actual passcode, to deter prying eyes from guessing the code.
- Silent Mode (Buzzer): Allows users to turn the buzzer sound on or off, providing a quiet operation if desired.
- Immediate Locking: A dedicated function to lock the door immediately.
- Indicator Light:
- Green: Indicates a successful setting, activation, or unlocking. Blinks once for a button press, stays green for a while for successful operations.
- Red: Indicates an unsuccessful setting, deactivation, or low battery warning. Blinks twice for operation failed or keys locked up, blinks 5 times for low batteries.
- Buzzer Sounds:
- Long Beep: Power on, unlocking successful, passcode operation successful, silent mode off, passage mode on/off, resetting successful.
- Beeps Once: Pressing a button.
- Silent: Silent mode on, auto-lock completed, immediate lock completed.
- Beeps Twice: Pressing a button when keys are locked up, operation failed.
- Beeps 5 Times: Low batteries warning.
Maintenance Features:
- Battery Replacement: The device uses 4 AA Alkaline batteries. When batteries are low, a warning (5 red blinks and 5 beeps) will be issued. It is crucial to replace batteries immediately upon warning.
- Emergency Power: If batteries die due to long idle time, a USB-C cable can be used with a power bank to provide temporary power for unlocking. After unlocking, new batteries should be installed immediately.
- Resetting the Door Knob: The door knob can be reset by removing the interior cover, pressing and holding the Reset Button until a long beep and green light are heard/seen. The knob will then reboot, and another long beep with green light will confirm a successful reset. This action will restore the default administrator passcode and clear all user settings.
- Backup Keys: The Vaulta K1 comes with physical backup keys, which are essential for unlocking the door if passcodes are forgotten or in case of electronic malfunction. Users are advised to always have access to their standard key.
- Troubleshooting: The manual provides guidance for common issues such as no indicator/sound response (check cable, battery polarity, power, silent mode) and latch/bolt issues (check hole size, latch installation, knob alignment, strike plate alignment/depth).
- Important Safeguards:
- Set a user code for daily use to limit exposure of the administrator code.
- Double-check recipient when sending user codes.
- Dispose of used batteries according to local laws.
- Prevent water and liquids from entering electrical components.
- Routinely check the administrator code to ensure it hasn't been altered by unauthorized access to the interior assembly, as a factory reset can be performed from there.
- The manufacturer advises that no lock provides complete security by itself and recommends consulting a qualified locksmith for enhanced security.