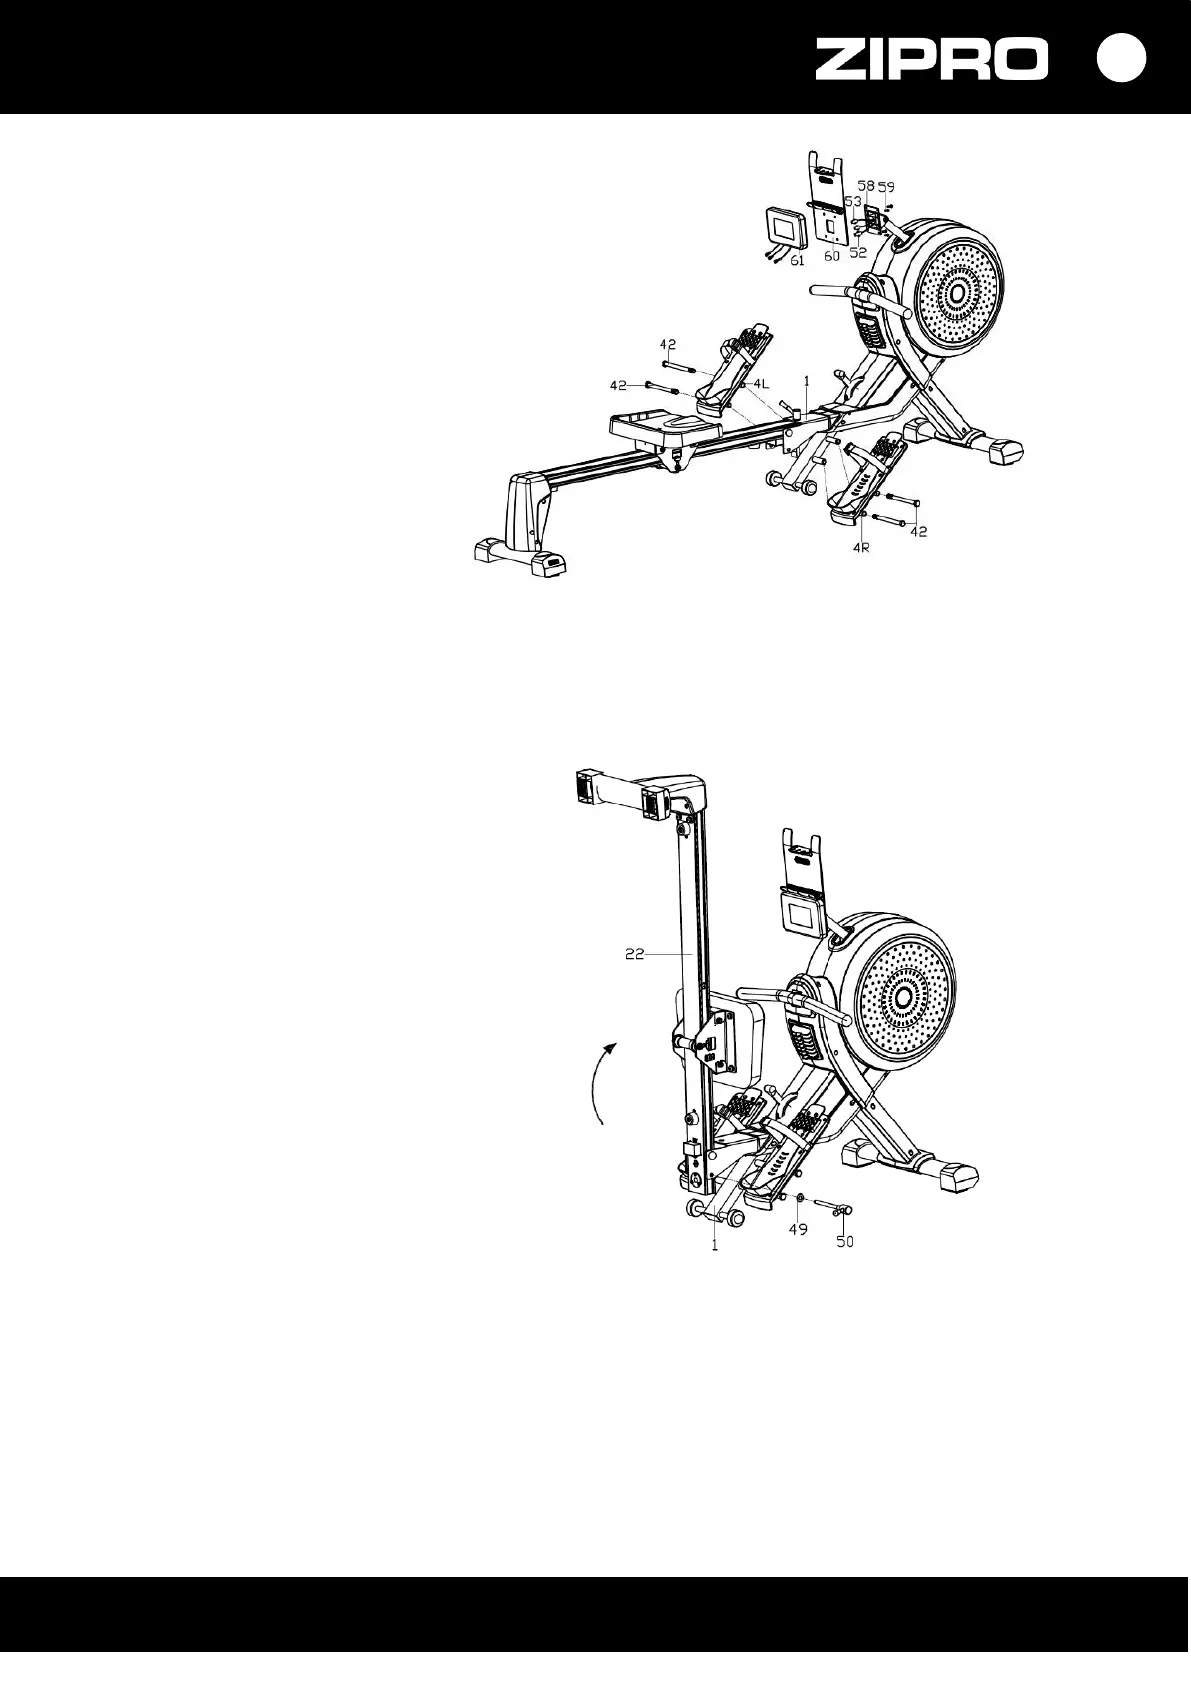
STEP 4.
Attach pedals (4 L/R) to the main
frame (1) with hexagonal bolts (42).
NOTE! The right pedal is marked
‘R’, and the left pedal is marked ‘L’.
Run the connecting cable (52)
and sensor cables (53) through
the smartphone holder (60)
and connect them with appropriate
computer cables (61).
Next, attach the computer (61)
and the holder bracket (60) to
the control panel holder (58)
with screws (59).
Congratulations! You have assembled rower!
Read the manual carefully before using the rower.
FOLDING AND UNFOLDING
NOTE! Before folding the product, make
sure all bolts are tight.
NOTE! Mind your fingers when folding
so that they don’t get pinched.
Unscrew the locking pin (50) and flat
washer (49), and then lift and fold
the rail (22) as shown by the arrow in
the picture.
Finally, lock the rail (22) with the main
frame (1) with the locking pin (50)
and a flat washer (49).
ADJUSTMENTS
Adjusting the resistance
The device has an adjustment lever for setting the resistance from 1 to 8.
To increase the resistance, move the lever up. The minimum setting is 1.
To decrease the resistance, move the lever down. The maximum setting is 8.
Adjusting pedal straps
Pedal straps are adjusted steplessly. Adjust the strap length so that the foot does not move during training
and can be easily taken out. Repeat for the other pedal.