7
2.3 I Power connec ons
• Before any work on the appliance, you must disconnect the electricity supply to avoid the risk
of electric shock which may cause material damage, serious injury or even death.
• Only a qualifi ed and experienced technician is authorised to carry out any service, including
cabling work within the appliance or to replace the power cord.
• To prevent overhea ng of the terminal board, which could create a fi re hazard, check that all
terminals have been properly ghtened. Loose terminals will void the warranty.
• The appliance must be connected to the earth.
• Any unsuitable electrical connec on will invalidate the warranty.
• The appliance's electrical supply must be provided through a protec on and circuit breaking device (not supplied)
complying with the standards and regula ons in force in the country in which it is installed.
• Electrical protec on: by circuit breaker (D curve), with a 30 mA dedicated diff eren al circuit breaker (circuit breaker
or switch) at the head of the line.
• The power supply must correspond to the voltage indicated on the appliance's informa on plate.
• The power cord must be insulated and protected against abrasions and damage.
• Use the gland to pass the power cord into the appliance.
• The appliance and the swimming pool and any other electrical equipment must be connected to the earth.
2.4.2 Power supply and clock
Connect the pump to the contactor downstream of the swimming pool switch box's fi ltra on clock.
The fi ltra on unit clock directly controls the pump's electricity supply, which then starts.
2.4.3 Connec ng the motor's power supply
• Open the electrical connec on box by unscrewing the 3 screws on the user interface and l ng it to the side (pay
a en on to the wires underneath).
• Disconnect and remove the factory test power wires exi ng the connec on box where necessary.
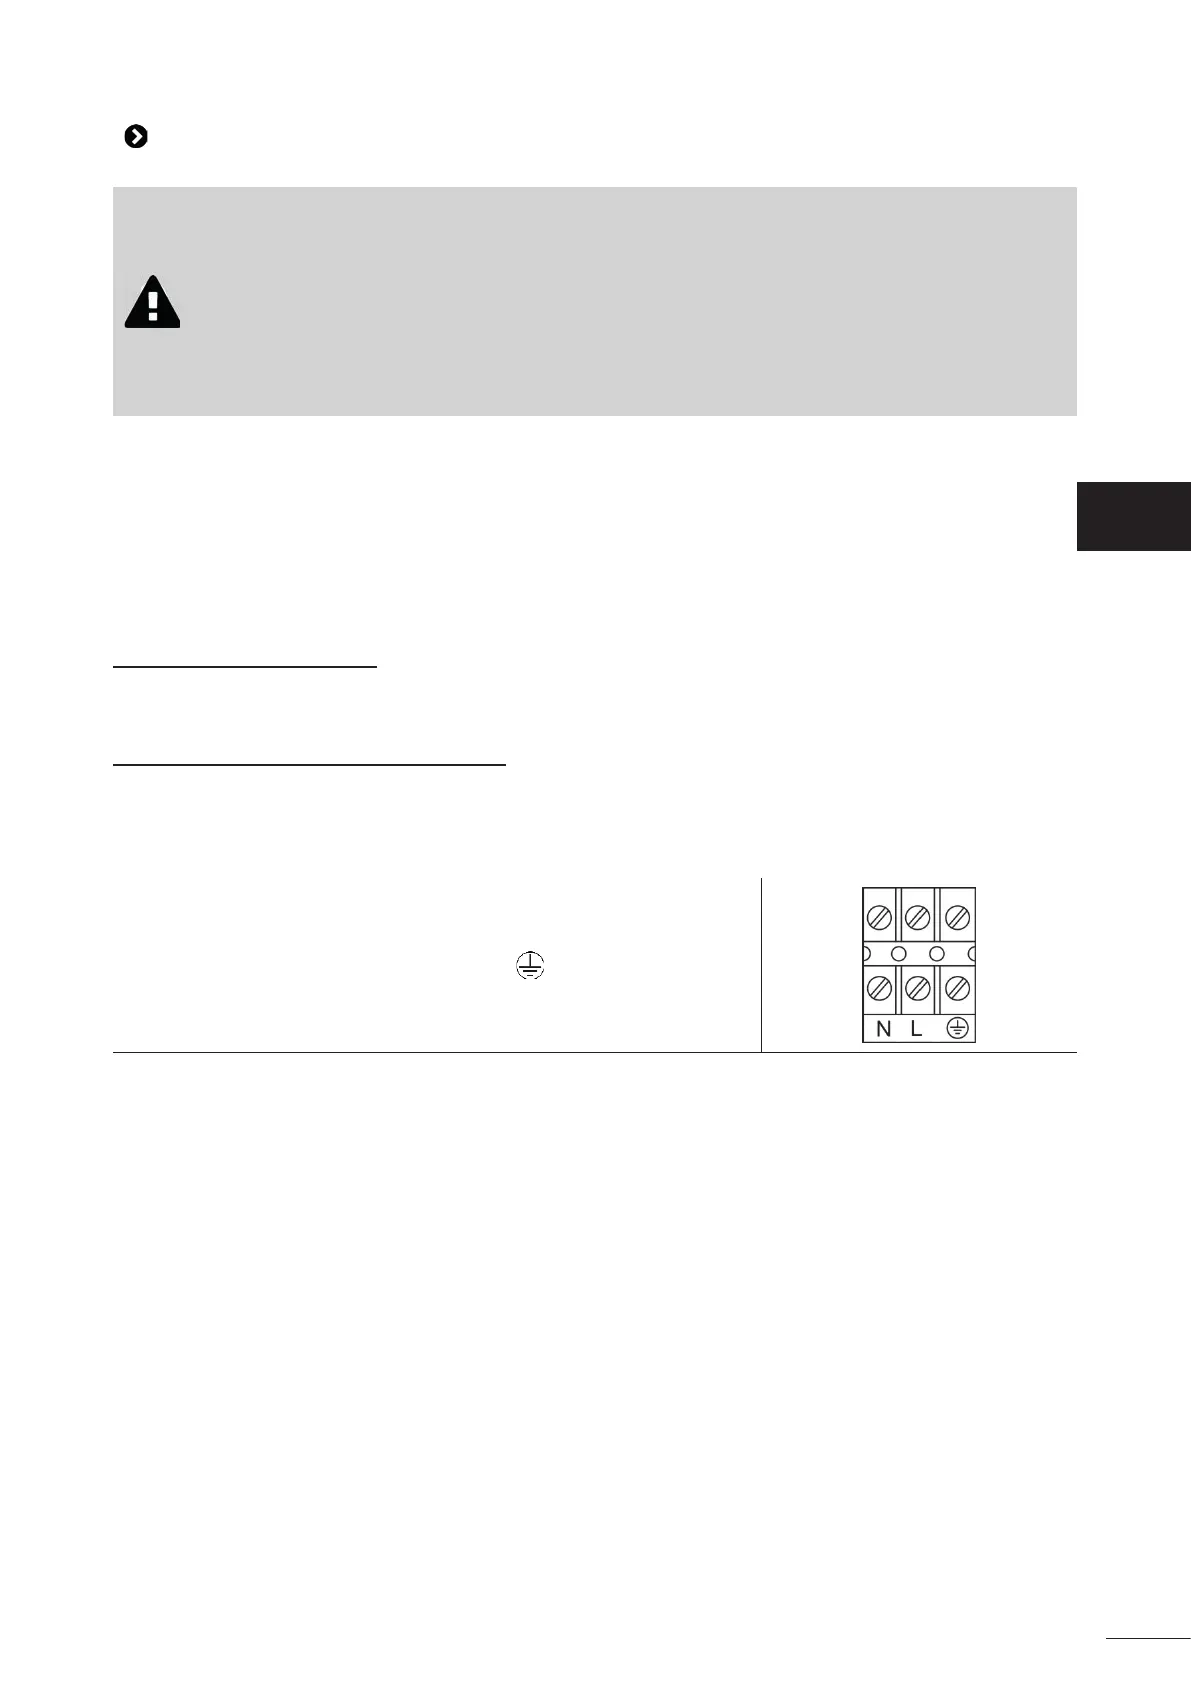
• Run the power cord through the gland and connect it to the terminals in accordance with the power supply:
230 Vac - 50 Hz power supply = connec on to the (earth) and N-L terminals.
• Close the electrical connec on box, making sure that the seal is on place and ghten the 3 screws.
EN