6
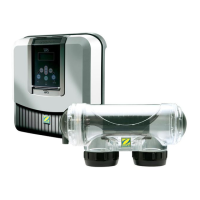
(1) = cell power supply
(2) = fl ow controller
(3) = shu er connec on
(4) = shunt
(5) = ven lator
(6) = 230V - 50Hz power supply
Shu er with an end of run dry contact (
1
) :
(shu er closed = contact closed)
Shunt the le hand “R/W” and “+15V” terminals, then connect
the dry contact from the shu er to the “BLK” and “0V” terminals
(3).
Shu er sending a closure signal (
2
) :
(shu er closed = LV 12-24 V dc)
Connect the casing to the “BLK” terminal” and the posi ve
(12-24 Vdc) to the le “R/W” terminal (3).
2.5.3 Connec on of an external controller (Automa on/Domo cs)
The electrolyser is compa ble with certain types of remote control for pools
(“automa on”). It has especially been designed to operate on the Zodiac AquaLink TRi®
system.
• Make sure the appliance is powered off .
• Remove the silver protec ve cover and the lower module (see “2.5.2 Connec on to an
electric roll-on shu er”). If the appliance is already fi ed with a pH Link or Dual Link
module, carefully disconnect its connec on braid before removing the module.
• Remove the small white cap covering the hole designed to pass the “RS485” type connec on cable (available as an
accessory) between the electrolyser and the automa on system.
• Pass the “RS485” cable from the automa on system through the hole. Place a cable e on the controller wire to prevent
it from being pulled off .
• Wind the «RS485» cable three mes around a ferrite (not supplied).
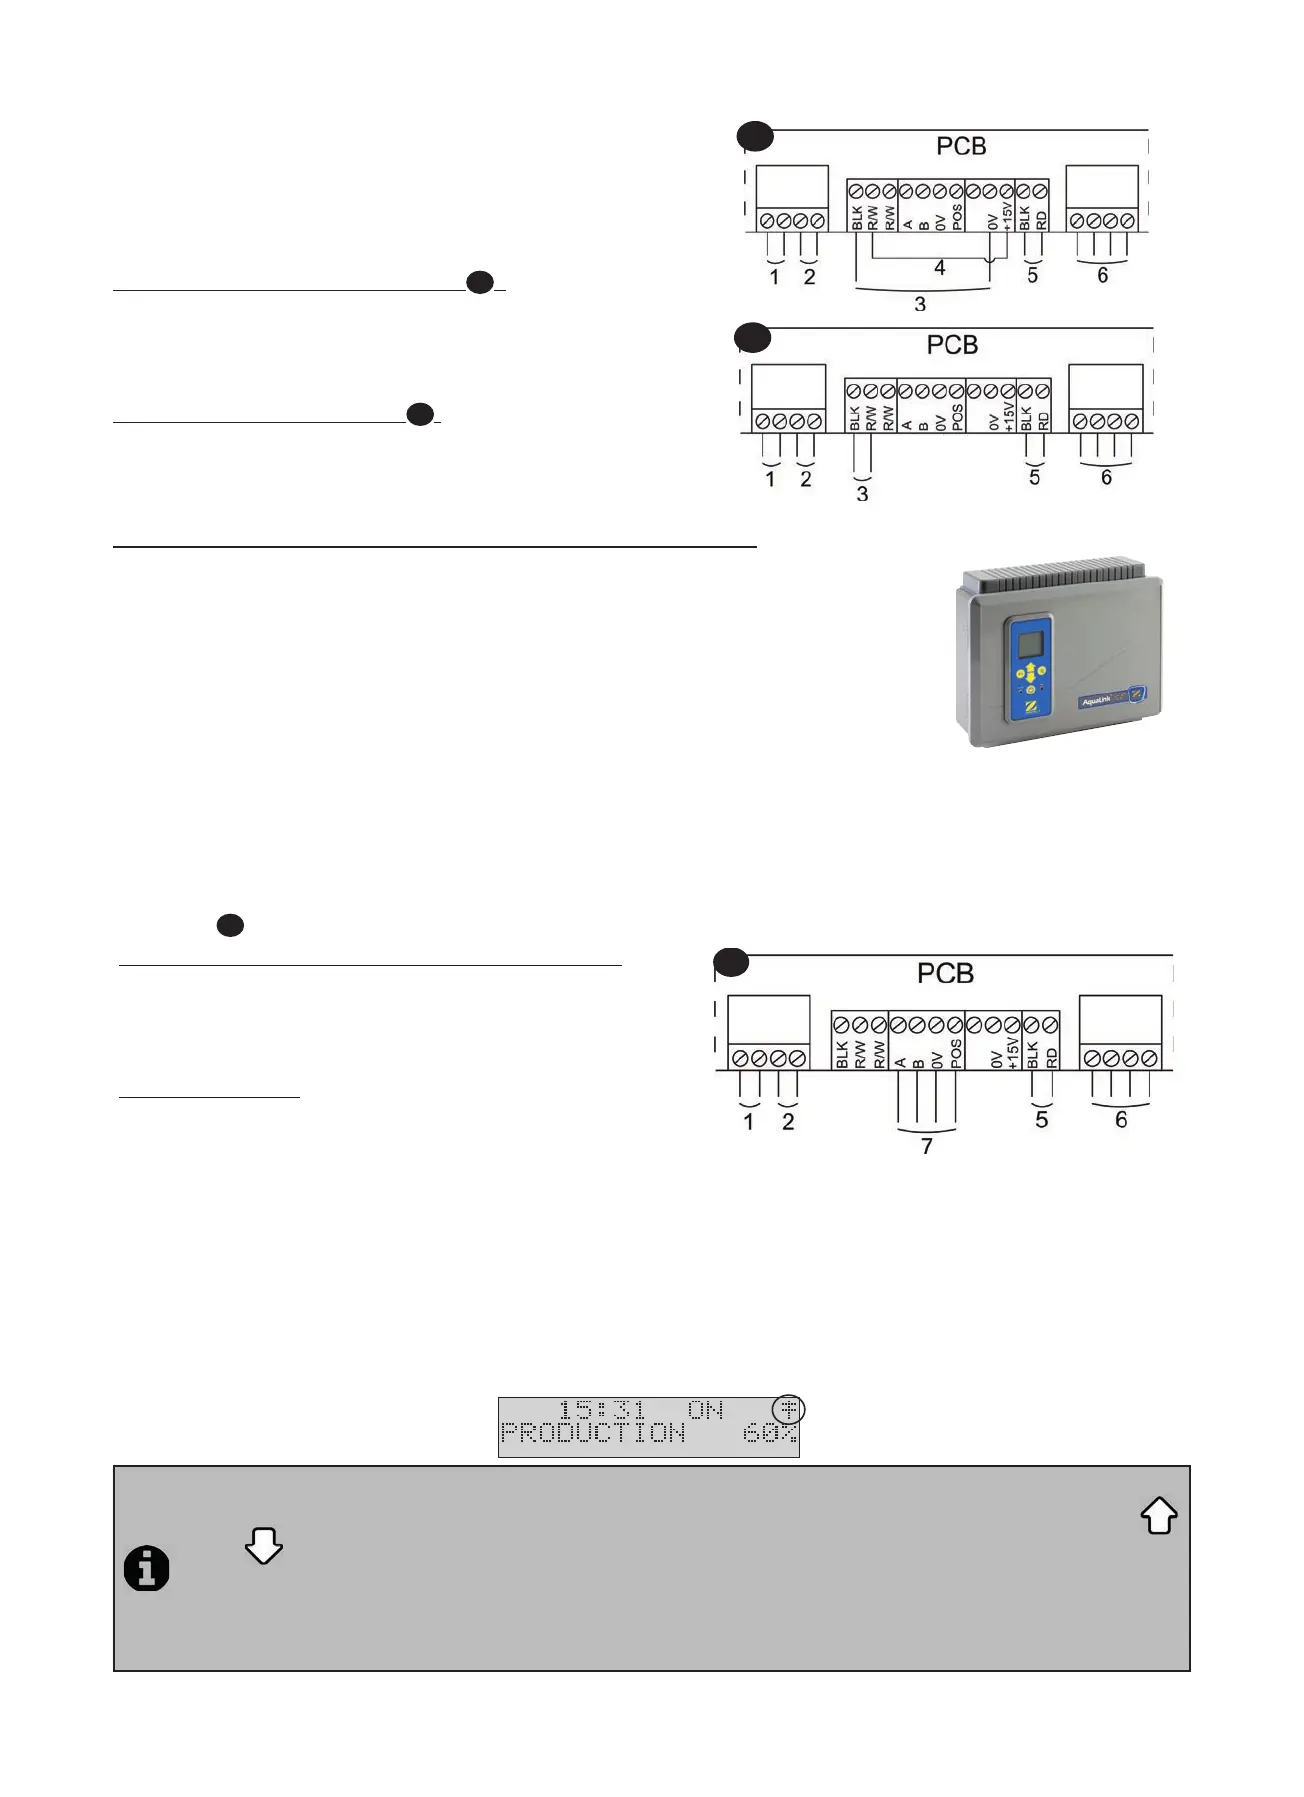
• Depending on the brand and type of external automa on system, complete the following connec ons for the connec on
cable (7,
3
):
Zodiac® AquaLink® TRi, Jandy AquaLink® and Polaris EOS :
- A Terminal = black wire
- B Terminal = yellow wire
- 0V Terminal = green wire
- POS Terminal = red wire
Pentair® Intellitouch:
- A Terminal = yellow wire
- B Terminal = green wire
- 0V Terminal = black wire
- POS Terminal = red wire
• Close the electrolyser control box cover.
• Make sure the automa on system is switched off , then power on the electrolyser.
• Go to the “CONTROLLER” menu on the electrolyser and select the corresponding
model from the list (see “3.2.4 External controller menu (Automa on/Domo cs)”).
The default se ng is “AQUALINK TRi”
• Switch on the automa on system and wait for a few seconds.
• If the connec on is successful the “‡” symbol will appear in the top right corner of the electrolyser screen:
• If the connec on fails, switch off both the automa on system and the electrolyser, check all the electric
connec ons and repeat the test. It may be necessary to reini alise the electrolyser. To do this press on
and
simultaneously: the appliance will restart and the clock we have to be reset to the correct me.
Consult the automa on system user manual if necessary.
• Once the electrolyser is connected to an automa on system it will only be possible to access its menu via its
control panel. The modifi ca on of all chlorine produc on related se ngs will from now on be managed using
the automa on system user interfaces.
1
2