3
INSTALLATION
Sump water is non-potable. To reduce the risk of contamination of the potable water supply, the FLEX
®
must be installed with a listed
backow device suitable for the installation, in accordance with the local plumbing code, such as a reduced pressure principle backow
preventer (RP). Alternately, consult the local plumbing and health codes or the authority having jurisdiction for guidance on cross-
connection and backow protection requirements.
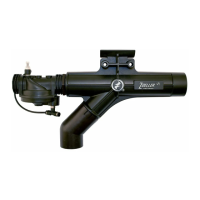
STEP 1: Placement of the Pump in the Pit
Note: If your pit has a cover, it will have to be modied to accommodate the FLEX
®
pump.
1.1) Inspect the pit for debris and clean as necessary.
1.2) For horizontal installation: the FLEX
®
's elbow is already set to the correct orientation from the factory. Mount the FLEX
®
to a oor joist directly
above the sump using the included lag bolts (see SK3220 on page 5).
1.3) For vertical installation: rotate the elbow 180 degrees. Clamp the FLEX
®
securely to the primary pump discharge pipe while ensuring that the
inlet tting of the pump is at least 6” above the basement oor or top of the sump pit (see SK3219 on page 5).
IMPORTANT
This pump is to be used as a backup to your primary pump. Make certain that there is no interference between the two pumps,
especially between the oat systems.
STEP 2: Installation of Suction Pipe
2.1) The desired location of the suction pipe’s foot valve is approximately 2-3” off the bottom of the sump pit.
2.2) Measure the distance between the rotating elbow of the FLEX
®
and the desired location of the suction pipe foot valve.
2.3) Cut 1-1/4" PVC piping (or 1-1/2" using the supplied elbow adapters) to measured length.
2.4) Tip: Dry t piping to foot valve and FLEX
®
to ensure PVC piping length is correct.
2.5) Using PVC cement, cement suction pipe foot valve to PVC piping (as well as included elbow adapter if utilizing) and place into pit at desired
location.
2.6) Cement opposite end of piping to the rotating elbow of FLEX (using included elbow adapter if utilizing).
STEP 3: Float Valve Installation
3.1) With the oat valve (A) in the OFF (down) position, the oat valve should be placed so that the bottom of the oat is a few inches above the
primary pump’s ON position. Note: The FLEX
®
will continue to run for a few seconds after the oat’s OFF position has been reached.
3.2) Securely clamp the oat valve to the FLEX
®
suction pipe, using the metal oat bracket and included hose clamp.
3.3) Ensure that the oat valve’s ON and OFF positions are free from any obstructions.
STEP 4: Installation of Tubing
4.1) Fully insert 5/32” tubing (included) to quick connect tting on top of oat valve (A) and ensure connection is secure.
4.2) Route tubing to the available opening of T quick connect on the diaphragm valve (B).
4.3) Trim to desired length, ensuring a square cut and insert into quick connect. Ensure connection is secure.
STEP 5: Installation of Discharge Piping
5.1) Install 1-1/2” thread to slip tting (C) from hardware pack. Utilize PTFE (Teon) sealing tape to prevent leakage.
5.2) Cement 1-1/2” PVC pipe to discharge.
5.3) Per the Uniform Plumbing Codes and IAPMO PS119, the discharge of the water-powered sump pump should not be connected to the
discharge of the primary sump pump. The discharge piping for water-powered sump pumps must have an air gap and extend outside of
the building, with the end of the pipe between 6 and 24 in. (150 and 610 mm) above the ground or the ood level of point of discharge.
5.4) A check valve must be installed onto the discharge line. Some local codes require a union check with ball valve. Check your local code
requirements to ensure that the installation complies.
© Copyright 2020 Zoeller
®
Co. All rights reserved.
 Loading...