Let’s Record
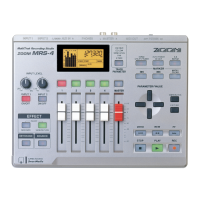
ZOOM MRS-8
16
in the lower part of the display. Adjust the recording level
so that the 0 (dB) segment for IN 1 flashes slightly when
the guitar is at maximum volume.
8.
Press the [EXIT] key repeatedly to return to
the main screen.
9.
Press status key 1 repeatedly until the key
is lit in red.
When a status key is lit in red, the respective audio track
(track 1 in this example) is selected as recording
destination.
10.
Operate fader 1 and the [MASTER] fader to
adjust the input signal monitor level.
Faders 1 – 4, 5/6, and 7/8 adjust the volume for the
respective track. When the input signal is sent to a track,
the monitor level can be adjusted. The [MASTER] fader
can be used to adjust the final output level.
11.
To start recording, press the PLAY [
R
] key
while holding down the REC [
O
] key.
A four-beat pre-count is heard, and recording starts. In
the default condition of a project, an 8-beat rhythm
pattern is played during recording and playback. Play
your instrument along with the rhythm pattern.
HINT
• If you do not want a rhythm pattern, select an empty rhythm
pattern (
→
p. 18) or mute the drum/bass sound (
→
p. 19).
• In the default condition of a project, the insert effect
processes the input signal. You can bypass the effect
(
→
p. 22) or select another effect patch (
→
p. 21).
12.
When recording is complete, press the
STOP [
P
] key.
The REC [
O
] key and PLAY [
R
] key go out, and
recording stops.
13.
To check the recorded contents, press the
ZERO [
U
] key and then press the PLAY [
R
]
key.
By operating the [MASTER] fader you can adjust the
volume of the entire song (stereo mix signal level).
14.
To cancel the recording condition, press
the status key 1 so that the key is lit in
green.
0 (dB) segment
Input 1 recording level
Lit in red
Lit in green
MRS-8(E).book 16 ページ 2004年7月30日 金曜日 午後5時24分
 Loading...