Installing the Switch 9100
27
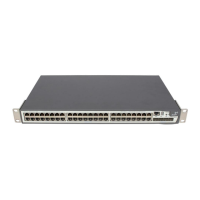
To install the mounting brackets on the switch, follow these steps:
1
Place the switch the right way up on a hard flat surface, with the front
facing toward you.
2
Remove the existing screws from the sides of the chassis.
3
Locate a mounting bracket over the mounting holes on one side of the
unit.
4
Insert the four screws and fully tighten with a suitable screwdriver, as
shown in Figure 4
.
Figure 4
Fitting the mounting bracket
5
Repeat the three previous steps for the other side of the switch.
6
Refer to the instructions that shipped with your rack, runners, shelf or
tray to complete the installation of the switch into the mounting rack.
CAUTION:
When using rack mounting runners, a shelf, or a tray, make
sure that the ventilation holes on the side of the switch are not
obstructed.
7
Connect cables.
Free-Standing
The Switch 9100 is supplied with four self-adhesive rubber pads. Apply
the pads to the underside of the device by sticking a pad in the marked
area at each corner of the switch.