8
3.0 INSTALLATION
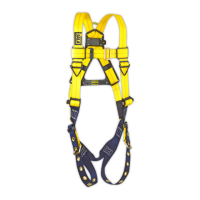
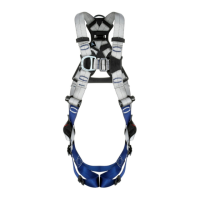
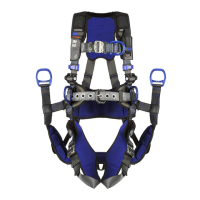
3.1 OVERVIEW: Full body harnesses are to be used as part of a Fall Protection system. Ensure each component of your Fall
Protection system is installed per the manufacturer instructions.
3.2 PLANNING: Plan your Fall Protection system before installation. Account for all factors that may affect your safety
before, during, and after a fall. Consider all requirements and limitations specied in these instructions.
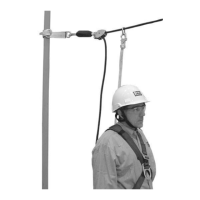
A. ANCHORAGE: Select an anchorage capable of sustaining the static load requirements of the intended Fall Protection
application. See the manufacturer instructions for each component of your Fall Protection system for more information.
The anchorage location should address all requirements specied in these instructions.
B. SHARP EDGES: Avoid working where system components may be in contact with, or scrape against, unprotected
sharp edges and abrasive surfaces. All sharp edges and abrasive surfaces should be covered with protective material.
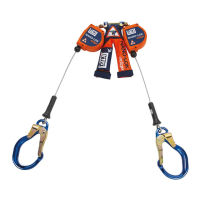
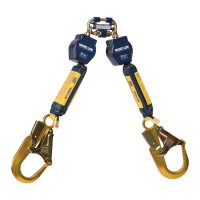
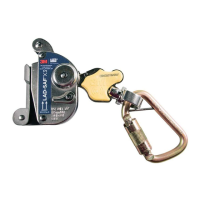
C. CONNECTING SUBSYSTEMS: Connecting subsystems used with the harness must be suitable for your system
application. See the Product Overview and Figure 2 for more information, as well as the manufacturer instructions for
your connecting subsystem.
D. HARNESS STRETCH: Some amount of harness stretch should be expected when using this product as part of a
Fall Arrest system during fall arrest. See “Table 1 – Product Specications” for how much harness stretch should
be expected when using this product. Harness stretch should be added to all fall clearance requirements for your
system, unless it is already accounted for by the connecting subsystem or another component. See the manufacturer
instructions of your connecting subsystem for more information on fall clearance requirements.
;
Maximum harness stretch is determined by the applicable standard or regulation.
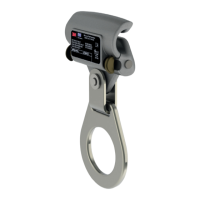
3.3 FASTENING BUCKLES: 3M Harnesses are equipped with a variety of Buckles for fastening and adjusting Leg Straps
and Chest Straps. See Figure 1 for the buckle types present on your harness. Figure 6 illustrates operation of each of the
following buckles:
1. Duo-Lok Quick Connect Buckles:
A. To fasten: Insert the Tab into the Receptor until a click is heard.
B. To adjust: Rotate the Webbing Lock to the unlocked position. Pull the Web Strap forward or backward through
the Buckle Slot to tighten or loosen. After adjustment, rotate the Webbing Lock to the locked position.
;
The Webbing Lock does not control release of the buckle. It only controls adjustment of the web strap.
C. To release: Squeeze the Lock Levers on either side of the Receptor. Pull the Tab out of the Receptor.
2. Tongue Buckles: Fasten and adjust the Tongue Buckle by passing the Tongue through the Buckle Frame and
inserting the Prong through the desired Grommet in the Tongue.
3.4 HARNESS ADJUSTMENTS: harnesses are equipped with a pair of Torso Adjusters for adjusting the Shoulder Straps.
Figure 7 illustrates operation of the Torso Adjusters:
1. Revolver Torso Adjusters: To adjust Shoulder Straps with Revolver Torso Adjusters:
A. Tightening: Rotate the Revolver Ratchet Knob as illustrated in Figure 7 to tighten the Shoulder Strap.
B. Loosening: Pull out and rotate the Revolver Ratchet Knobs as illustrated in Figure 7 to loosen the Shoulder
Straps.
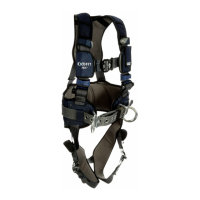
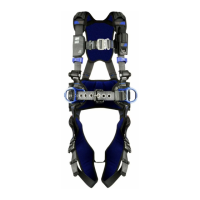
3.5 DONNING AND FITTING THE FULL BODY HARNESS: Figure 8 illustrates donning and tting of the harness. When
donning your harness, ensure that it has a snug, comfortable t. To don and t the harness:
;
Procedures for buckling and adjusting the straps on your harness will vary with the harness model. See Sections 3.3
and 3.4 for more information, as well as Figures 6 and 7.
1. Lift up and hold the harness by its Dorsal D-ring. Prevent any harness straps from twisting through the following
steps.
2. Grasp the Shoulder Straps and slip the harness onto one arm. The Dorsal D-ring should be placed on your back.
Ensure that the harness straps are not tangled and that they hang freely. Slip your free arm into the harness and
position the Shoulder Straps on top of your shoulders. The Chest Strap and Chest Buckle will be positioned on your
front when worn properly.
3. Reach between your legs and grasp the Leg Strap on your right side. Bring the strap up between your legs and
connect it to the mating buckle on your right hip. Adjust the Leg Strap for a snug, comfortable t. When comfortably
adjusted, tuck the loose end of the Leg Strap under the Strap Keeper.
Repeat this process to buckle and adjust the left Leg Strap.
4. If present, adjust and fasten the Tongue Buckle Waist Belt.
5. Fasten and adjust the Chest Strap. The Chest Strap should be approximately 6.0 in. (15 cm) down from the top of
your shoulders. When comfortably adjusted, tuck the loose end of the Chest Strap under the Strap Keeper.
6. Adjust the Shoulder Straps for a snug, comfortable t with the Torso Adjusters. Each Shoulder Strap should be
adjusted to the same length. The Chest Strap should be centered across your lower chest, approximately 6.0 in. (15
cm) down from your shoulders. The Dorsal D-ring should be centered between your Shoulder Blades. The Sternal
D-ring, if present, should be located laterally within 2.0 in. (51 mm) of the vertical centerline of the harness.
 Loading...