Technical Information DFS 700 / 09.2008 2-2
2 Resetting the units time and date.
If the battery is replaced after the existing one has depleted and the unit has lost power, the
basic settings of the sign may have been set back to a default setting. This can be checked
and changed as follows.
(5) Switch on the power to the DFS and wait for it to complete its boot cycle (peripheral lines
of the LED face chase and then two solid lines in the centre of the 2 digits illuminate to
show the cycle has been completed.
(6) Open the DFS-CAS software and connect to the sign via your preferred method
(Bluetooth / USB cable / Modem).
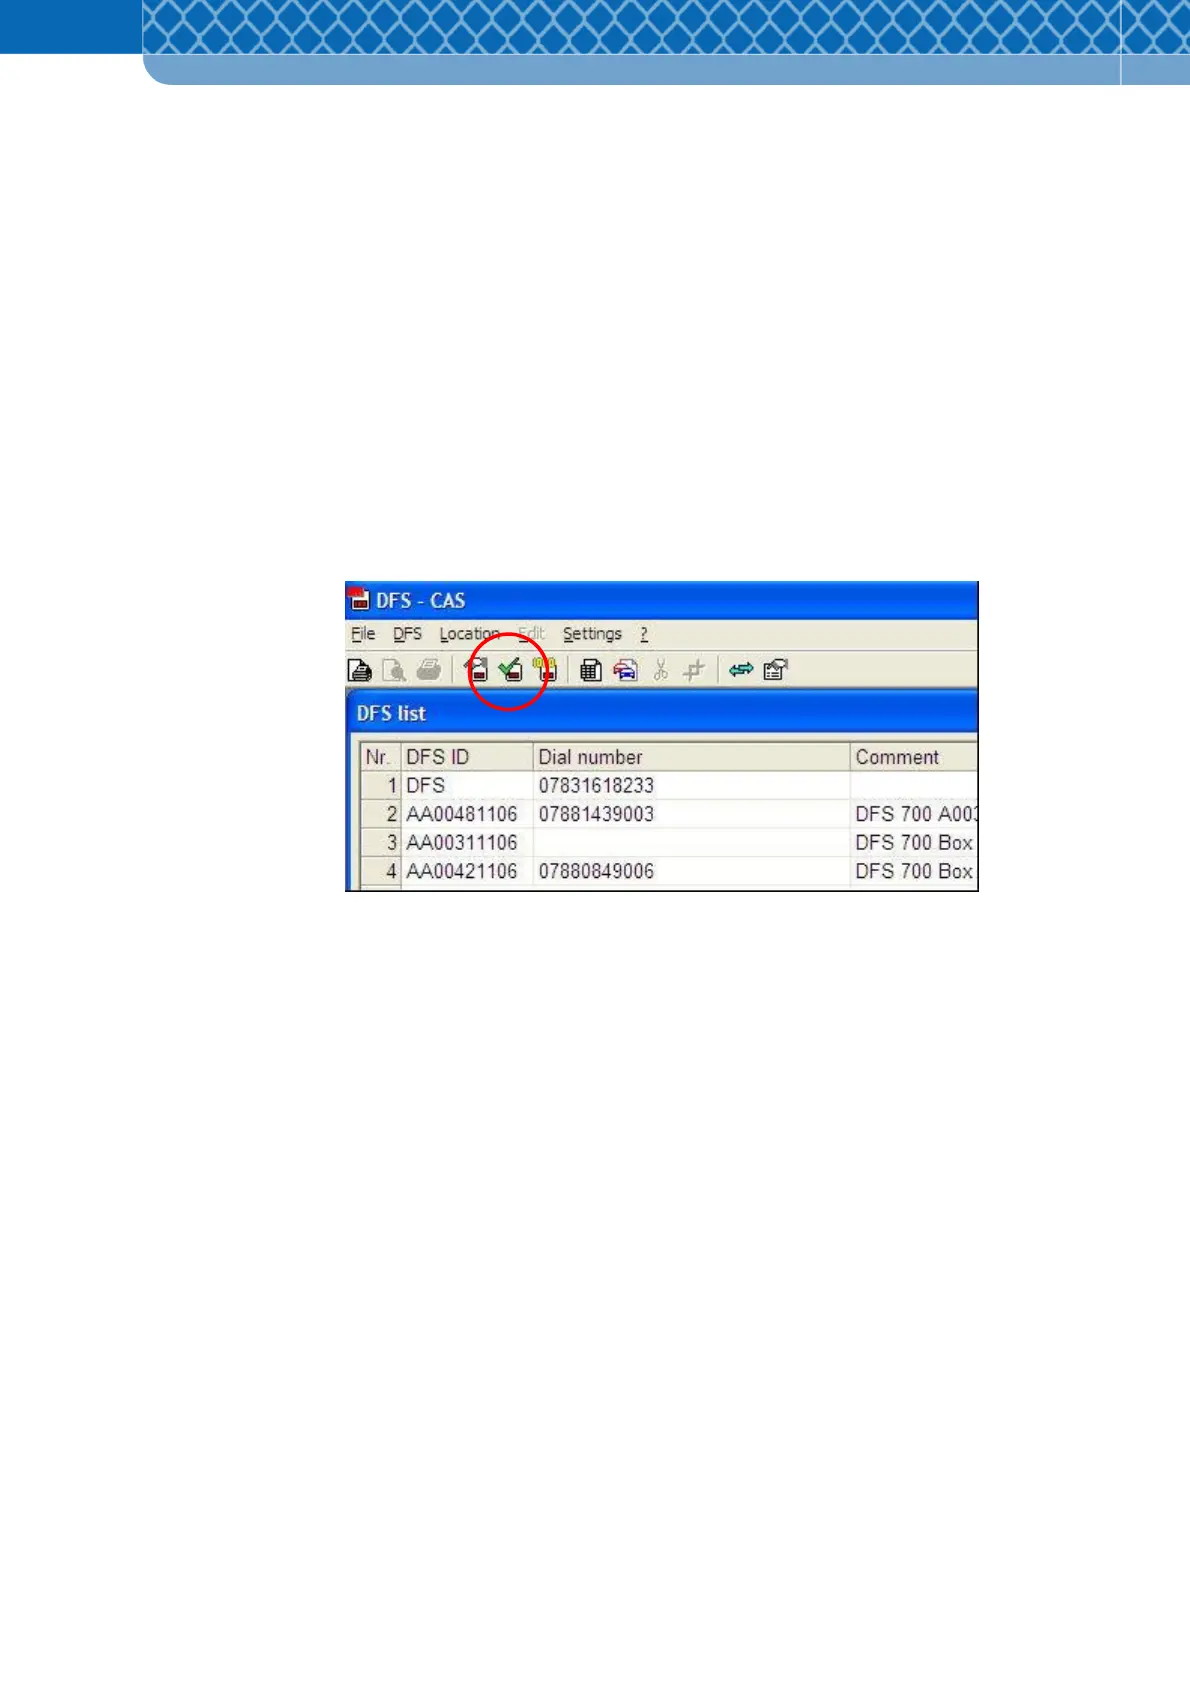
(7) Perform a status check of the unit (Figure 2).
Figure 2
(8) Click the readout button and check that the date and backup battery status are correct in
the diagnostics screen
(9) If the units date and time is incorrect (has defaulted back to 1970’s) the following
operations will set the correct time and date. If the time and date are correct, this
procedure is complete.
(10) Ensure the unit is not collecting vehicle data, this can be done either by removing the
sign door from its mounting box and facing away from the traffic or temporarily setting
the recording parameters to a high setting (eg 100mph) so that it will not record any
passing traffic.
 Loading...