CLEANING & MAINTENANCE
24 P/N 595390-01 Rev B 202003
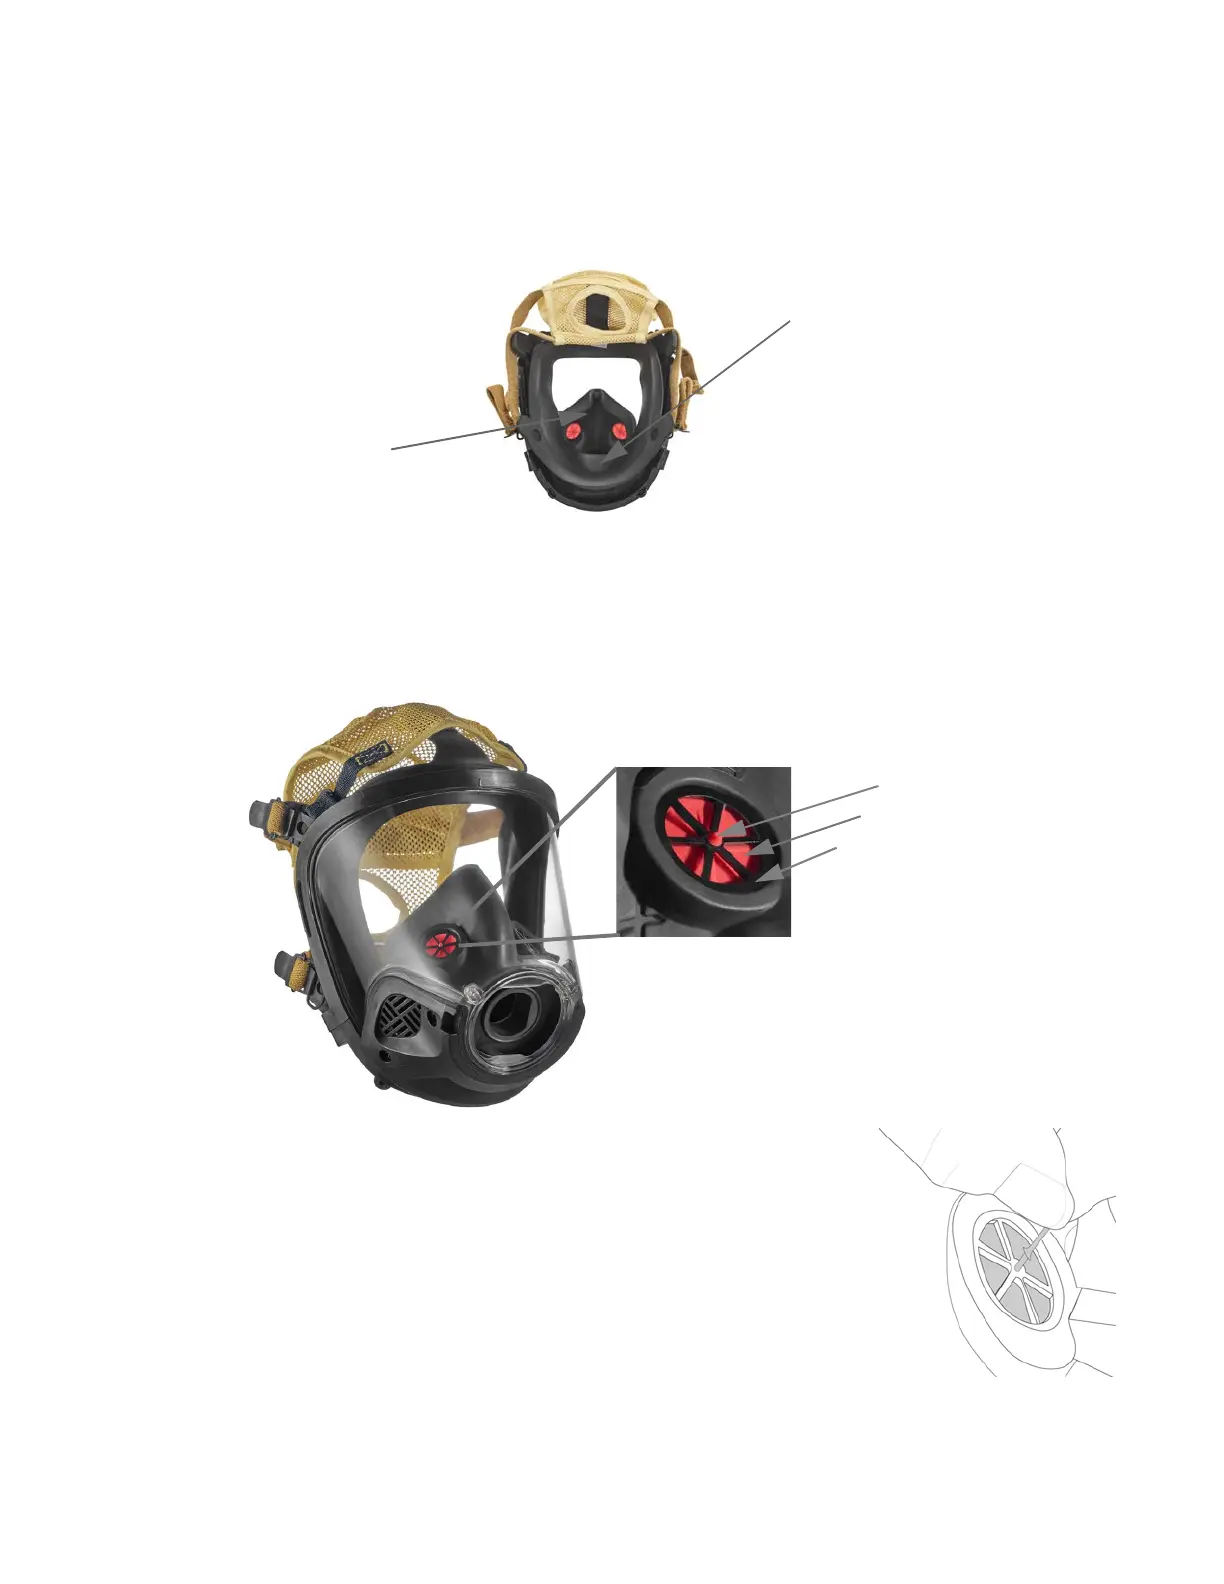
4 Check the nose cup to verify the following:
• The inhalation check valves are facing up and toward the inside of the nose cup.
• The nose cup is properly seated on the retaining posts and around the voicemitter ducts.
• The nose cup is behind the faceseal (inside the facepiece). See Figure 4-3.
Figure 4-3 Nose cup behind faceseal
To replace the valves
Typically, the two inhalation check valves installed in the nose cup assembly are not removed during maintenance;
however, if replacement is required, proceed as follows:
1 Grip the check valve disc with your fingers and pull off the valve seat. See Figure 4-4.
Figure 4-4 Valve assembly
2 Select new check valves and moisten the stem of the valve with a drop of clean
water.
3 From inside the nose cup, slip the stem of the valve into the center hole of the
valve seat. From outside the nose cup, gently pull the stem to seat the check
valve in the valve seat. See Figure 4-5.
4 Repeat with the other valve and trim excess stem as required.
Figure 4-5 Replacing the valve
Faceseal
Nose cup
Stem
Valve seat
Valve disc

 Loading...