24
Operator’s Guide
3M
™
Super Close Projection System SCP716
© 3M 2009. All Rights Reserved.
ENGLISH
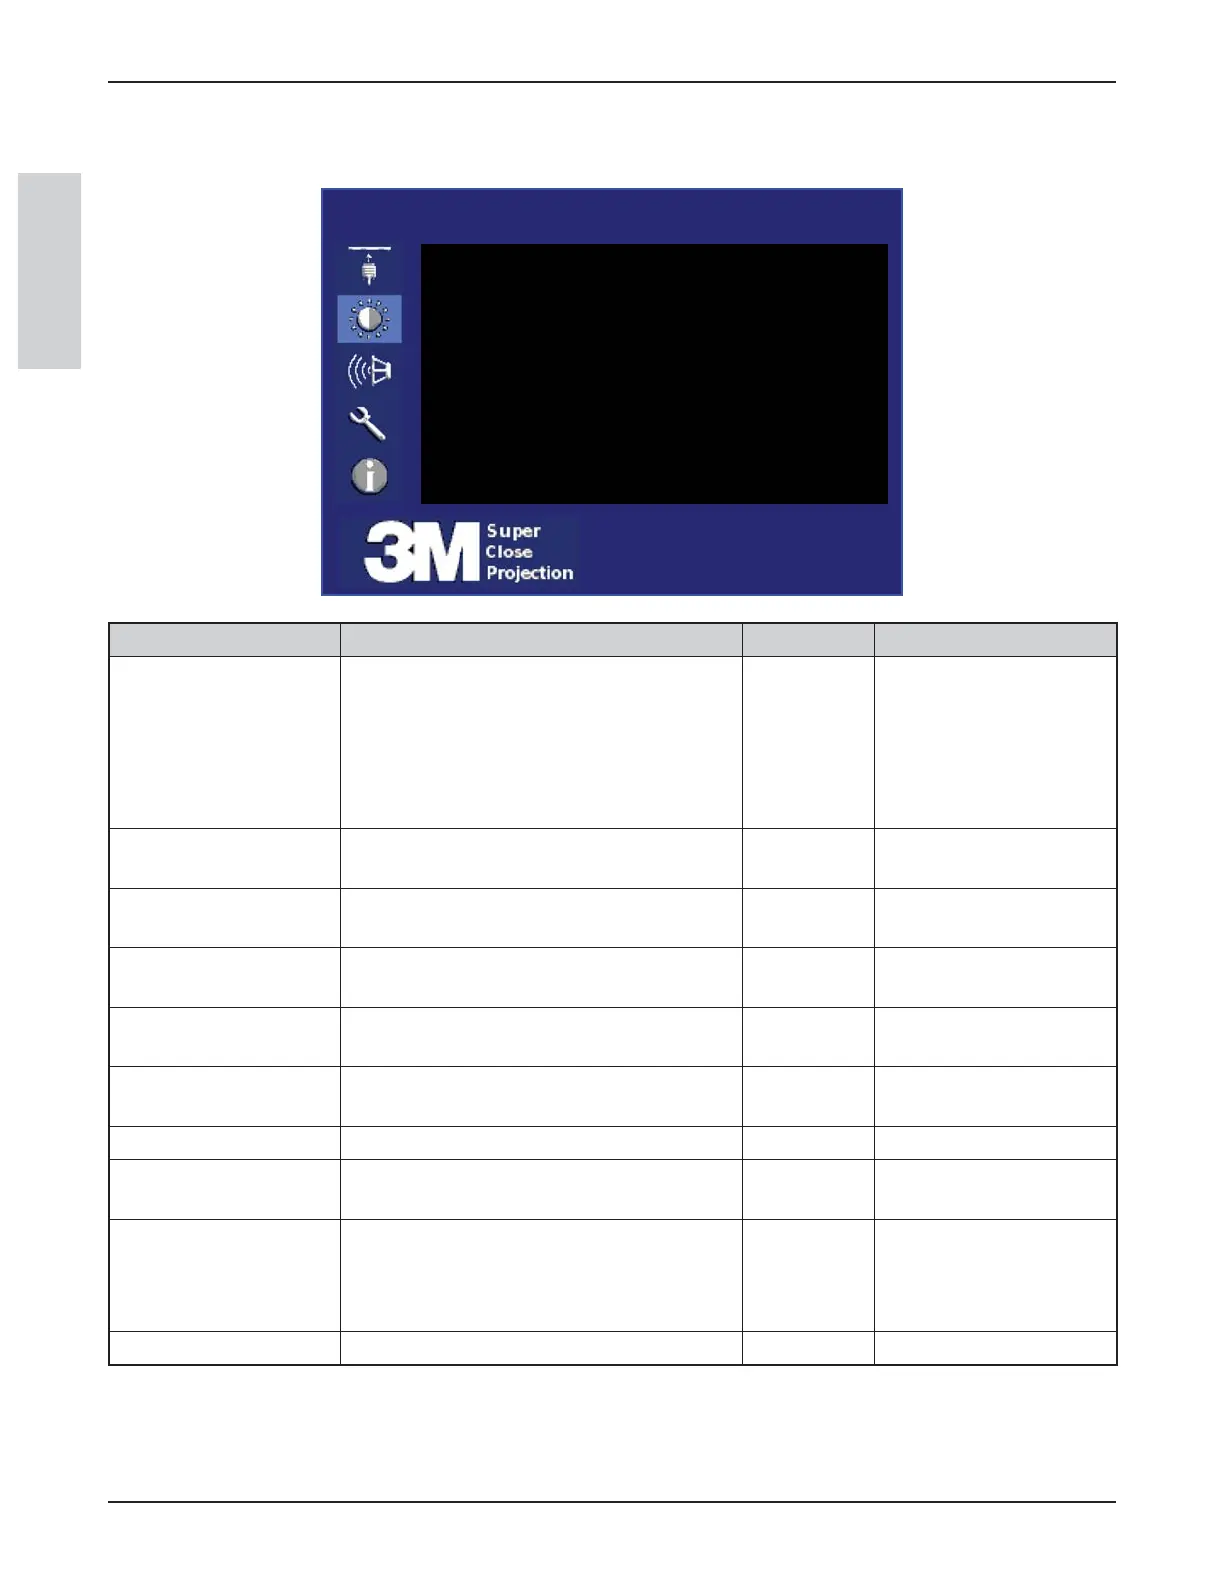
Picture Menu
The Picture Menu, shown below, is used to adjust the picture settings to display the best possible image.
Picture Input Source: Computer 1
Picture Mode Enhanced Photo X
Brightness 50 |···········z············|
05tsartnoC |···········z············|
Color 50 |···········z············|
Hue 0 |···········z············|
Sharpness 0 |···········z············|
Video Noise Reduction On
Aspect Ratio Full Screen
Advanced
Reset X
Feature Description Range Default
Picture Mode
Select the best mode to optimize the
projector image.
1. Max Brightness
2. Enhanced Photo
3. Photo
4. Enhanced
N/A
VGA-Max Brightness
Video-Enhanced Photo
Brightness
Adjust brightness (low to high) of
displayed image
0–100 50
Contrast
Adjust the contrast (dark to light) in the
displayed image
0–100 50
Color *
SEENOTE
Adjust the intensity of color in the
displayed image
0–100 50
Hue *
SEENOTE
Adjust the balance of red (-) to green (+)
for video signals.
-15–+15 0
Sharpness
Adjust the displayed image to look sharper
or softer
-15–+15 0
Video Noise Reduction Turn noise reduction ON or OFF N/A Off
Aspect Ratio
Set aspect ratio to: [Full Screen or 16:9 or
Native]
N/A Full Screen
Advanced
Navigate to the Advanced picture setting
menu. This option is for Computer/
Component input and only displays when
the I/O Module is connected.
N/A N/A
Reset Reset values in this menu only N/A N/A
* Note: Tint/Hue can only be adjusted for S-Video and RCA video input signals