Nozzle change
When you need to change the nozzle, follow this procedure:
1. Follow the “filament removal” procedure for selected extruder
2. Turn off the heating of ALL extruder and print bed
3. Wait for complete cool down of all printer parts
4. Move the print bed at Z>=100, for better access to extruder area (when using Repetier
Host, in the manual control area, enter “G1 Z100” and press enter in the Gcode box)
5. Turn printer OFF: don't continue the
procedure if printer is still powered!
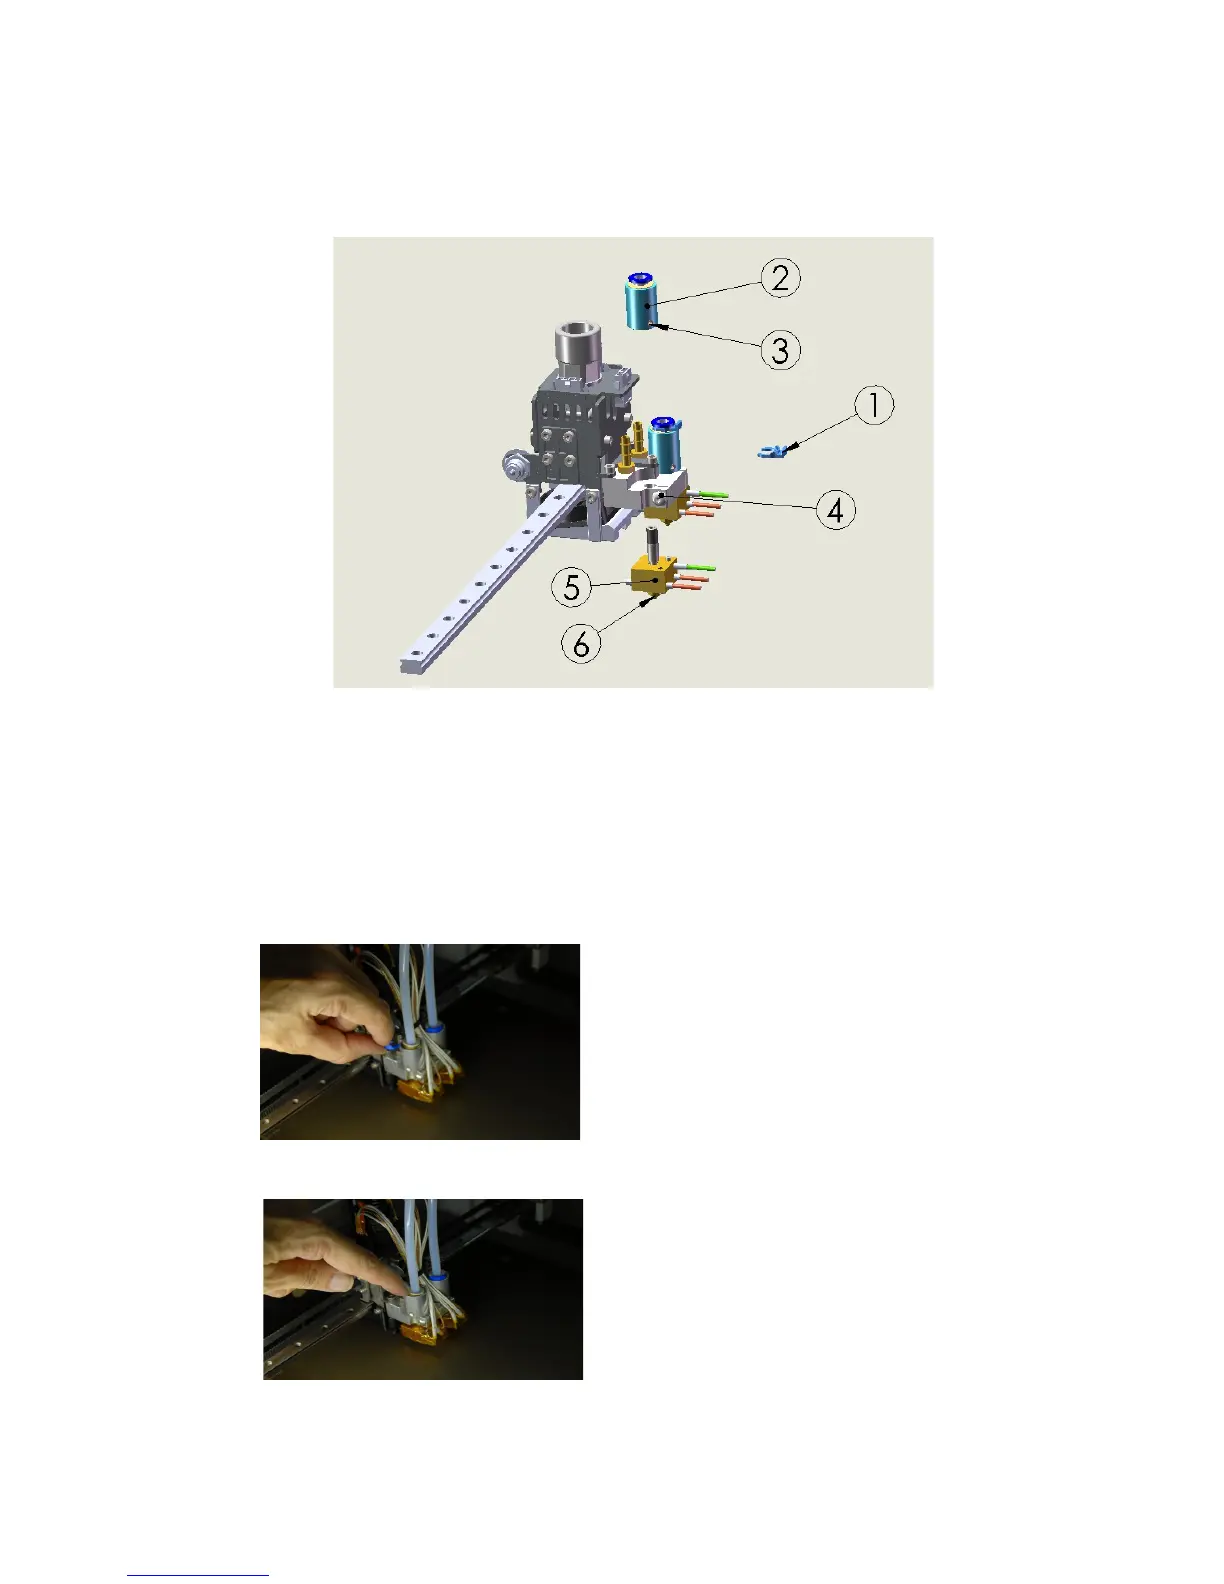
6. Remove PTFE lock ring (1)
7. Push on the tube adapter (2) with the
PTFE pipe while also pushing on the
plastic collar
8. While pushing the collar pull the
PTFE pipe and remove it
9. Release the locking grain (3) on the
tube adapter using a 2mm hex key.
Just half turn will suffice: if the grain
would protrude from tube adapter
you couldn't remove the tube
adapter itself.
10. Remove (unscrewing) the tube
adapter(2)
11. Unplug the electric connector: hold
the plastic part, don't pull the cable.
12. Release the extruder lock screw (4)
26