3 Accessing the Network Camera
3.1 Adding a VISIX S-Series Camera to VIGIL Server
Purpose:
By following the steps outlined in this section, a user can add a camera to VIGIL Server using the 3xLOGIC
Camera (VISIX IP) Setup Utility. The utility was previously utilized in Section 2.1.2 to detect and change the
camera’s IP address. This utility is installed alongside VIGIL Server and will launch automatically when
following the below steps.
Steps:
1. Login to VIGIL Server.
2. Open the Settings > Camera Setup Tab.
3. Select an unused camera channel to associate with the camera.
4. Toggle the Network Camera checkbox. The Network Camera Settings form will deploy. If the form does
not deploy automatically, click the Network Camera - Settings button.
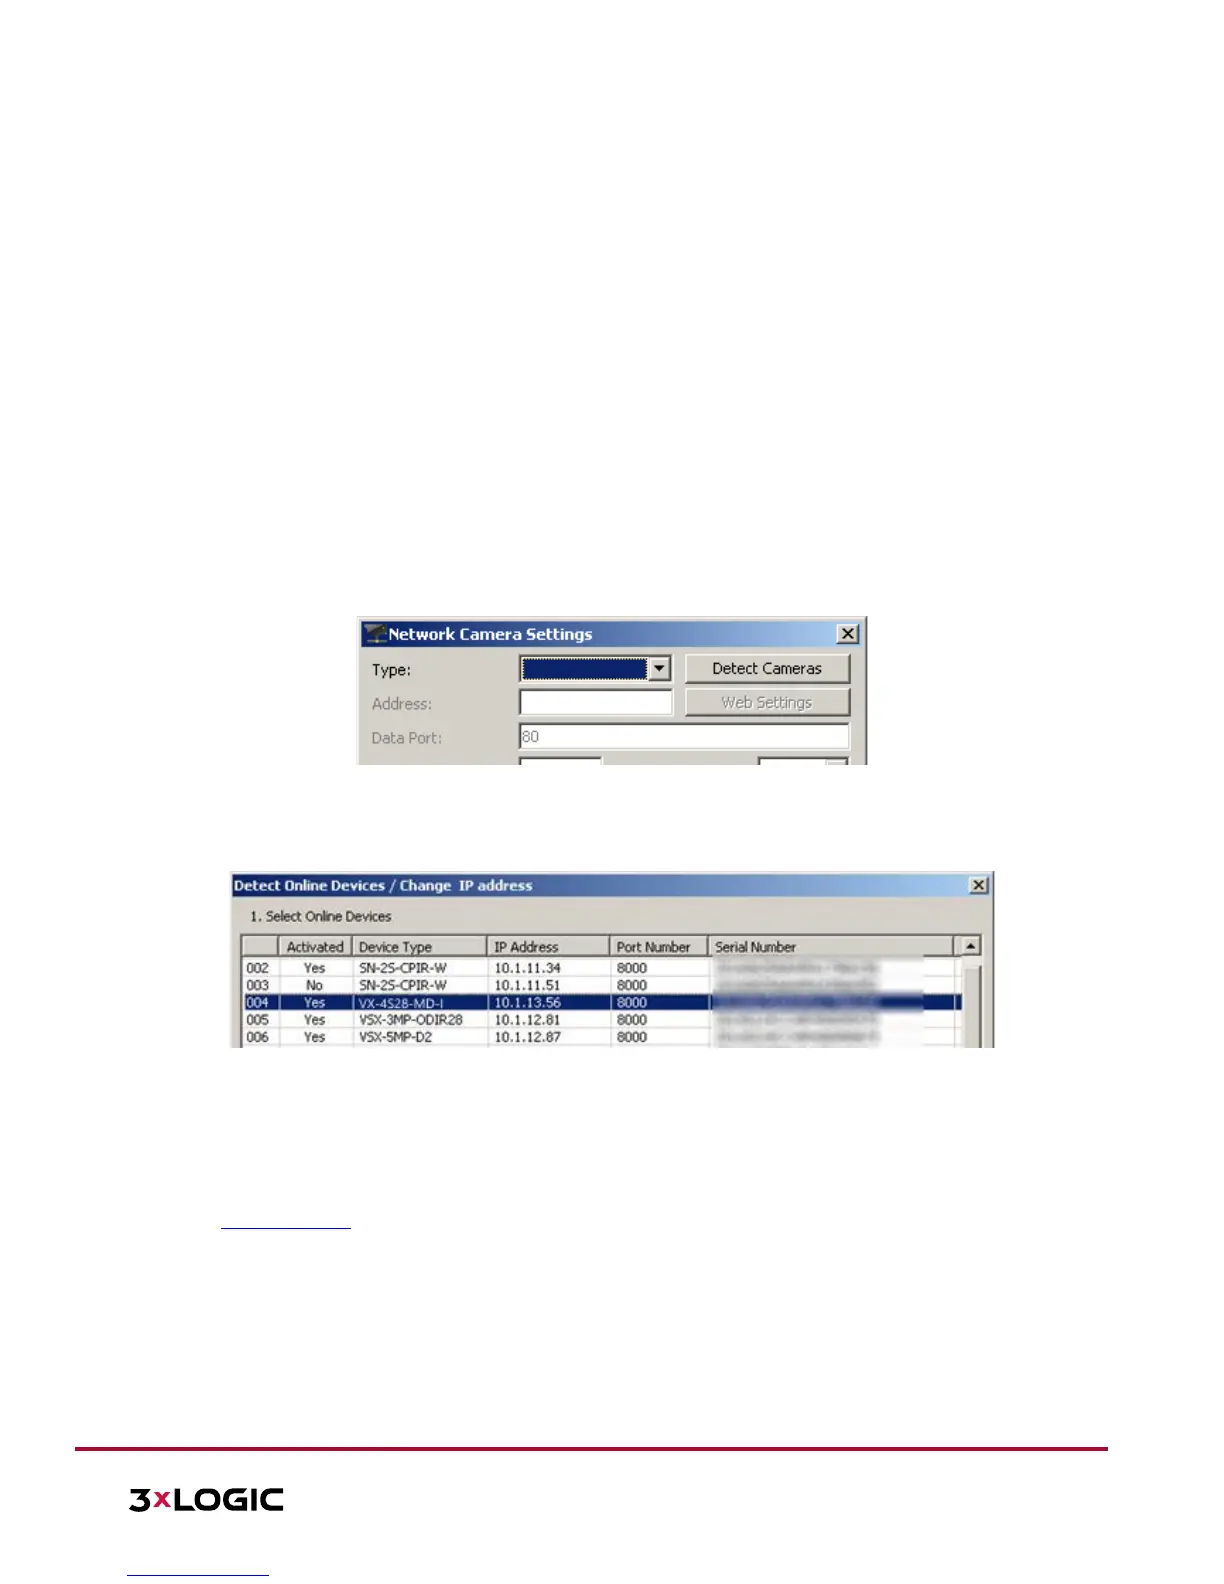
5. Click the Detect Cameras button located next to the Type field. The 3xLOGIC Camera Setup Utility will
deploy and will automatically begin detecting devices on the network.
Figure 3-1 Launching the 3xLOGIC Camera Setup Utility
6. Select the desired camera from the list of online devices and click Next.
Figure 3-2 3xLOGIC Camera (VISIX IP) Setup Utility – Selecting Camera from Online Devices List
7. After the utility successfully accesses the camera, click Save to VIGIL. A window will deploy where the
user can assign the camera’s stream profiles.
NOTE: If the utility fails to access the camera, confirm the utility is using the correct log-in credentials for
the camera (created during camera activation) and re-attempt saving to VIGIL. If issues persist, contact
3xLOGIC Support
.
 Loading...