Steps:
1. Configure the FTP settings and check Upload Picture checkbox in FTP Settings interface. Refer to Section
6.1.2 Configuring FTP Settings for more details on configuring FTP parameters.
2. Check Upload to FTP checkbox in Motion Detection Settings or Alarm Input interface. Refer to Section
5.2.1 Configuring Motion Detection for more details.
3. Toggle the Enable Event-triggered Snapshot checkbox.
CONFIGURING NET HDD
Before you start:
The network disk should be available on the network and properly configured to store the recorded files, log
files, etc.
Steps:
Add the network disk
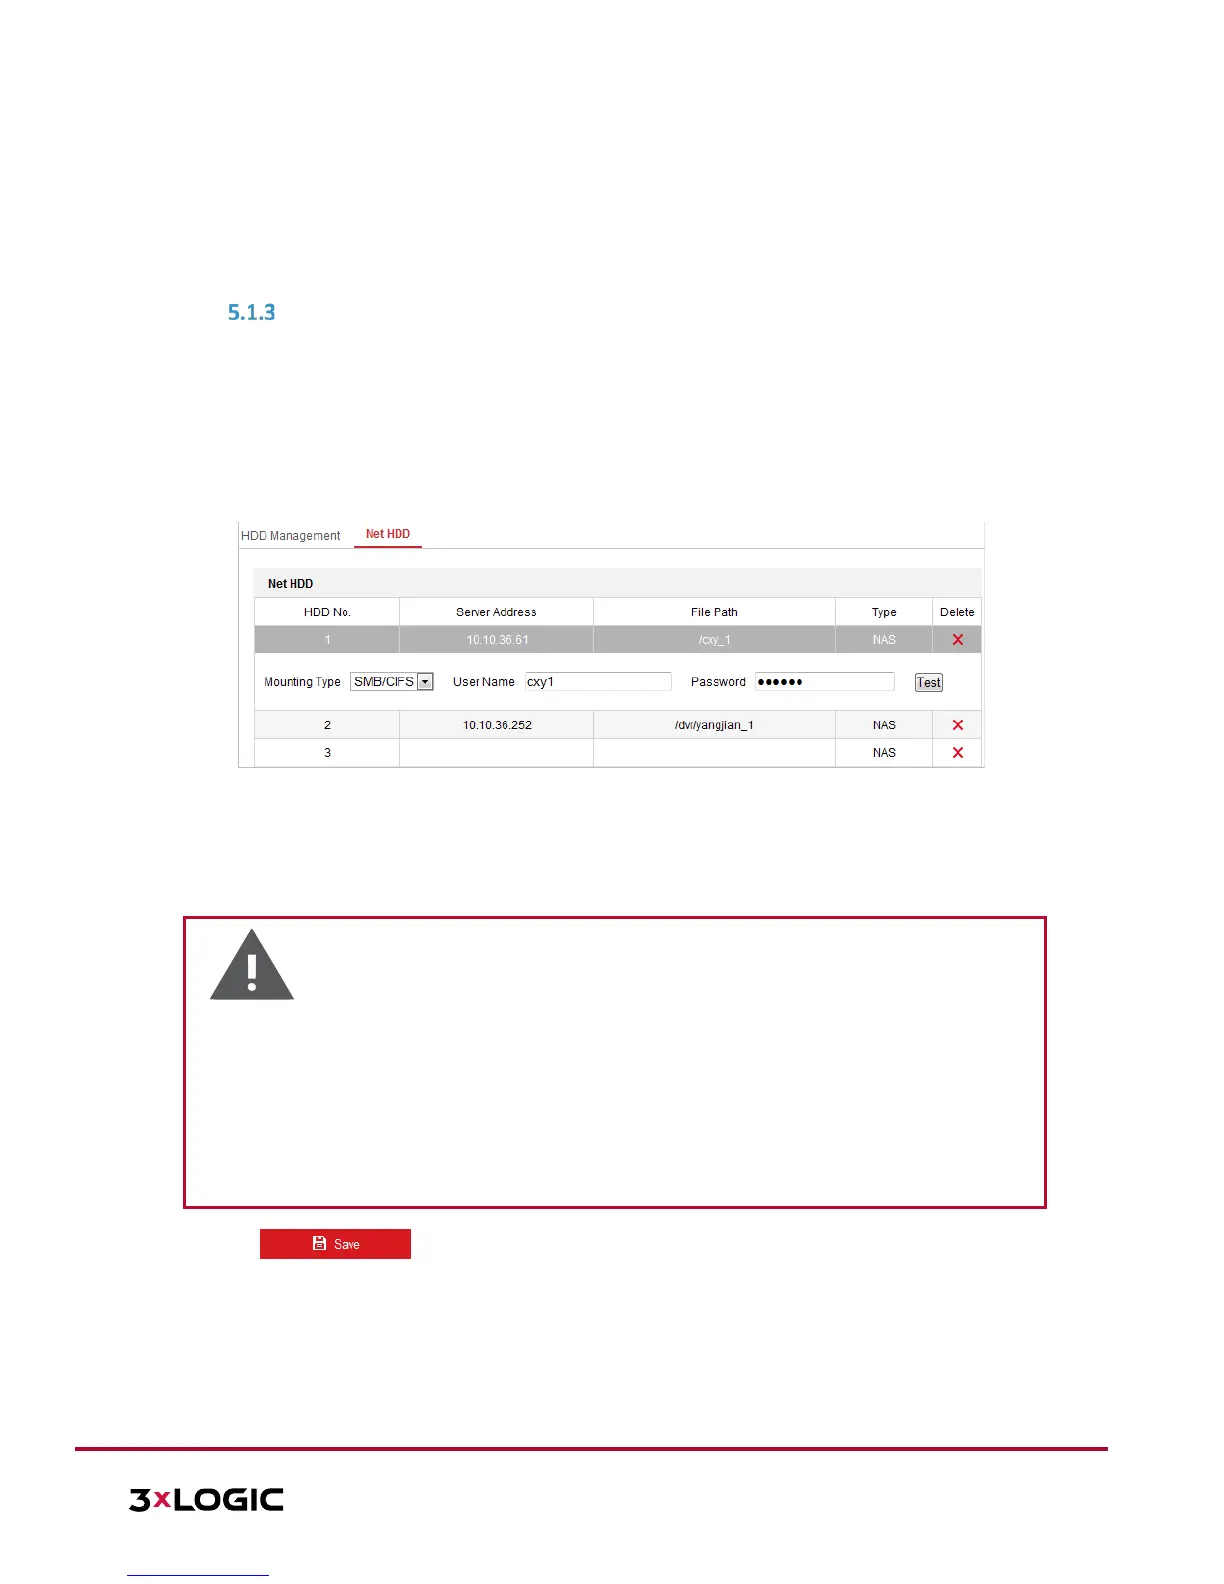
1. Enter the NAS (Network-Attached Storage) settings interface: Configuration > Storage > Storage
Management > Net HDD
Figure 5-5 Select Net HDD Type
2. Enter the IP address and the file path of the network disk.
3. Select the mounting type. NFS and SMB/CIFS are selectable. The user can set the user name and password
to guarantee security if SMB/CIFS is selected.
NOTE: Refer to the NAS User Manual for creating the file path.
Warning
For your privacy and to better protect your system against security risks, we strongly
recommend the use of strong passwords for all functions and network devices. The password
should be something of your own choosing (using a minimum of 8 characters, including
upper case letters, lower case letters, numbers and special characters) in order to increase
the security of your product.
Proper configuration of all passwords and other security settings is the responsibility of the
installer and/or end-user
.
4. Click to add the network disk.
NOTE: After having saved successfully, you need to reboot the camera to activate the settings.
Initialize the added network disk.
1. Enter the HDD settings interface (Configuration > Storage > Storage Management > HDD Management),
in which you can view the capacity, free space, status, type and properties of the disk.
 Loading...