Installation and electrical
connection
Operating Instructions | 1473-1-8319
Pos: 38 /#Neustruktur #/Online-Dokumenta tion (+KNX)/Übersc hriften (--> Für alle Dokumente <--) /2. Ebene/M - O/Montage @ 18\mod_13026159 60458_15.docx @ 103424 @ 2223 @ 1
7.3 Mounting
Pos: 39 /#Neustruktur #/Online-Dokumenta tion (+KNX)/Montage/a lle Geräte/Montage - UP-Dosen - DIN 49073-1 oder geeignetes Aufputzg ehaeuse - Ohne Docvariable @ 25\ mod_1340354979636_15. docx @ 219890 @ 3222 @ 1
The flush-mounted insert must only be installed in flush-mounted wall boxes according to DIN 49073-1, Part 1, or
suitable surface-mounted housings.
Pos: 40 /#Neustruktur #/Online-Dokumenta tion (+KNX)/Montage/A udioVideo/Montage - 8218 @ 22\mod_13324965607 46_15.docx @ 206027 @ 22 @ 1
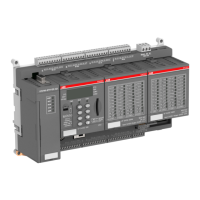
Busch-iDock is mounted as shown below.
1. First the flush-mounted insert is connected.
2. Then, after the cover frame (separate) has been attached, the charging cradle is connected to the
flush-mounted insert with the enclosed M3 screw.
3. Finally the cover plate (A) (separate) is attached to the charging cradle.
Fig. 2: 8218 U + 8254-xxx (A) + 2511-XXX / 1721-xxx (B)
No. Function
* Screw 1= LED+IR
Pos: 41 /#Neustruktur #/Online-Dokumenta tion (+KNX)/Steuerm odule - Onli ne-Dokumentatio n (--> Für alle Dokumente <--)/++++++++++++ Seitenumbruch ++++++++++++ @ 9\mod_1268898668093_0. docx @ 52149 @ 2222222 @ 1
 Loading...