OI-LLT100-EN Rev. D | User Guide 33
CAUTION Property damage
See note “Securing the housing cover in flameproof/
explosion proof areas” on page 8
7. Power on the LLT100.
At power-on, the sensitivity of the LLT100 through-the-glass
(TTG) interface goes through a calibration. For the TTG to work
properly, it is mandatory that the housing cover be correctly
tightened before power-on.
NOTICE
After power-on, wait at least 30 seconds before
operating the TTG display.
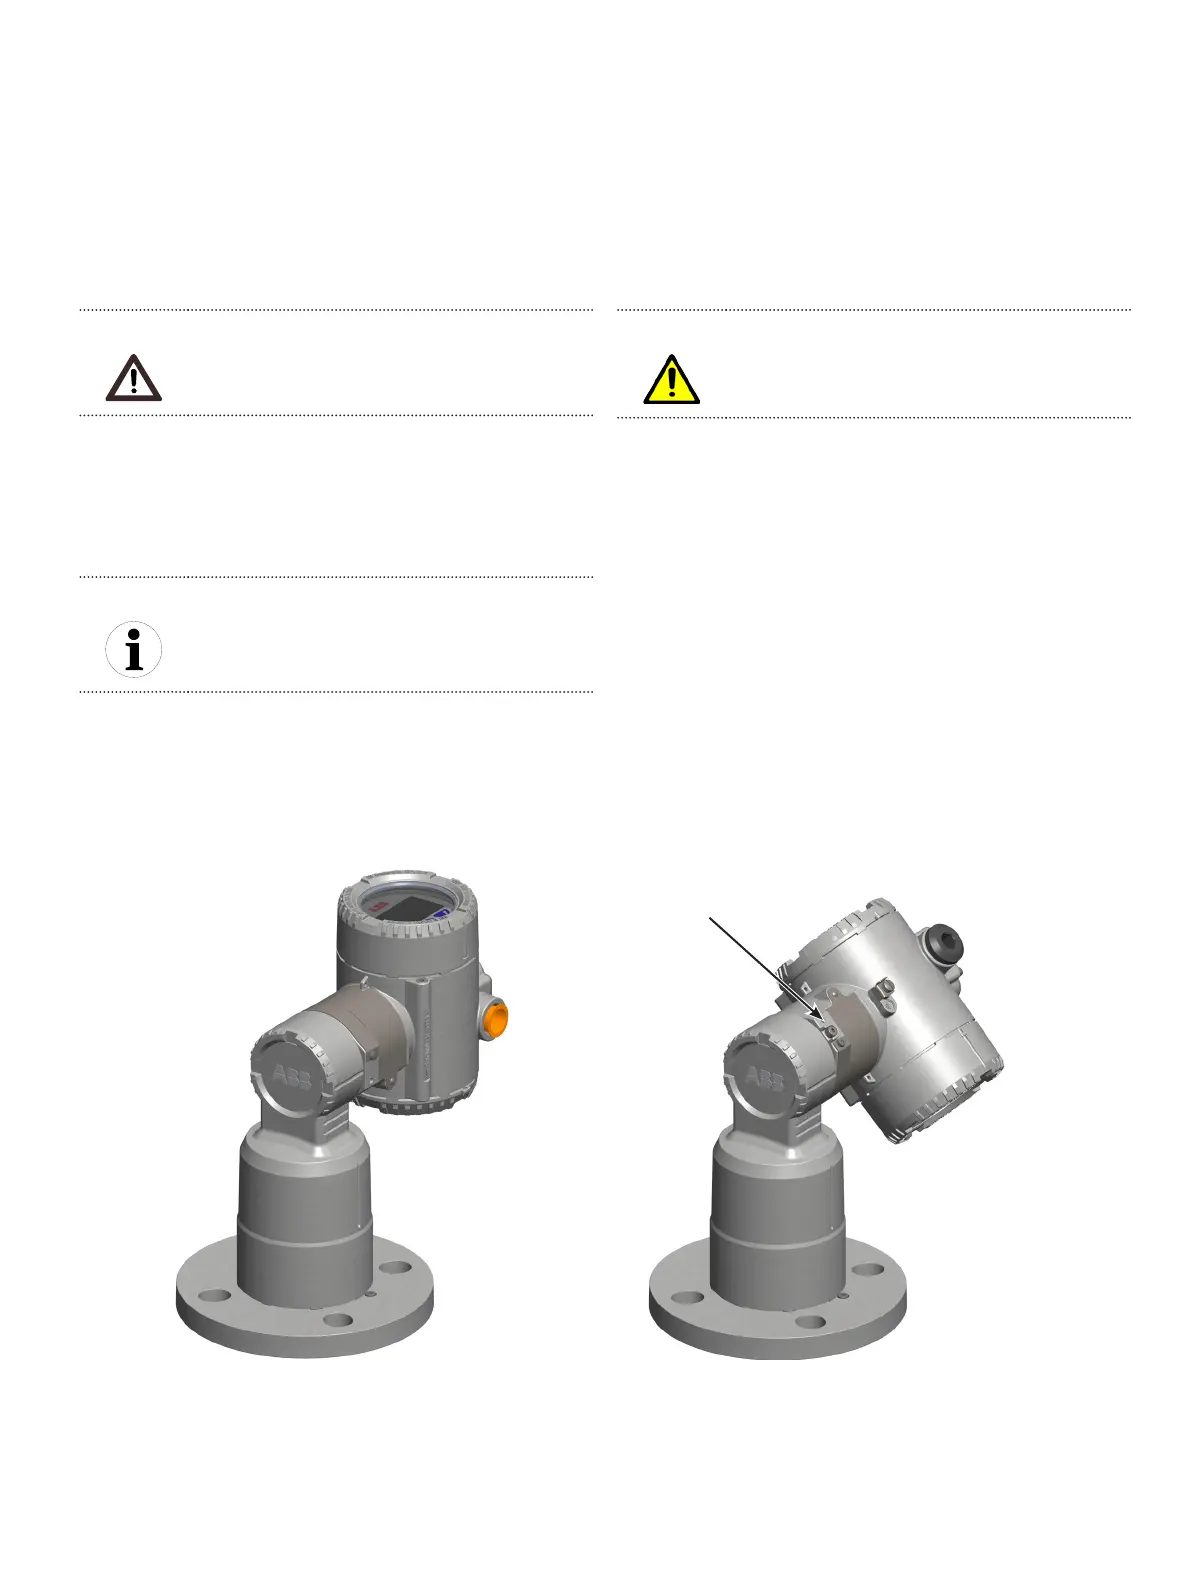
11.5 Rotating the LCD housing
To improve field access to the wiring, or LCD visibility, you may
rotate the LLT100 housing anywhere between –45° and +90°
from its initial position, and fixed in any of these positions.
A stop prevents the housing from being rotated too far.
Figure23 Rotating limits of the LLT100 housing
Housing stop
tang-screw
+90° –45°
WARNING Property damage
Trying to turn the housing beyond the limits indicated
previously may permanently damage the instrument.
To rotate the housing:
1. With an Allen key, unscrew the housing stop tang-screw by
NO MORE than one turn (do not pull out the screw).
2. Position the housing in a way that is optimal to you (between
–45° and +90°). The tang-screw rotates with the housing.
3. Once the housing is in the proper position, tighten the stop
tang-screw.
11.6 Selecting installation material
The LLT100 is delivered as an autonomous assembly.
– Gaskets, washers, bolts and nuts are not included. Make sure
to procure all bolts, nuts and washers selected according to
the process and/or applicable national standards.
– Select application-specific gaskets, i.e. gaskets that complies
with the ASME B16.5 standard or the standard that you require.
– The instrument gasket and flange are to be selected
according to the application service conditions.
Mounting depends on the flange and process type. The
instrument can be bolted directly onto a flange or bracket.
– Make sure to follow the mounting setup as illustrated in
Figure 20 and Figure 21 on page 36.