GUID-9A3AF6D3-8133-424A-A7AF-BC48E868A65E V1 EN
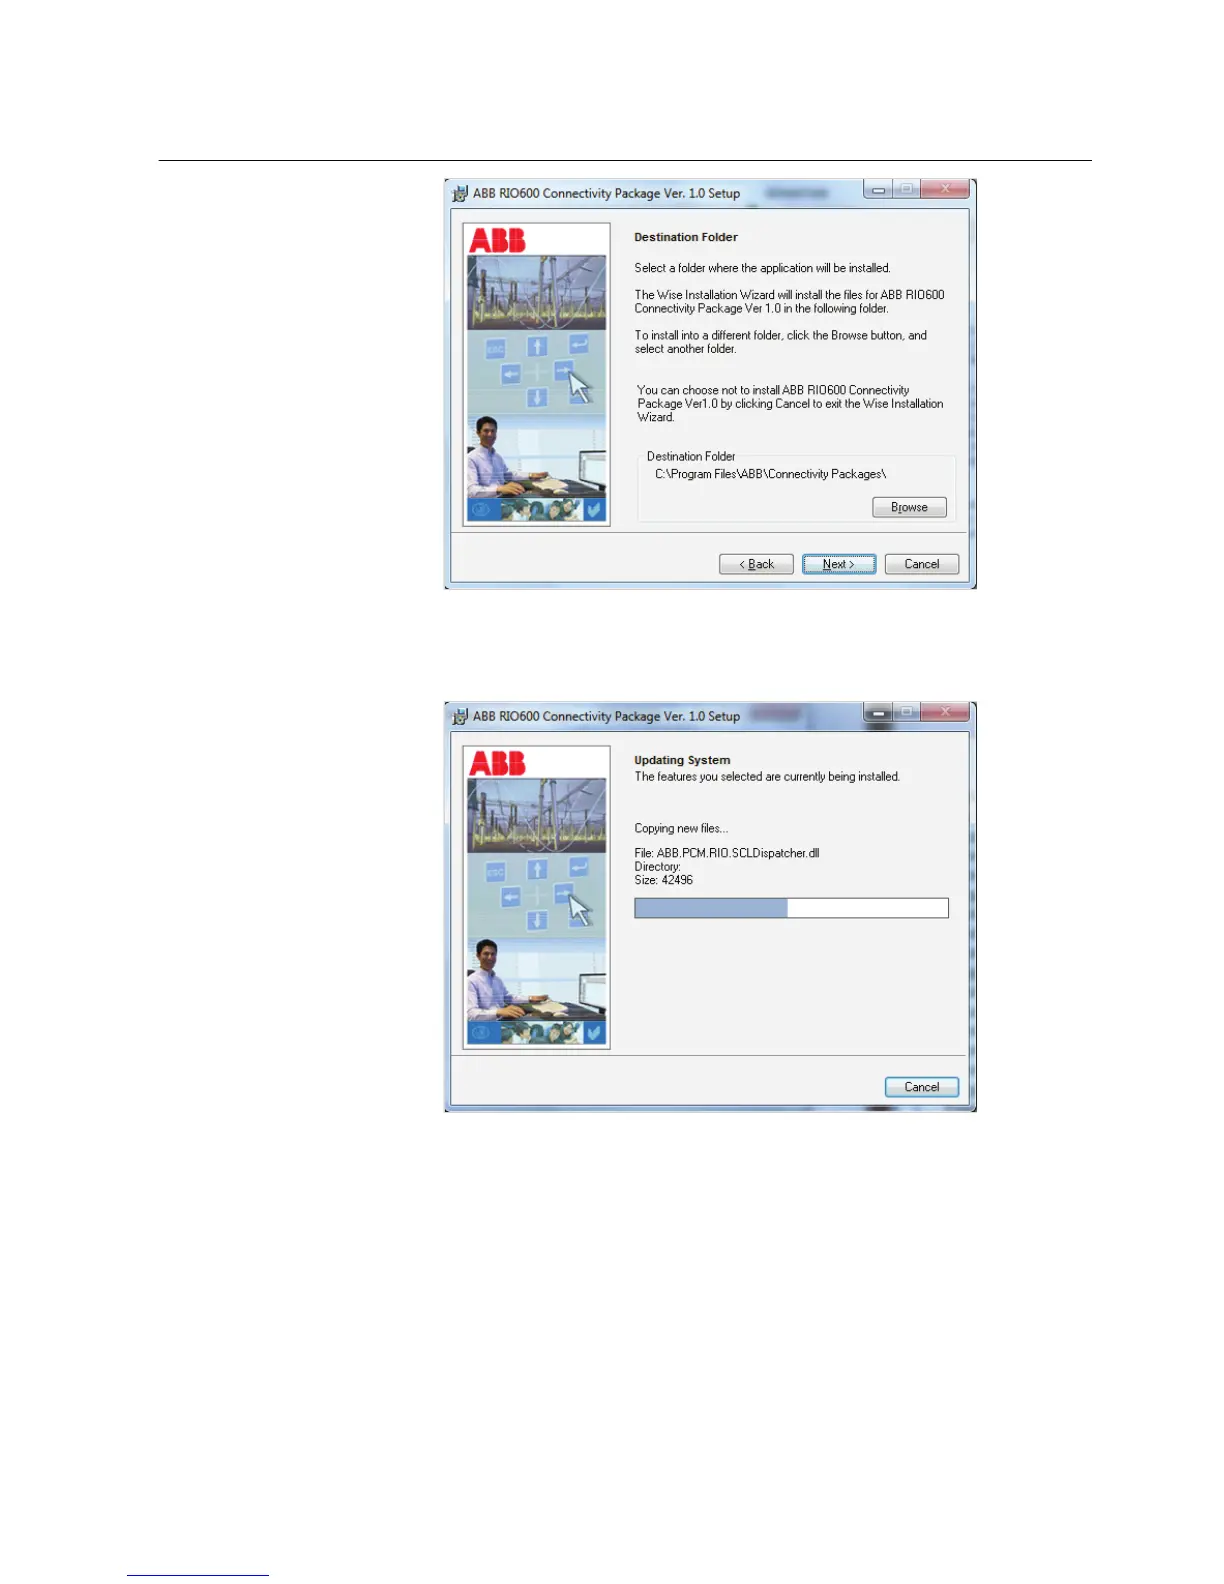
Figure 7: Selecting the folder for installation
5. Click Next to start the installation.
GUID-AF3833E9-54FB-41C1-B70B-98CE07D1AA9F V1 EN
Figure 8: Installation progress
6. After the installation is complete, click Finish to exit the setup program.
1MRS757489 A Section 3
Setting up a project
RIO600 13
Configuration Manual