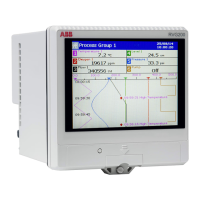
S P I R I T
IT
F L O W- X INS T R U C T I O N M A N U A L | I M/ F L O W X - EN 15
The Flow-X/C Bracket can be fixed to any construction, but for
an easy installation three installation cases will be described
later in this chapter. The installation of the Flow-X/C is very
similar to the Flow-X/P.
Front mount
The Bracket can be mounted in two different ways. The first
method is by using the holes in the front of the bracket to mount
the bracket to a front plate. In this case you need flat head
screws (M4) and (flange) nuts. For more information, read
chapter Bracket to blanking plate (front mounting) on page 15.
Bottom mount
The second method is to use the slots on the bottom side of the
bracket. You need for this construction screws (M4) with a low
head (maximum of 3 mm), washers and nuts. For more
information, read chapter Bracket to Rittal Component Shelf
(bottom mounting) on page 16.
Figure 5-9 Mounting instructions M4 screw with low head
Minimal Distance
Due to heat control, we advice you to add free space around the
Flow X/C.
Figure 5-10 Minimal Distance around Flow-X/C (Brackets) (in mm)
Blanking Plate
The installtion of the Flow-X/C can be finished with an blanking
plate. The measurements for the cut-out of the blanking plate
can be found on page 45.
The maximum distance the Flow-X/C can come out of the
bracket is 23 mm:
Figure 5-11 Maximum distance of the Flow-X/C out of the Bracket
Flow-X/C installation example instructions
The installation with the Flow-X/C Bracket can be used for any
custom installation solution. For convenience, there are also
standard solutions available; one front mounting construction
and two based on standard components of Rittal.
The cabinet installation examples we provide are based on an
installation in a 19 inch (swing) frame and in the door of the
cabinet.
Bracket to blanking plate (front mounting)
At the front of the bracket there are 5 M4 holes to mount the
bracket directly to a plate. For this construction we advise you to
use an 8 mm (anodized) aluminium plate. This plate can be
mounted to a 19” inch (swing) frame or to the at the back of the
door.
Figure 5-12 Example of front mounting in a 19” frame
Figure 5-13 Example of front mounting in a door
On pages 45 & 47 you can find the measurements for a front
installation.

 Loading...