Installing the Motherboard 2-5
User’s Manual
Step 3. Before touching any electronic
components, make sure you first touch
an unpainted, grounded metal object to
discharge any static electricity stored on
your clothing or body.
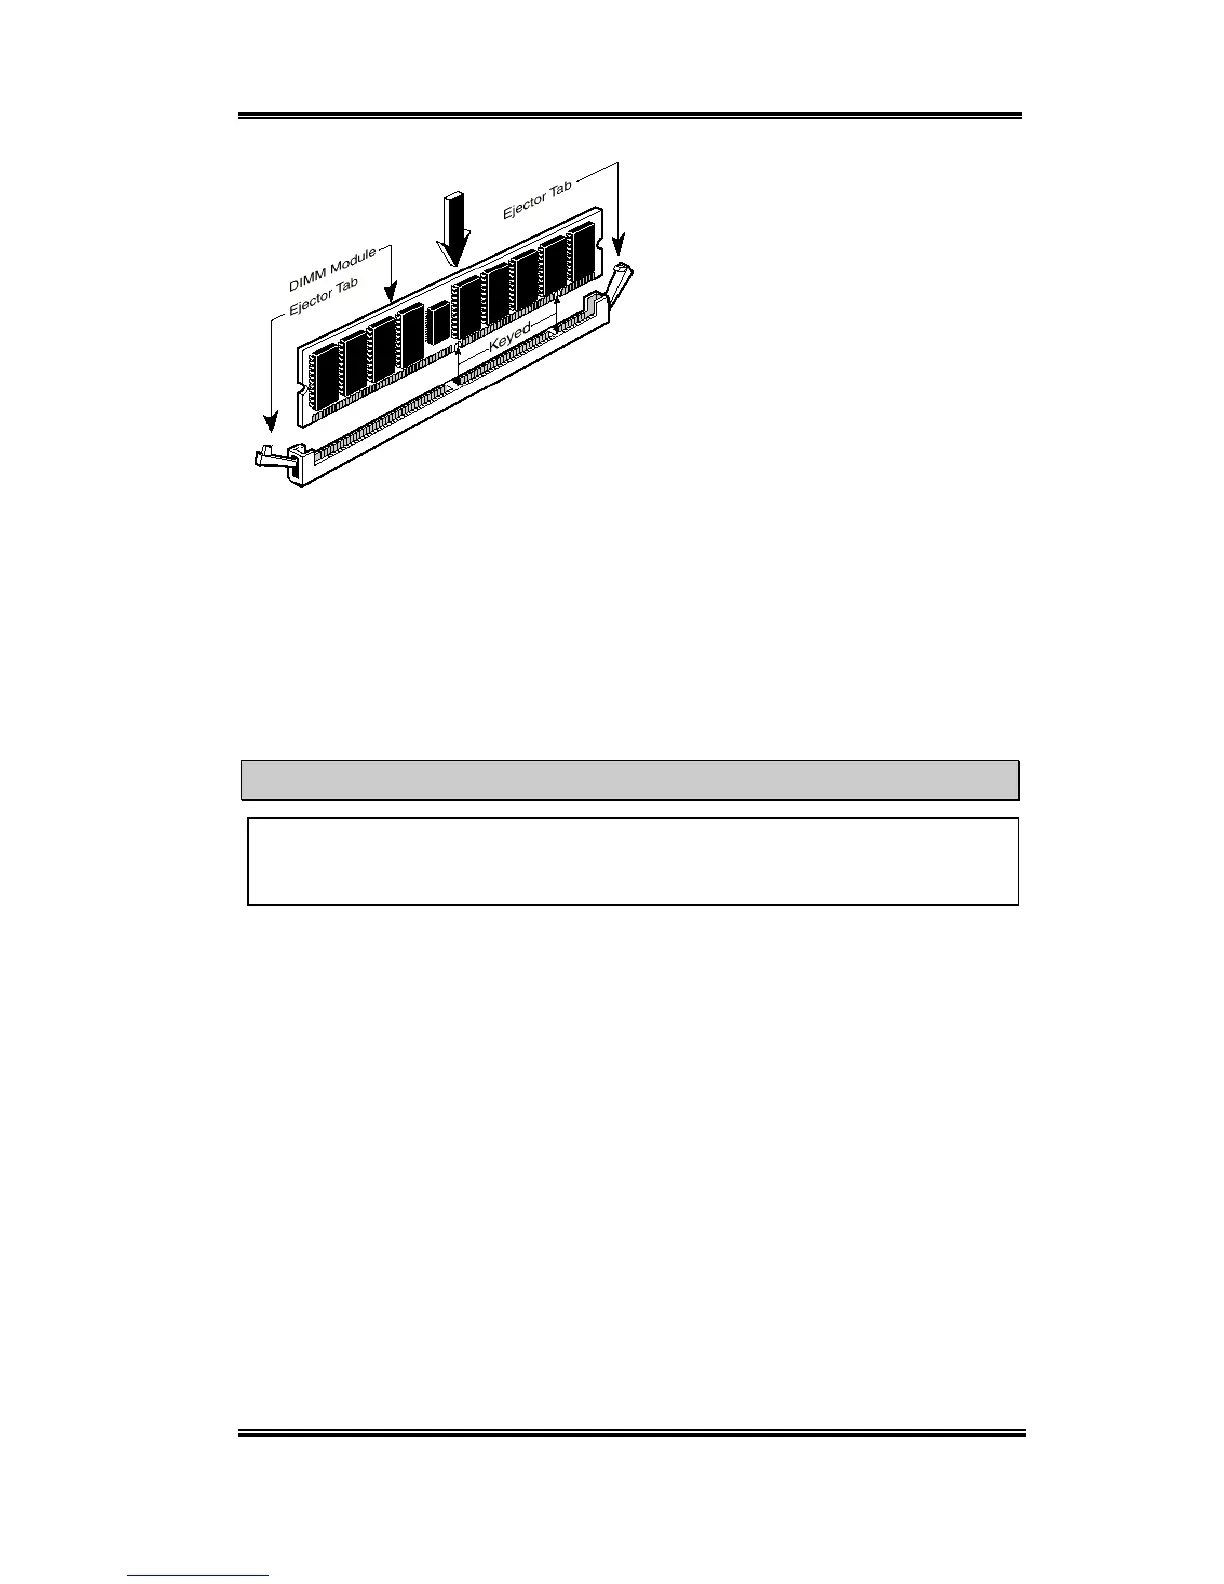
Step 4. Locate your computer’s 168-pin
memory expansion DIMM socket.
Step 5. Insert the DIMM module into
the expansion socket as shown in the
illustration. Note how the module is
keyed to the socket. You can refer to
figure 2-4 for the details. This insures the DIMM module will be plugged into the
socket in one way only. Firmly press the DIMM module into the DIMM socket,
making certain the module is completely seated in the DIMM socket.
Step 6. Once the DIMM module has been installed, the installation is complete and the
computer’s cover can be replaced. Or you can continue to install other devices and
add-on cards that are mentioned in the following section.
Note
When you install a DIMM module fully into the DIMM socket, the eject tab should be
locked into the DIMM module very firmly and fit into its indention on both sides.
It is difficult to differentiate between the PC100, PC133 SDRAM and VCM DRAM
modules from the exterior. The only way to identify them is through the sticker on the RAM
module.
Figure 2-4. Memory module installation