Chapter 3 68
5. Push the ODD module outwards then take the ODD out of the support bracket. Remove the screw that
fastens the ODD support bracket then remove it.
Removing the HDD Bracket
1. See “Removing the Battery” on page 50.
2. See “Removing the Middle Cover” on page 54.
3. See “Removing the Keyboard” on page 61.
4. See “Removing the Upper Case Assemly” on page 63.
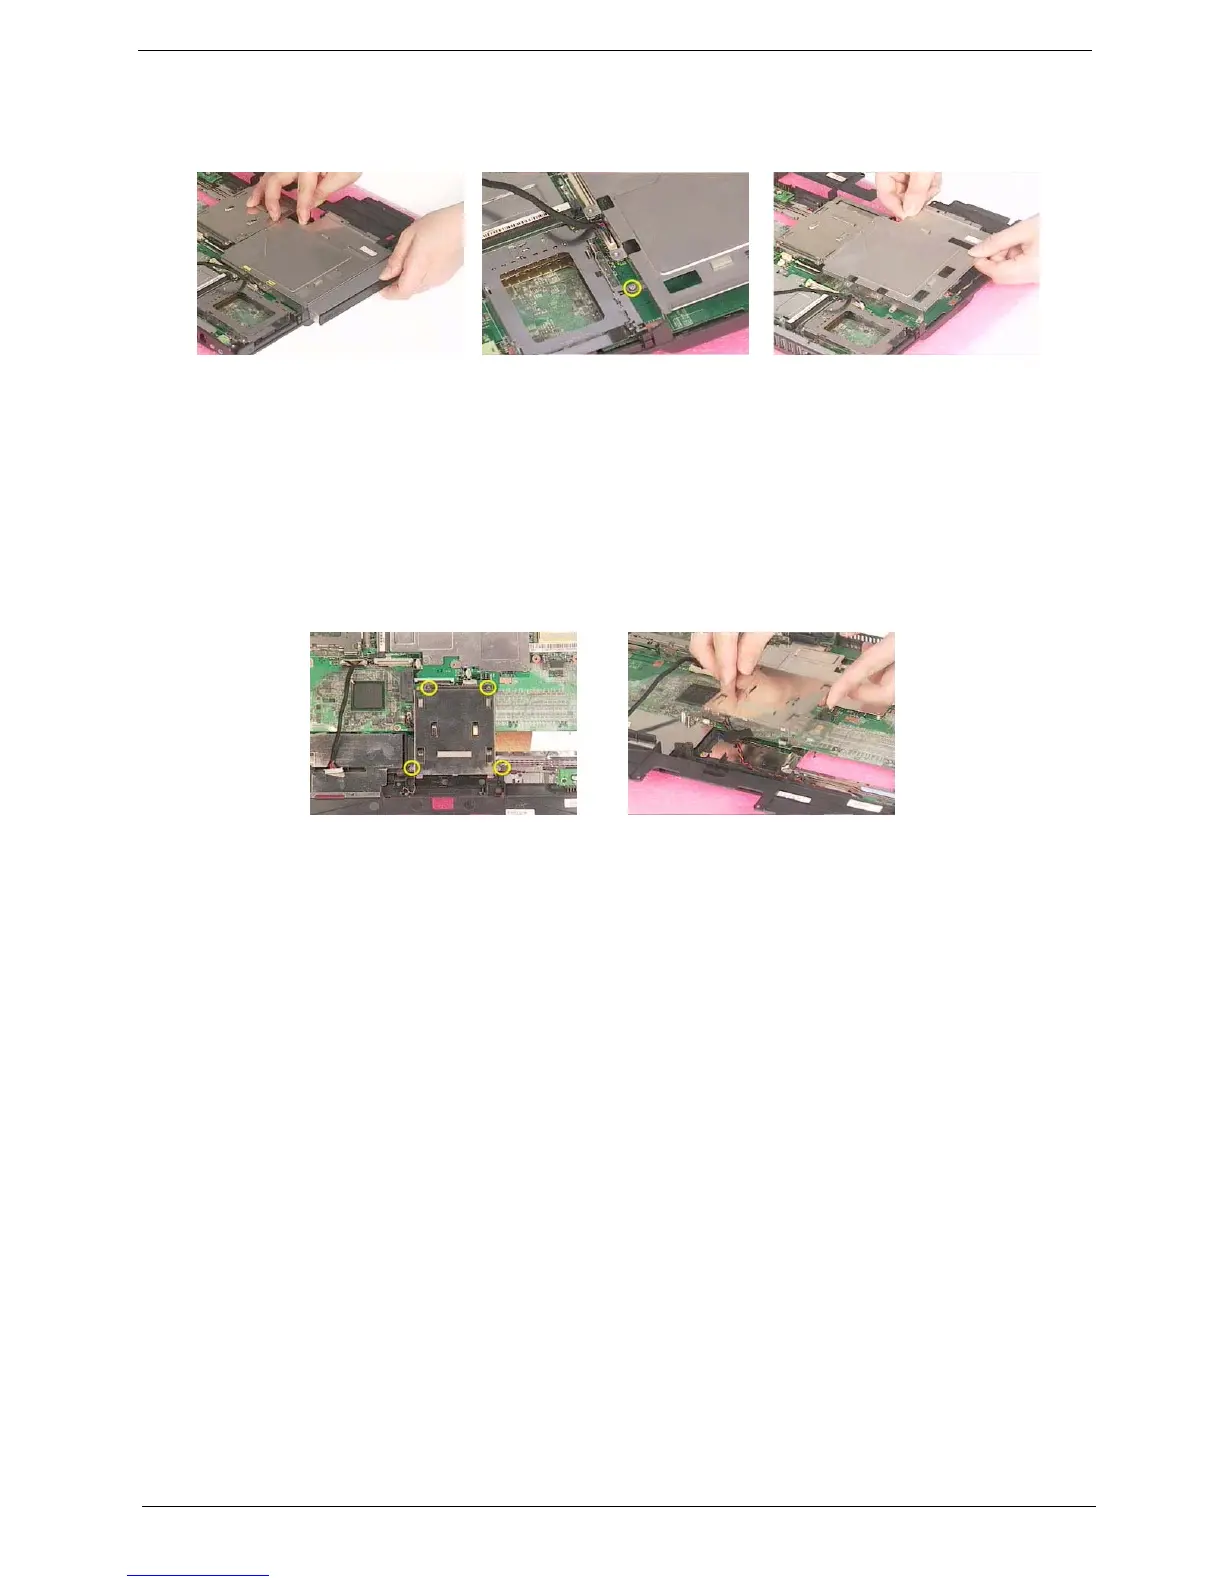
5. Remove the four screws holding the HDD bracket, then remove the HDD bracket.
Removing the Main Board
1. See “Removing the Battery” on page 50.
2. See “Removing the Middle Cover” on page 54.
3. See “Removing the Keyboard” on page 61.
4. See “Removing the Fan” on page 61.
5. See “Removing the Thermal Module” on page 62.
6. See “Removing the Upper Case Assemly” on page 63.
7. See “Removing the VGA Thermal Plate” on page 66.
8. See “Removing the CPU Heatsink Plate” on page 66.
9. See “Removing the Floppy Disk Drive Module” on page 65.
10. See “Removing the Second Fan Bracket” on page 67.
11. See “Removing the ODD Module(2)” on page 67.
12. See “Removing the HDD Bracket” on page 68.
13. Disconnect the launch board cable. Tear off the tape that fastens the speaker set cable. Then disconnect
the speaker set cable.