Do you have a question about the AcuRite 01534 and is the answer not in the manual?
Install batteries correctly in the 5-in-1 sensor for operation.
Set the A-B-C switch on the display to match the sensor.
Connect the power adapter to the display and an electrical outlet.
Position the display in a dry area away from direct sunlight and heat.
Place the sensor outdoors in an open location for accurate measurements.
Guidelines for wireless range, interference, heat, humidity, sprinklers, and obstructions.
Guidelines for sensor mounting height, location, and bracket options.
Ensuring level installation and correct solar cell facing for accurate readings.
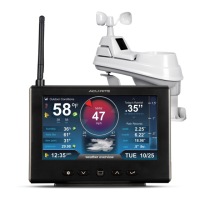
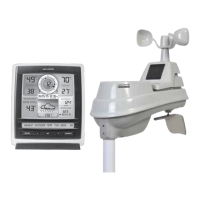
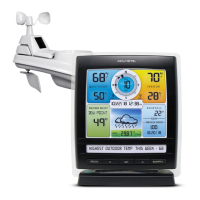
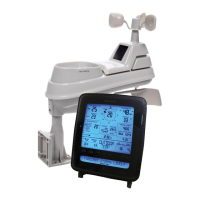
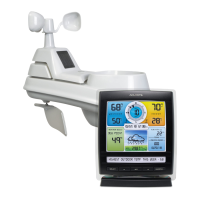
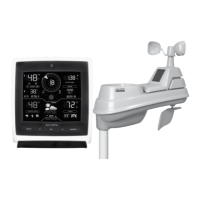
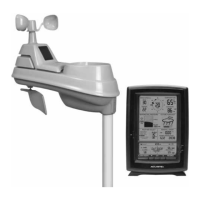
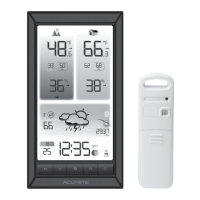
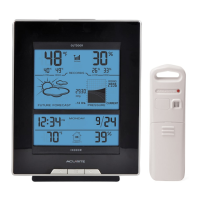
The device described in this manual is a Professional Weather Center, models 01506, 01524, and 01534. It consists of a 5-in-1 outdoor sensor and an indoor display unit, designed to provide comprehensive weather information and forecasts.
The Professional Weather Center offers a wide range of weather monitoring capabilities. The 5-in-1 sensor measures outdoor temperature, humidity, wind speed, wind direction, and rainfall. This data is wirelessly transmitted to the indoor display unit, which then presents the information in an easy-to-read format.
A key feature of this weather center is its Self-Calibrating Forecasting, which uses a unique algorithm to analyze pressure changes over time to determine your altitude and generate a personalized 12 to 24-hour weather forecast. This "Learning Mode" takes about 14 days to complete, after which the forecast becomes highly accurate for your specific location. The display shows various forecast icons, such as stormy & windy, snow likely, snow/rain mix likely, chance of rain, and cloudy, to visually represent the predicted weather conditions.
The display unit also tracks current indoor temperature and humidity. For outdoor conditions, it shows current temperature and humidity, along with trend arrows indicating whether these values are rising, falling, or steady. Wind information includes current wind speed, peak wind speed (highest in the past 60 minutes), average wind speed (over the past 2 minutes), and current and previous two wind directions. A wind speed alert indicator activates if wind speed exceeds 50 mph.
Rainfall tracking is a significant component, providing current rainfall totals since 12:00 am, as well as historical data. The system records rainfall for today, over all-time, by year, by month, and by individual rainfall events. A rainfall alert indicator activates if more than 1 inch (25 mm) of rain falls in 2 hours or less.
Barometric pressure is displayed with an arrow icon to show its trending direction (falling, steady, or rising), which is crucial for weather prediction. The display also features a "Weather Select" category that allows users to view additional data such as heat index, dew point, wind chill, "feels like" calculations, days with rain this month, and days since the last recorded rainfall.
The device includes a clock and date display, and it automatically adjusts its display brightness based on the time of day and year when in "AUTO DIM" mode. High and low records for indoor and outdoor temperature and humidity are automatically cleared at midnight daily, and users can view all-time records with a timestamp.
Setup of the weather center involves a few straightforward steps. Both the 5-in-1 sensor and the display unit have an A-B-C switch that must be set to the same letter (A, B, or C) to ensure synchronization.
For the 5-in-1 sensor, 4 x AA batteries are required. Lithium batteries are recommended for temperatures below -4°F / -20°C, as alkaline batteries may not function properly in extreme cold. A crucial step during sensor setup is to remove the rain gauge stabilizer (a plastic tab) from the bottom of the sensor, as the rain gauge will not function otherwise. The sensor should be mounted at a minimum height of 5 feet (1.5 meters) in an open area, with the solar cell facing SOUTH to ensure maximum sun exposure and proper wind direction orientation. A built-in bubble level on the sensor helps ensure a level installation for accurate wind measurements. After installation, a "CLEAR ALL/RESET" button on the back of the display can be pressed and held to clear any erroneous data collected during setup.
The display unit can be powered by a power adapter, which is recommended for full functionality, or by 6 x AA alkaline batteries as a backup power source. The display can be placed on a tabletop using its stand or wall-mounted.
Setting the time, date, and units (temperature in °F or °C, wind in MPH, KPH, or Knots, rain in inches or mm, and pressure in inHg or hPa) is done through the "SET" button on the front of the display. Users can adjust values using the "^" or "V" buttons.
The display offers three backlight settings: High (100%), Medium (60%), and Low (30%) brightness. When running on battery power, the backlight is momentary, activating for 10 seconds with a press of the "" button. With the power adapter, the backlight remains on at 100% brightness and can be dimmed to 60%, 30%, or set to "AUTO DIM" mode by repeatedly pressing the "" button.
The "SELECT" button allows users to cycle through different "Weather Select" categories. The "RAINFALL" button is used to review historical rainfall data.
Regular maintenance is essential for optimal performance and accuracy.
Display Care: The display should be cleaned with a soft, damp cloth, avoiding caustic cleaners or abrasives. It should be kept free of dust, dirt, and moisture, and ventilation ports should be regularly cleaned with a gentle puff of air.
5-in-1 Sensor Care: The sensor should be cleaned with a soft, damp cloth, avoiding caustic cleaners or abrasives that could mar the polished surfaces of the rain collection funnel or solar cell, as scratches can reduce performance.
Insect Prevention: Insects can obstruct the sensor and interrupt data. Spraying the OUTSIDE of the sensor with a household insect repellent, following the repellent's instructions, can help mitigate this problem.
Snow & Freezing Weather: The 5-in-1 sensor is designed to withstand freezing conditions. However, if the rain collector cup fills with snow and then melts, it will register as rain on the display.
Clean the Rain Collector Cup: The debris filter, located in the rain collector funnel, should be removed and emptied regularly. It can be removed from the top by gently squeezing and pulling it out.
Clean the Wind Vane & Anemometer: Foreign matter should be removed from the outside of the sensor to ensure free movement of the wind vane and anemometer. If needed, a small amount of spray lubricant, clear silicone, or graphite powder can be applied to the anemometer for improved movement.
Calibration: The indoor/outdoor temperature and humidity readings, and barometric pressure can be calibrated on the display to improve accuracy, especially if sensor placement or environmental factors affect data. Calibration mode is accessed by pressing and holding the "^" and "V" buttons simultaneously for at least 5 seconds. Users can adjust values higher or lower, and a "عد" icon will illuminate next to calibrated values. Barometric pressure can only be calibrated when set to "MANUAL" mode.
Rain Gauge Calibration: The rain gauge can also be calibrated for improved accuracy. This involves using a plastic cup with a pinhole to drip exactly 1 cup (8 oz) of water into the rain gauge over a period of more than 20 minutes, simulating a normal steady rainfall. The display should register 1.06" after this process. If the reading is not accurate, calibration screws on the bottom of the 5-in-1 sensor can be adjusted (clockwise to increase rainfall, counter-clockwise to decrease). It's also important to ensure the internal buckets are tipping freely and an equal number of water drops occur between tips.
| Display Type | LCD |
|---|---|
| Indoor Temperature Range | 32°F to 122°F (0°C to 50°C) |
| Outdoor Temperature Range | -40°F to 158°F (-40°C to 70°C) |
| Humidity Range | 1% to 99% |
| Wireless Range | 330 ft (100 m) |