Changing It Up
By default the pins are
floating
so the voltages will vary. While connected to the serial console, try touching a wire from
A1 to the GND pin or 3Vo pin to see the voltage change.
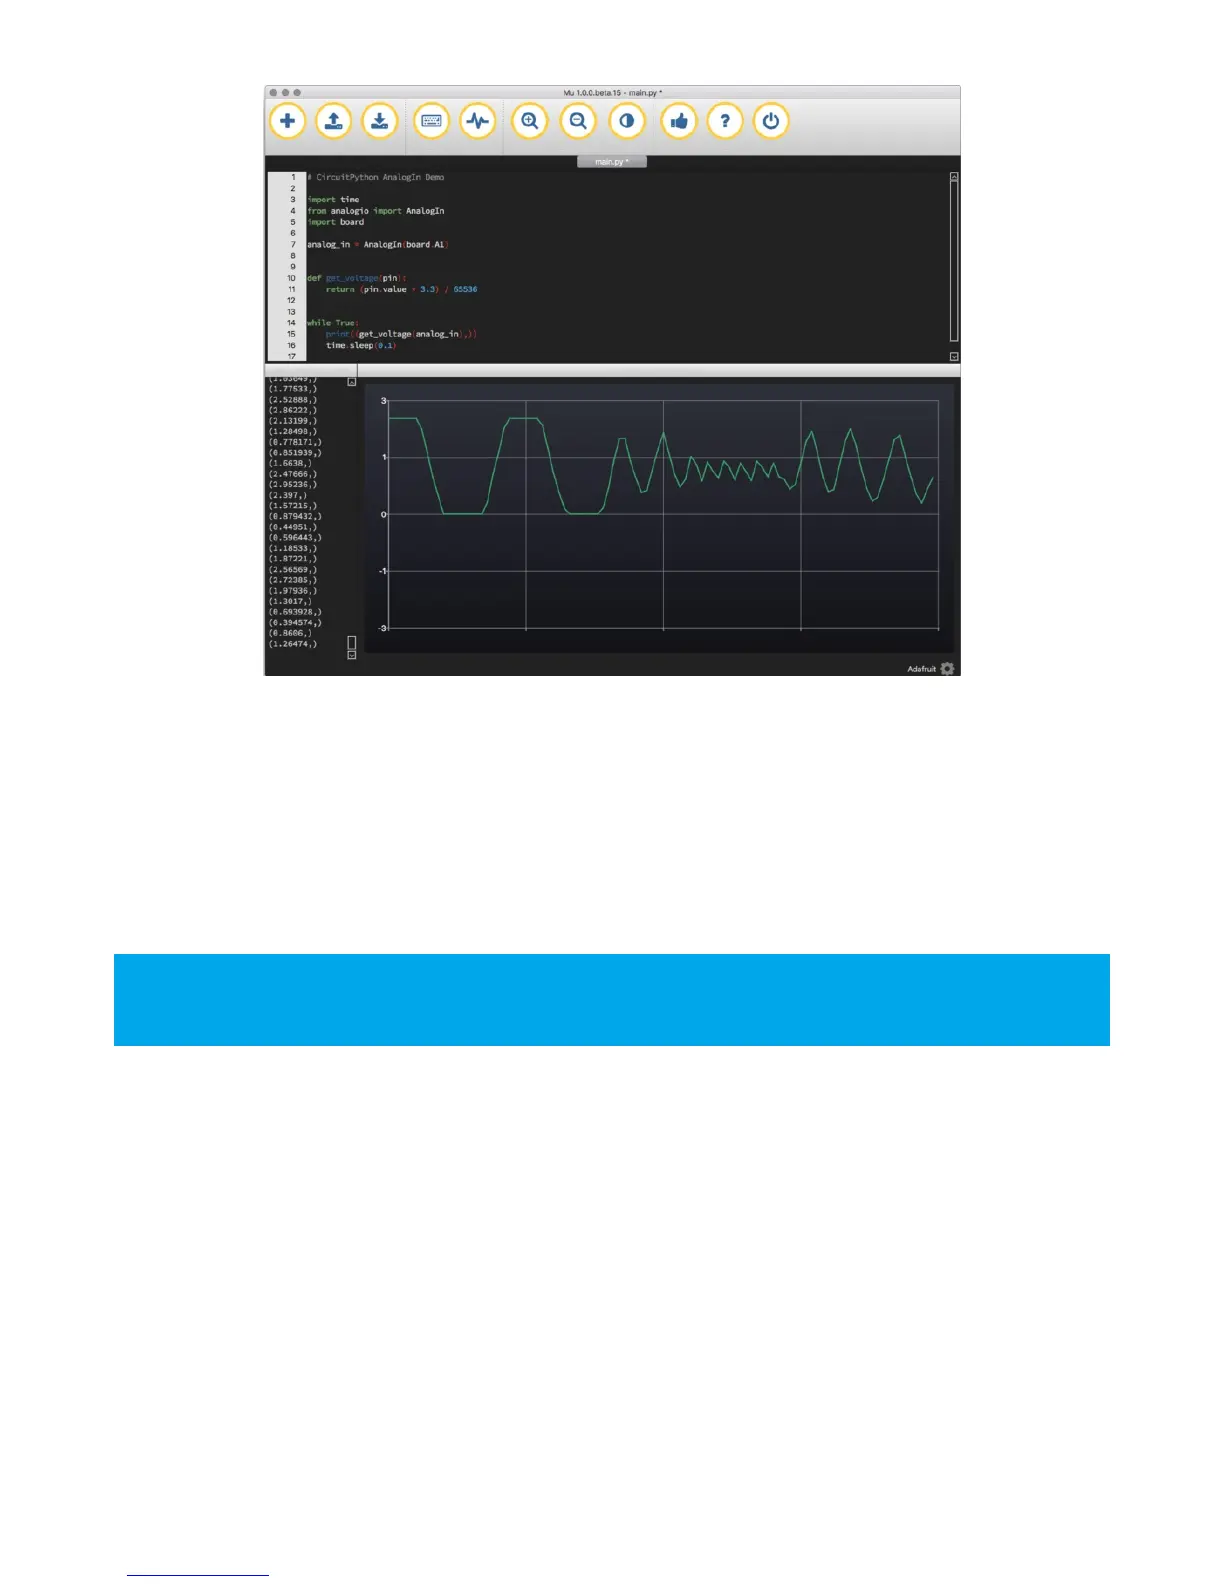
You can also add a potentiometer to control the voltage changes. From the potentiometer to the board, connect the
left pin to ground, the middle pin to A1, and the right pin to 3V. If you're using Mu editor, you can see the changes as
you rotate the potentiometer on the plotter like in the image above! (Click the Plotter icon at the top of the window to
open the plotter.)
Wire it up
The list below shows wiring diagrams to help find the correct pins and wire up the potentiometer, and provides more
information about analog pins on your board!
When you turn the knob of the potentiometer, the wiper rotates left and right, increasing or decreasing the
resistance. This, in turn, changes the analog voltage level that will be read by your board on A1.
 Loading...