CircuitPython Servo
In order to use servos, we take advantage of pulseio . Now, in theory, you could just use the raw pulseio calls to set
the frequency to 50 Hz and then set the pulse widths. But we would rather make it a little more elegant and easy!
So, instead we will use adafruit_motor which manages servos for you quite nicely! adafruit_motor is a library so be
sure to grab it from the library bundle if you have not yet (https://adafru.it/zdx)! If you need help installing the library,
check out the CircuitPython Libraries page (https://adafru.it/ABU).
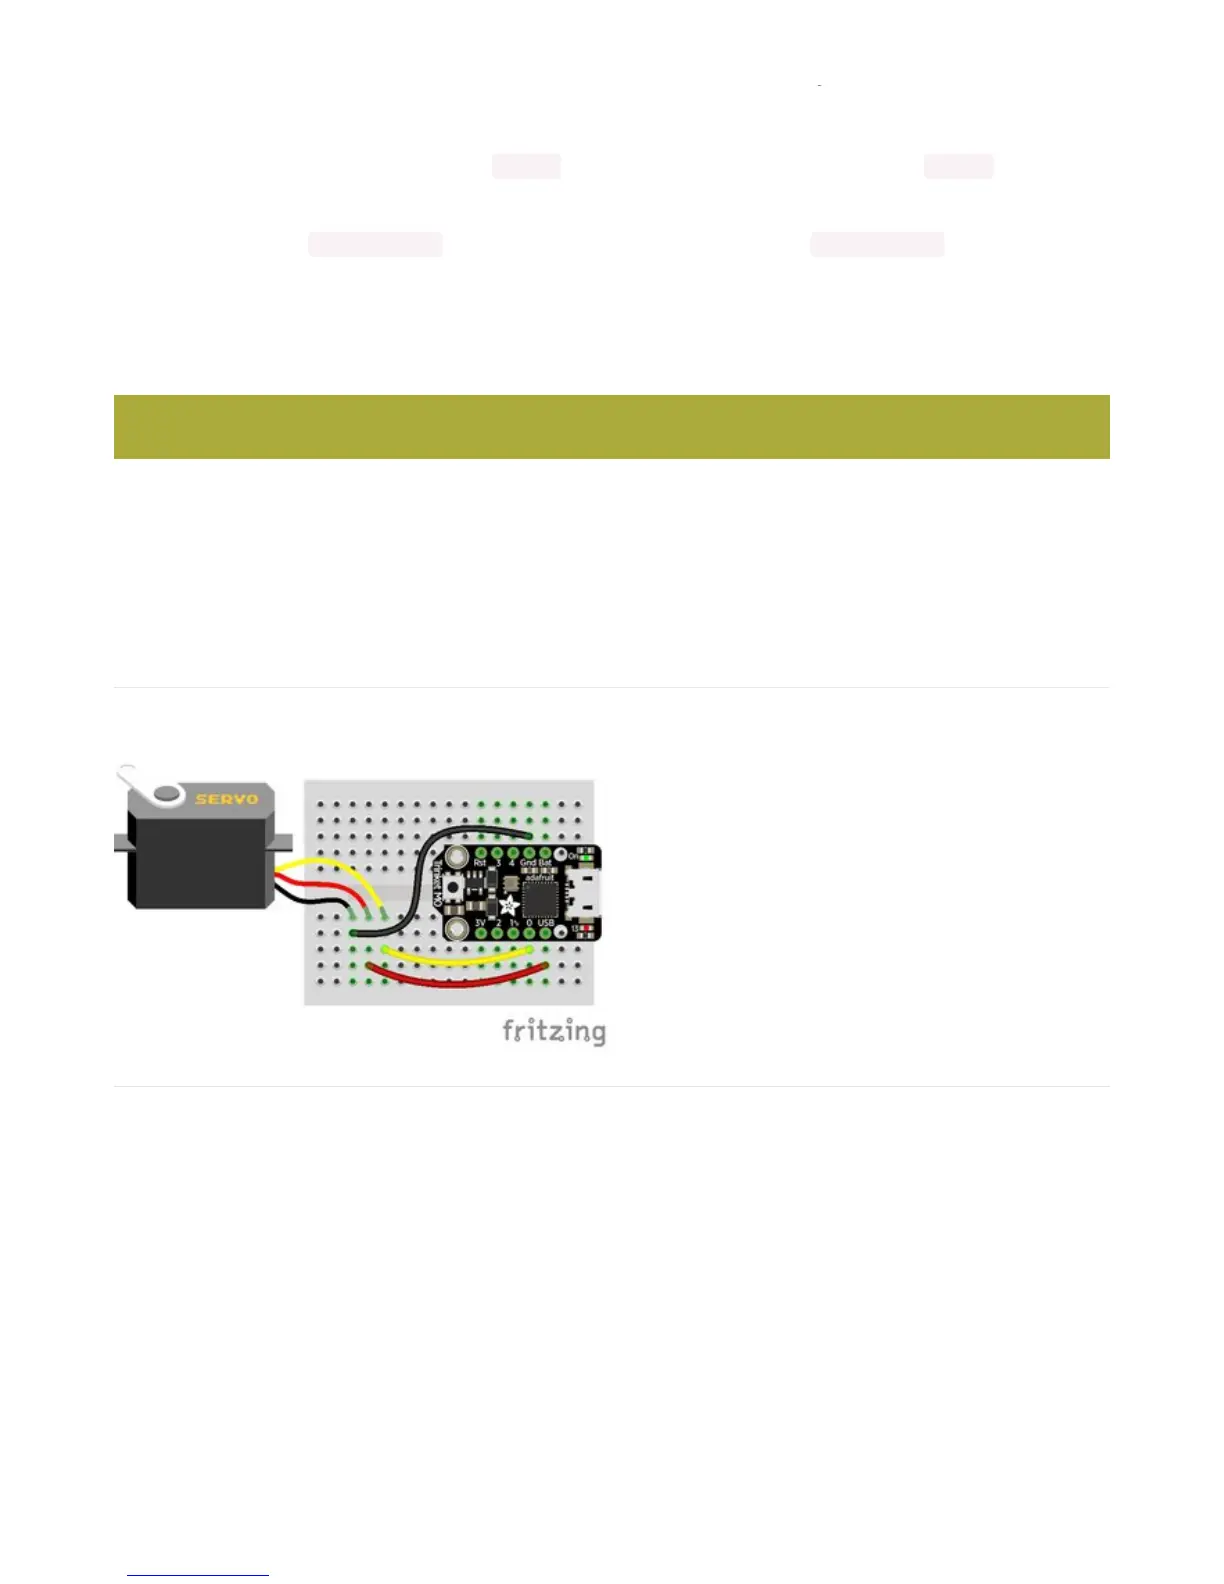
Servo Wiring
Connect the servo's brown or black ground wire to ground on the CircuitPython board.
Connect the servo's red power wire to 5V power, USB power is good for a servo or two. For more than that, you'll need
an external battery pack. Do not use 3.3V for powering a servo!
Connect the servo's yellow or white signal wire to the control/data pin, in this case A1 or A2 but you can use any PWM-
capable pin.
For example, to wire a servo to Trinket, connect the
ground wire to GND, the power wire to USB, and the
signal wire to 0.
Remember, A2 on Trinket is labeled "0".
Servos will only work on PWM-capable pins! Check your board details to verify which pins have PWM outputs.
 Loading...